
Motor mount replacement


Thread Starter
Registered User
Joined: Nov 2011
Posts: 7
Likes: 0
From: UK
Hello Guys, I am just about to swap out the engine mounts. I have heard it�s a difficult job. Are there any hints or tips on how to do it? From what I can see half the bolts are not even visible and the others need gynaecology skills to remove. Any help would be greatly appreciated.
Thread Starter
Registered User
Joined: Nov 2011
Posts: 7
Likes: 0
From: UK
Progress so far.
Bottom mount nuts off.
Rear two bolts on the RH bracket off (top mount nut is inaccessable)
Looks like I am going to have to remove the oil filter to get to the front two.
Top nut on LH mount off (had to modify a wrench to get the angle).
I have heard you have to drop the crossmember. Having trouble getting the 19mmAF nuts of that hold the bottom arms and subframe in place. Is there any way the engine can be lifted high enough to get the mounts out without dropping the crossmember? Its fighting me all the way!
Time for a coffee.

Thread Starter
Registered User
Joined: Nov 2011
Posts: 7
Likes: 0
From: UK
I am taking some photos as I go along so you can share in my pain and suffering.
All chassis bolts loose. oil filter off. Just taking out the front two RH mount bracket bolts now.
Thread Starter
Registered User
Joined: Nov 2011
Posts: 7
Likes: 0
From: UK
5 hours down and the mounts are out. Dropped the subframe about 20mm and lifted the engine about the same (removed the strut brace first)
Update...everything back together but not tightened up yet, got to make another wrench mod as the new mount has a 15mm AF top nut on it. I will finish it tomorrow and hopefully at the week end put the pictures of the sequence of work at the week end. It has never EVER taken me this long to swap out a set of mounts.
Update...everything back together but not tightened up yet, got to make another wrench mod as the new mount has a 15mm AF top nut on it. I will finish it tomorrow and hopefully at the week end put the pictures of the sequence of work at the week end. It has never EVER taken me this long to swap out a set of mounts.
Last edited by 4_stroke; Feb 16, 2012 at 07:51 AM. Reason: update


can i ask, what did you use?
I have a billet and poly Avid trans mount bushing already, a motor out, a big built FI engine going back in very soon.
I dont race, but i also dont want insane NVH vibration.. im curious what mounts u went with and what your imrepssions on it are today..
in for the reply.
I have a billet and poly Avid trans mount bushing already, a motor out, a big built FI engine going back in very soon.
I dont race, but i also dont want insane NVH vibration.. im curious what mounts u went with and what your imrepssions on it are today..
in for the reply.
Trending Topics
Thread Starter
Registered User
Joined: Nov 2011
Posts: 7
Likes: 0
From: UK
Go these from a vendor in the UK
http://www.vibra-technics.com/nissan...M/engine_mount
I'll let you know how they perform tomorrow when I eventualy fire it up. They are rubber rather than Poly. Supposed to give better vibration isolation.
http://www.vibra-technics.com/nissan...M/engine_mount
I'll let you know how they perform tomorrow when I eventualy fire it up. They are rubber rather than Poly. Supposed to give better vibration isolation.
Thread Starter
Registered User
Joined: Nov 2011
Posts: 7
Likes: 0
From: UK
Having struggled with my first ever 350Z motor mount swap I wanted to share with you how I managed it. There may be better ways to do it and if anyone says it can be done without removing the right hand engine mount bracket I think I will shoot myself! This was by far the hardest part of the job. Anyhow here it is�.
First off open the hood and remove the strut brace (you will need to raise the engine later so you will need clearance). The remove the 5 bolts holding the plastic under tray to the cross member. The carefully remove the plastic clips that hold the centre of the tray to the cross member. Just use a screwdriver to prise out the centre of the clip then pull it clear.
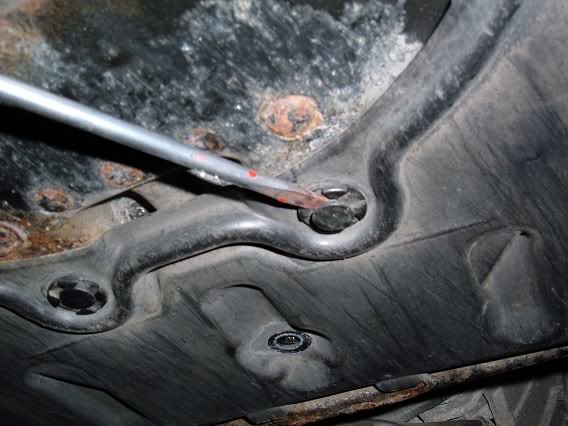
Next spray penetrating oil onto all fixings that hold the main cross members and suspension brackets to the body. These will need to soak for a while. Also now would be a good time to remove the nuts holding the bottom of the mounts to the cross member
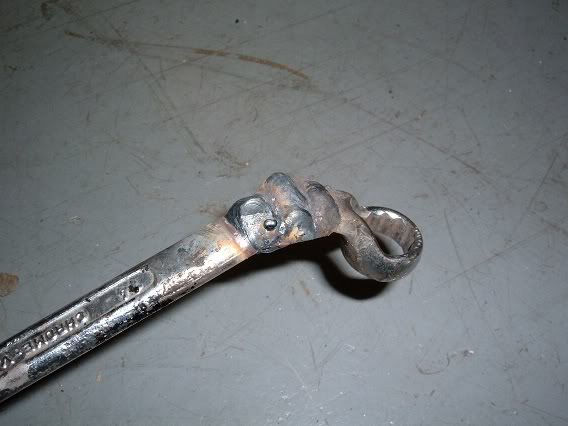
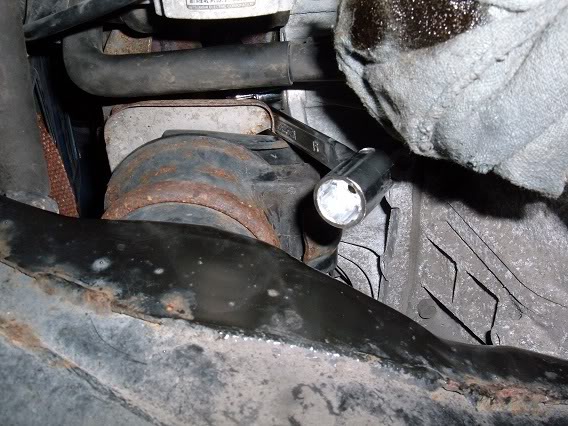
Tackle the left hand mount by modifying a 14mm wrench to clear the heat shield and allow you to get onto the top nut. You will need to lever the heat shield out of the way by a few mm. It can be bent back later. Make sure the ring spanner is square on the nut otherwise you risk rounding off the head.
Modified ring wrench
Access to the LH mount top nut
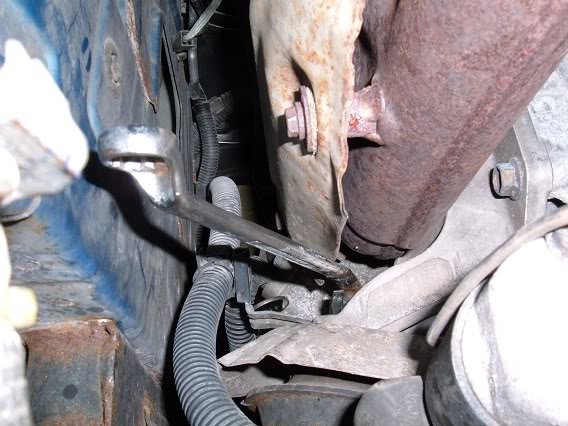
Next you need to tackle the RH mount bracket by removing it from the block altogether still connected to the mount. You need to do this because the top nut is inaccessible, unlike the LH side.
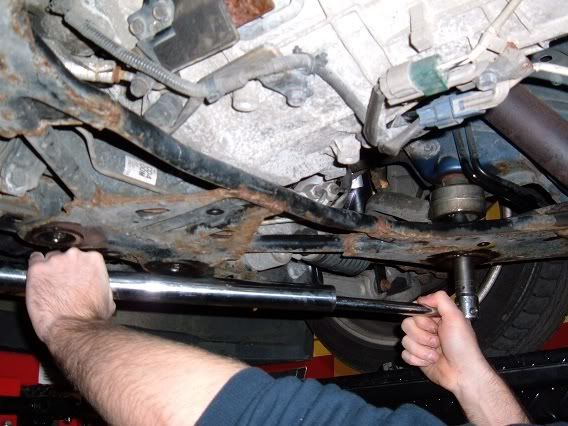
Use a swivel-socket wrench to undo the top and bottom rear bolts. You may need to put an extension tube onto the wrench to get more force. As you can see space is limited.
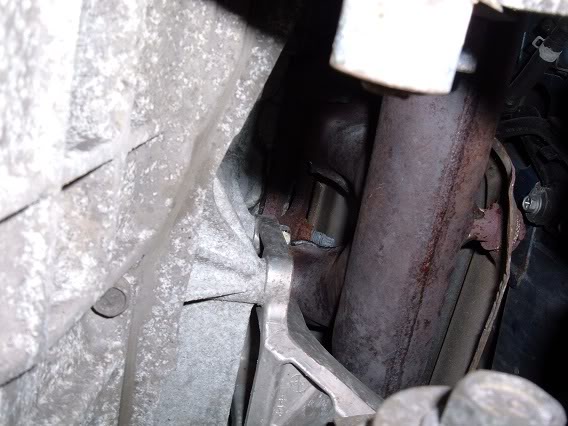
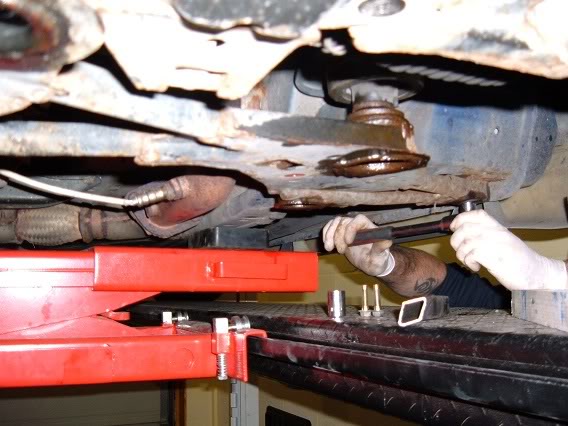
To remove the front bolts on the RH bracket you will need to take off the oil filter. This will allow you to get 1/8th turn on the wrench.
Next you need to drop the cross member. Support the body and remove the four nuts holding the main cross member onto the body. Remove the two bolts that hold the cross member to the brace bar then slacken off the nuts and bolts that hold the brace bar to the body. You don�t need to remove the brace bar you just need it to drop about 25mm at the front. The 19mm bolts can be very tight so you may need an extension bar
Now lever the cross member down about 20-25mm. It is located on pins. The front can drop more than the rear because of the steering rack. There is no need to disconnect the rack or steering column.
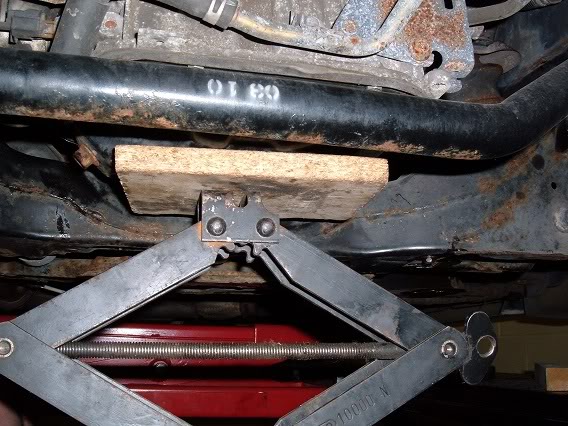
Now support the weight of the engine by placing a jack under the oil pan. Use a piece of wood to spread the load. Jack the engine up about 20mm
Continue to jack the engine until the mounts are free. The LH mount comes out easy.
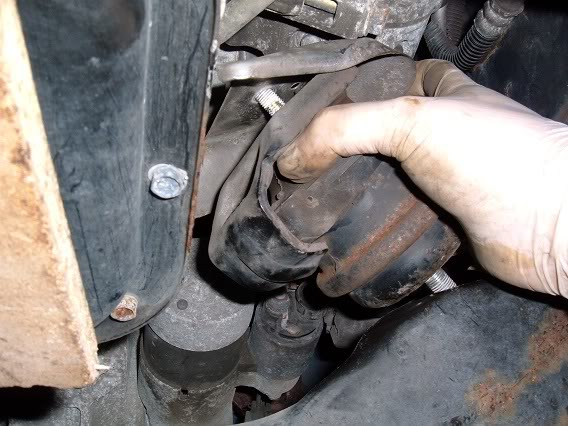
But the RH mount will have to be joggled forward through the gap between the engine and the cross member because it is still attached to the engine bracket
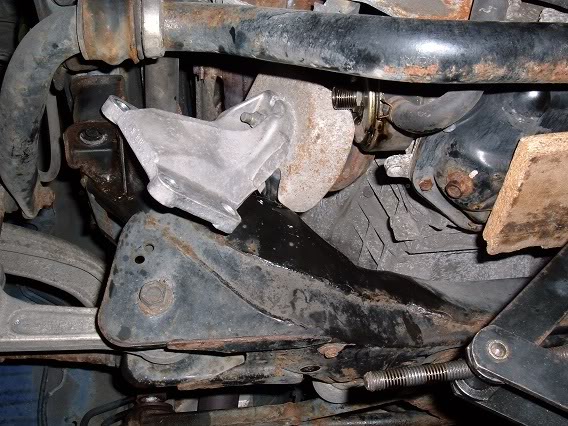
The LH mount is removed from the bracket on the bench and the new mount bolted up. Both mounts are then put back in (this is slightly easier because the new mount is smaller in diameter)
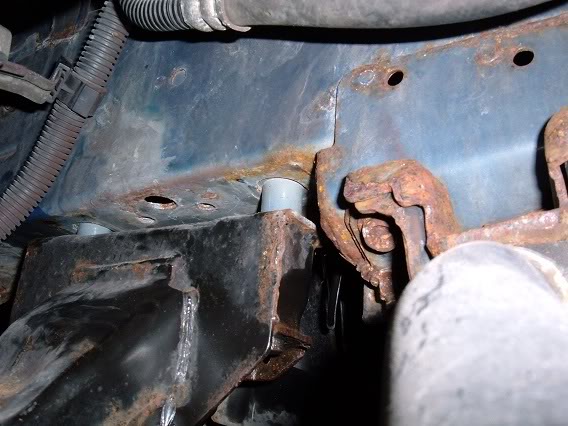
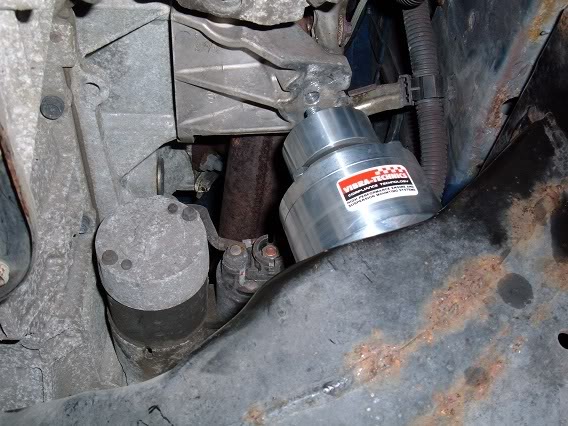
New mounts now in place


Now as the say in the books, refitting is the reverse of the removal procedure. Make sure you remember to put the little bracket back on to the LH mount under the nut. It holds the engine harness away from the header.
Time for a well deserved test drive.

That�s all folks!
First off open the hood and remove the strut brace (you will need to raise the engine later so you will need clearance). The remove the 5 bolts holding the plastic under tray to the cross member. The carefully remove the plastic clips that hold the centre of the tray to the cross member. Just use a screwdriver to prise out the centre of the clip then pull it clear.
Next spray penetrating oil onto all fixings that hold the main cross members and suspension brackets to the body. These will need to soak for a while. Also now would be a good time to remove the nuts holding the bottom of the mounts to the cross member
Tackle the left hand mount by modifying a 14mm wrench to clear the heat shield and allow you to get onto the top nut. You will need to lever the heat shield out of the way by a few mm. It can be bent back later. Make sure the ring spanner is square on the nut otherwise you risk rounding off the head.
Modified ring wrench
Access to the LH mount top nut
Next you need to tackle the RH mount bracket by removing it from the block altogether still connected to the mount. You need to do this because the top nut is inaccessible, unlike the LH side.
Use a swivel-socket wrench to undo the top and bottom rear bolts. You may need to put an extension tube onto the wrench to get more force. As you can see space is limited.
To remove the front bolts on the RH bracket you will need to take off the oil filter. This will allow you to get 1/8th turn on the wrench.
Next you need to drop the cross member. Support the body and remove the four nuts holding the main cross member onto the body. Remove the two bolts that hold the cross member to the brace bar then slacken off the nuts and bolts that hold the brace bar to the body. You don�t need to remove the brace bar you just need it to drop about 25mm at the front. The 19mm bolts can be very tight so you may need an extension bar
Now lever the cross member down about 20-25mm. It is located on pins. The front can drop more than the rear because of the steering rack. There is no need to disconnect the rack or steering column.
Now support the weight of the engine by placing a jack under the oil pan. Use a piece of wood to spread the load. Jack the engine up about 20mm
Continue to jack the engine until the mounts are free. The LH mount comes out easy.
But the RH mount will have to be joggled forward through the gap between the engine and the cross member because it is still attached to the engine bracket
The LH mount is removed from the bracket on the bench and the new mount bolted up. Both mounts are then put back in (this is slightly easier because the new mount is smaller in diameter)
New mounts now in place
Now as the say in the books, refitting is the reverse of the removal procedure. Make sure you remember to put the little bracket back on to the LH mount under the nut. It holds the engine harness away from the header.
Time for a well deserved test drive.
That�s all folks!
Last edited by 4_stroke; Feb 17, 2012 at 11:32 AM.

Thread Starter
Registered User
Joined: Nov 2011
Posts: 7
Likes: 0
From: UK
The factory mounts were OK, and to be fare are quite good at the job but we wanted to get a bit more feedback to the drivetrain without compromising comfort too much as the car is used on the road and for track days.

Is there anyway you can easily tell if they're worn?
I have what i would describe as unreasonable NVH, and my wheels are hopping again (though that's at the rear) they hopped before as my rear diff mount had blown, that has a whiteline in it now. It fixed it then, but it's hopping again, so i'm not sure what's going on.
I have what i would describe as unreasonable NVH, and my wheels are hopping again (though that's at the rear) they hopped before as my rear diff mount had blown, that has a whiteline in it now. It fixed it then, but it's hopping again, so i'm not sure what's going on.

I don't mean to revive the dead but this is the only write up I could find on swapping engine mounts in the 350. I am currently in the middle of this myself so I'm going to add to this DIY with pics and tips as well to keep it current.
My only question is, what kind of modification was done to the wrench to reach the bolt on top of the drivers side engine mount? Or if anyone knows another tip for the drivers side, post it up!
My only question is, what kind of modification was done to the wrench to reach the bolt on top of the drivers side engine mount? Or if anyone knows another tip for the drivers side, post it up!
General & Tech Moderator
MY350Z.COM
MY350Z.COM

Joined: Jan 2013
Posts: 10,400
Likes: 2,226
From: ZdayZ
I don't mean to revive the dead but this is the only write up I could find on swapping engine mounts in the 350. I am currently in the middle of this myself so I'm going to add to this DIY with pics and tips as well to keep it current.
My only question is, what kind of modification was done to the wrench to reach the bolt on top of the drivers side engine mount? Or if anyone knows another tip for the drivers side, post it up!
My only question is, what kind of modification was done to the wrench to reach the bolt on top of the drivers side engine mount? Or if anyone knows another tip for the drivers side, post it up!

Bumping
It is easier to just remove the heat shield when accessing driver side mount instead of whatever OP did.
Also I am installing Crawford Headers at the same time, so I am thinking this will let me access the passenger side mount top nut so I don't have to remove the whole bracket.
Will find out if I can get away with not doing what OP did - slightly dropping the crossmember. Hopefully I can just jack up the engine 20mm. Will update when I get around to doing this.
I'll be installing Z1 Poly Motor Mounts
Last edited by rottingcat; Feb 28, 2018 at 08:24 PM.


Ive been thinking about putting in solid mounts at some point. (Probably when I replace the cradle if or when I do) this post made me not feel bad about my rust situation. I'm pretty sure that motor mount bolt is accessible from the top once the heat shield is gone.

Thread
Thread Starter
Forum
Replies
Last Post