
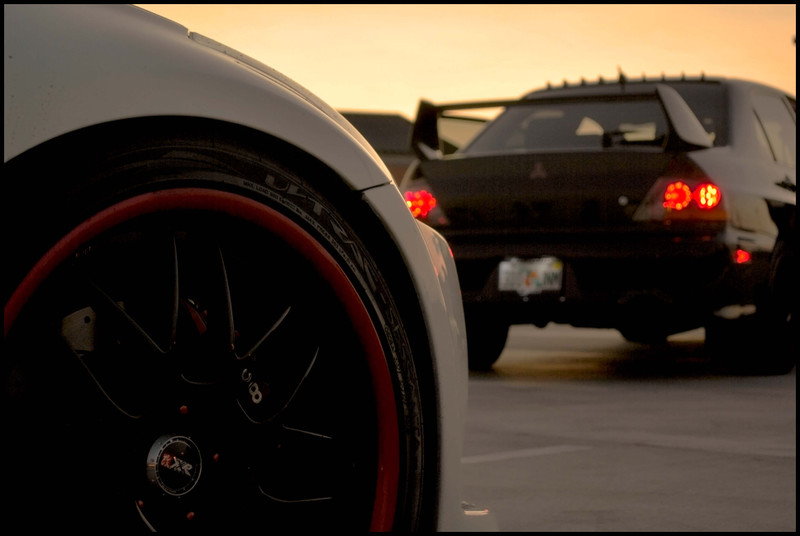
ChriZTT's Pikes Peak White 350Z Build Thread


I want this thread to be a place were I can keep a log of my build, share progress pictures, and interact with fellow forum members. I've been on the forms consistently since August of 2005. I bought my Z in May of 2006, and I've used the forum as a reference for all things Z related over the years. The grand majority of my time here has been as a consumer of information (just look at my post count lol). So I'd like to finally introduce myself and my Z to the community.
My name is Chris, and the following is a synopsis of the last 8 years of owning my PPW '06 Z.
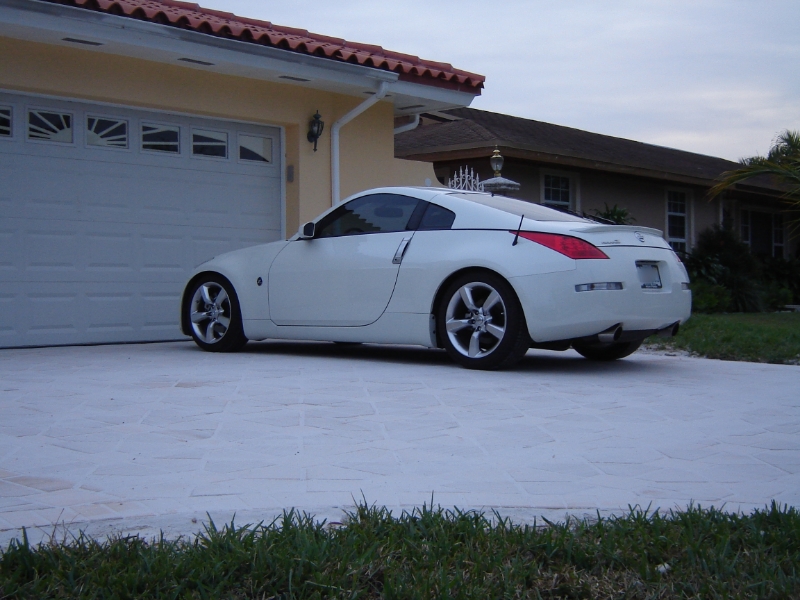
Here's the first picture of the Z after I brought it home from the dealer and washed it.
PHASE ONE: Blank Canvas. Oh the Possibilities!
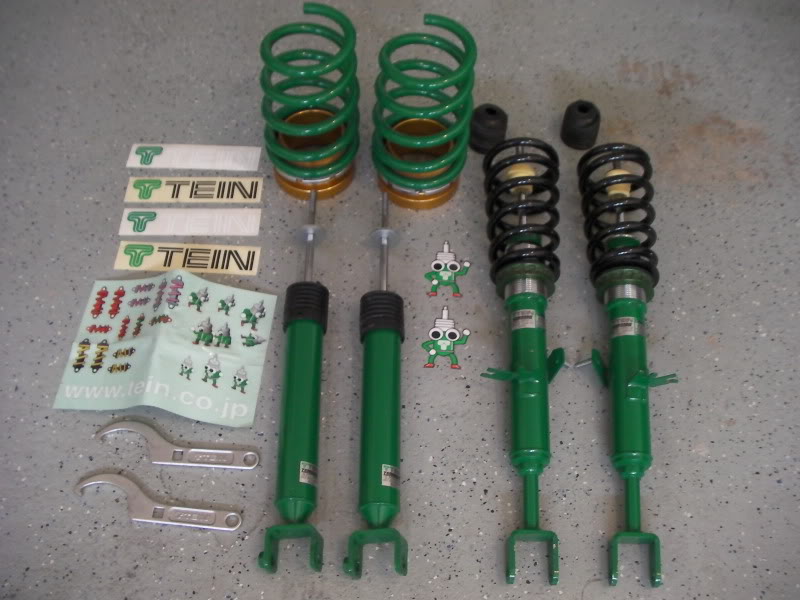
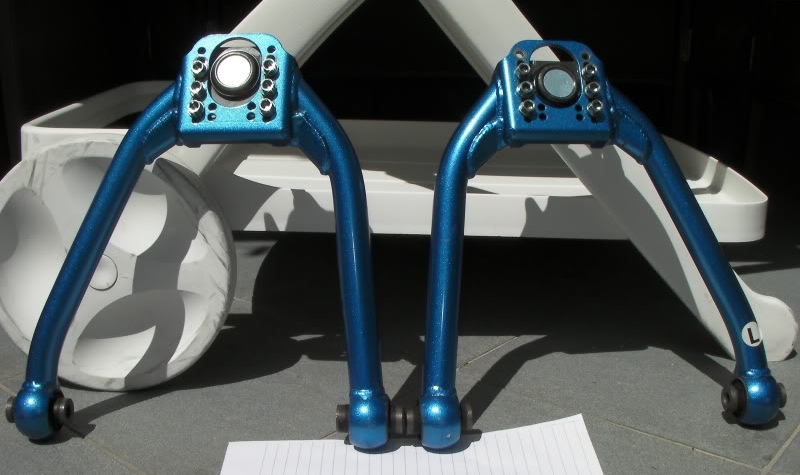
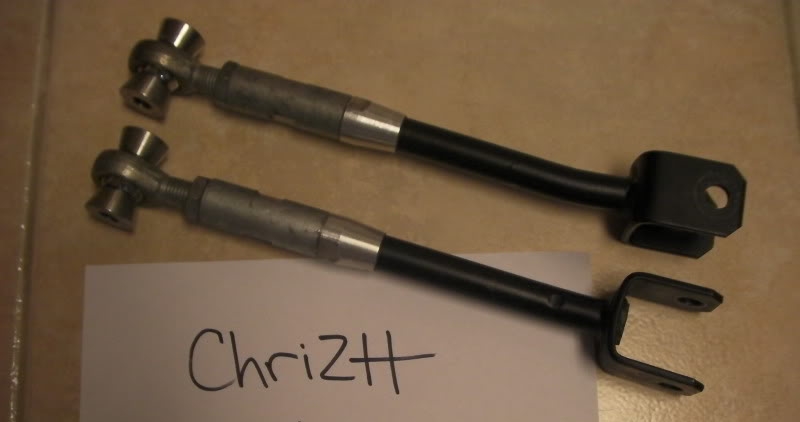
It wasn't long before I started to change things just for the sake of changing things (hind-sight is always 20-20). I started with the suspension thinking that on my small budget I could increase performance and the overall aesthetics of my Z. I first purchased Tein Basic Coilovers. Later, I got Cusco Front A-Arms and Rear Camber Arms to fine tune the alignment. I finished it off with Stillen front and rear sway bars. Looking back, the sway bars made the biggest difference to the handling characteristics of the car over any of the other suspension components I added.
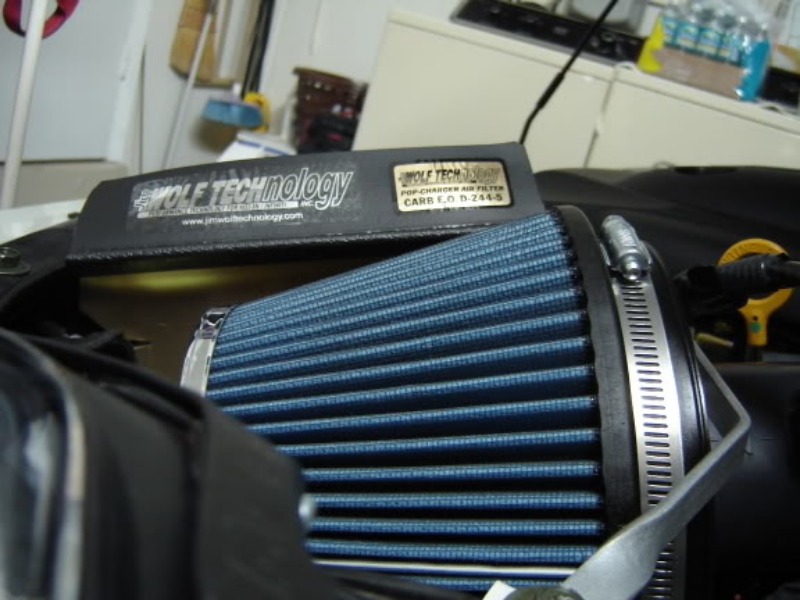
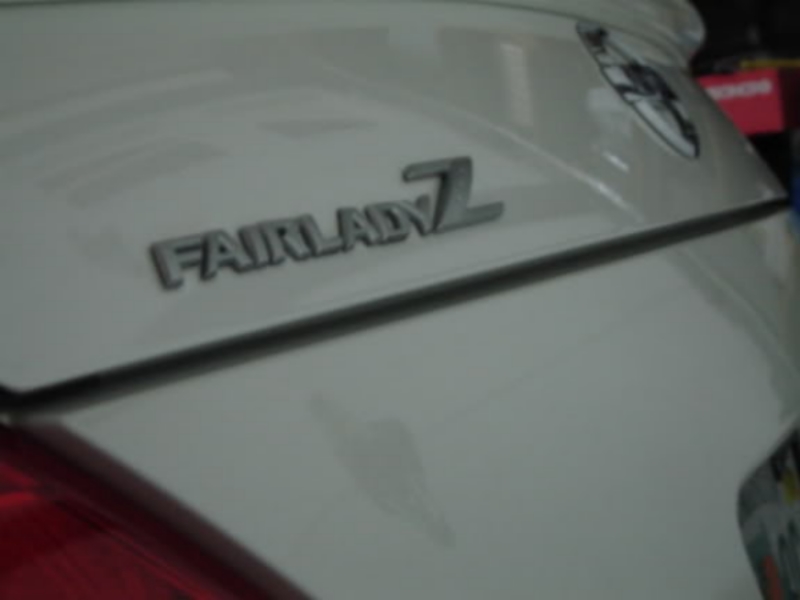
Other changes worth mentioning included: JWT Pop Charger Intake, S2000 antenna, Nismo Ti shift ****, and a genuine Fairlady Z badge, which I throughly enjoyed. It might be frowned upon today, but back in '06 I was getting all kinds of positive feedback on the badge.
Tein Basic Coilovers
Cusco Front Upper Arms
Rear Camber Arms
JWT Pop Charger
PHASE TWO: Back to Basics.
I was on that setup for a little over a year. However, spend enough time reading and learning about any topic or hobby and your perspective will eventually mature. The more I learned about suspension and chassis tuning, the more I realized that I would need a much larger budget to really improve upon the stock suspension. I decided to sell off the aftermarket suspension parts with the exception of the Stillen sway bars (which I still have on the Z to this day), and return back to stock form.
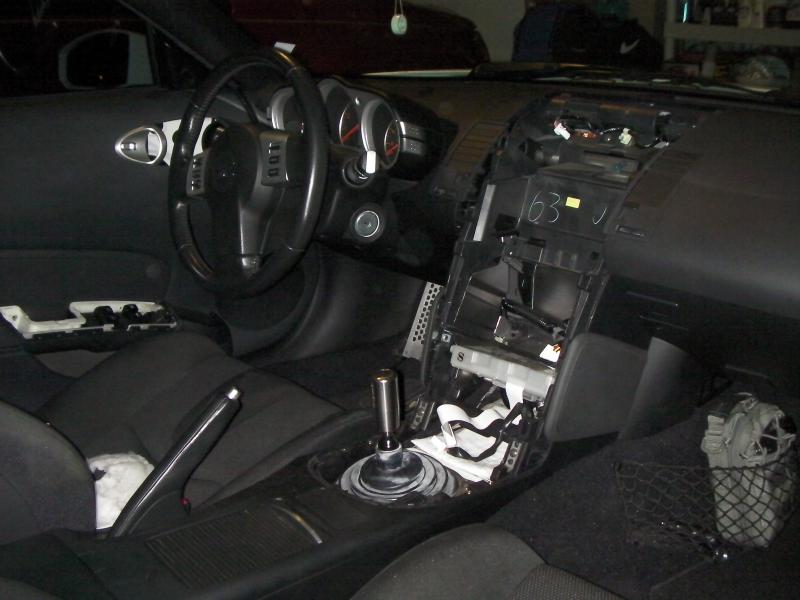
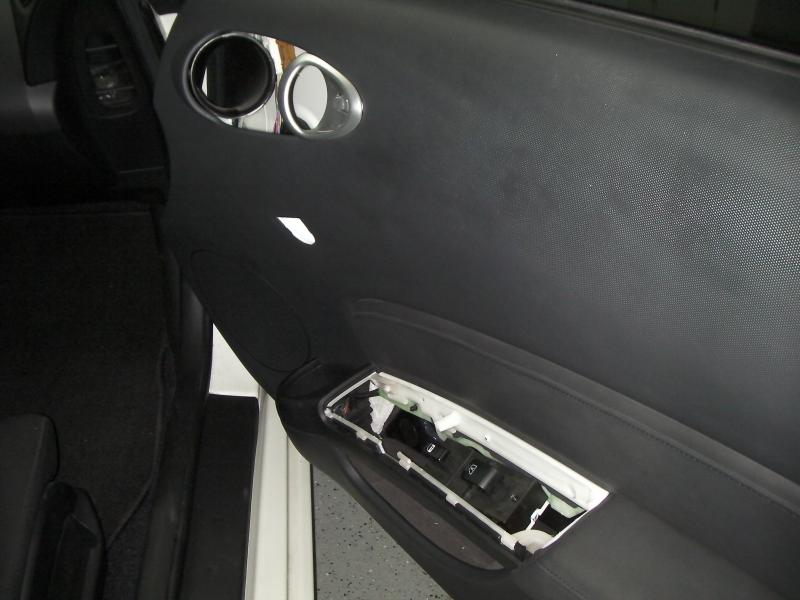
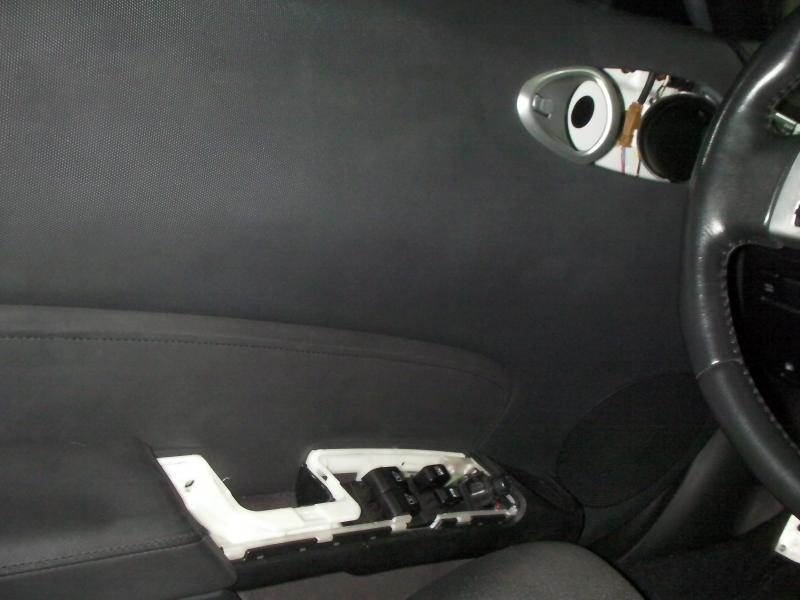
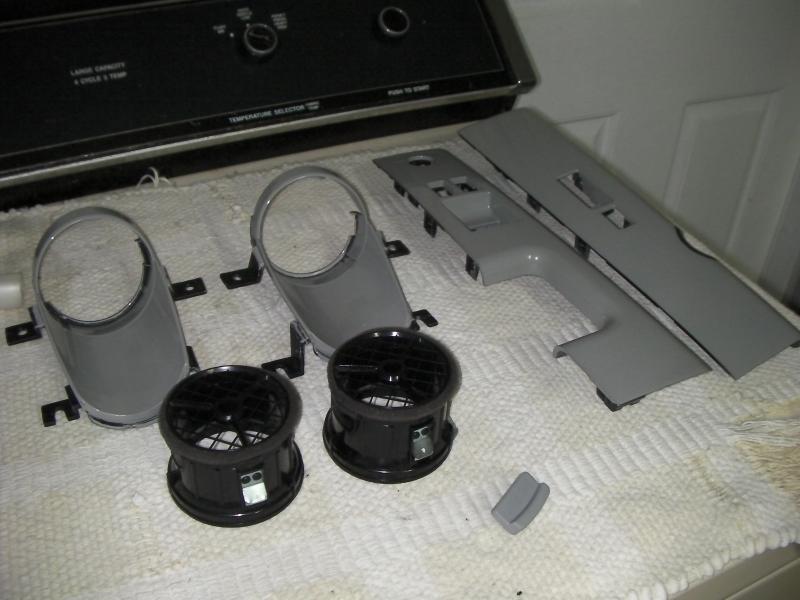
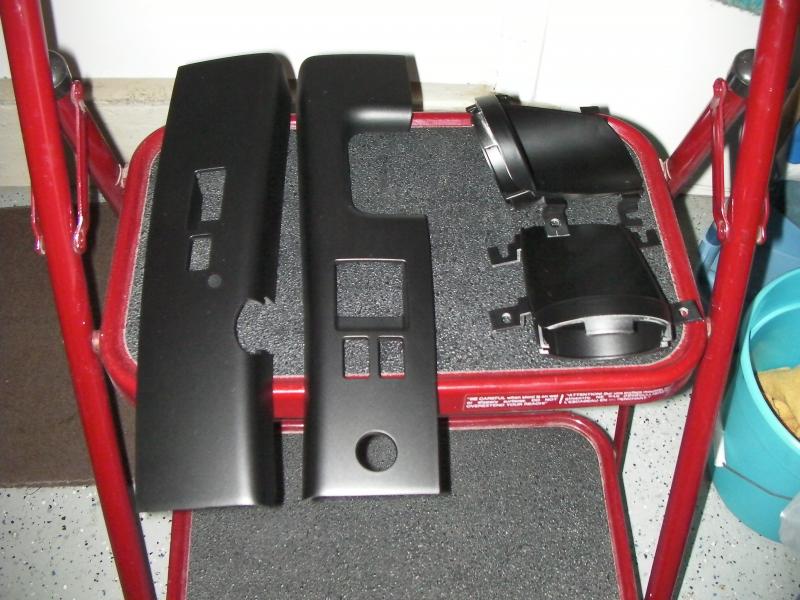
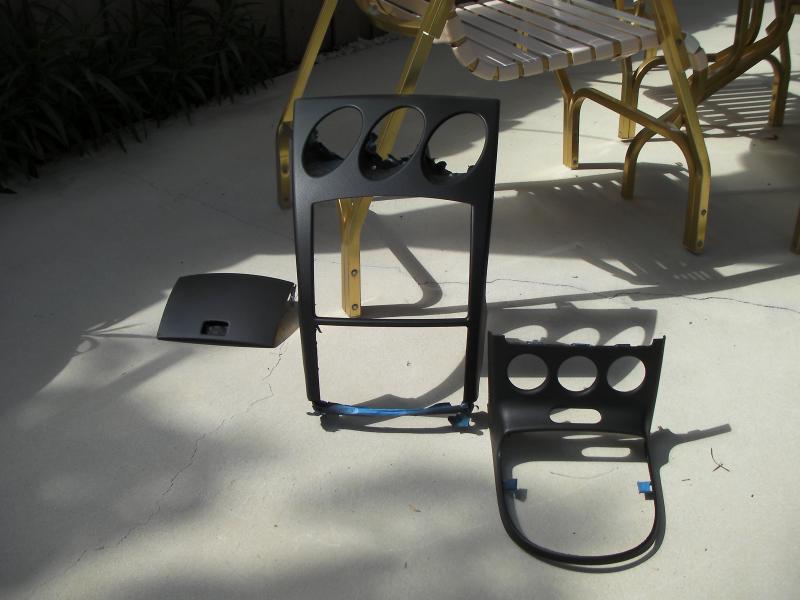
I took a break from buying parts and simply focused on driving, maintaing the car, and learning as much as I could about the direction I wanted to take with my future build (more on this later). During this time I refurbished the interior plastics on the doors and the waterfall. This was my first attempt ever at a project like this. It was a great experience and I was extremely satisfied with the results.
Plastics after I removed OE coating.
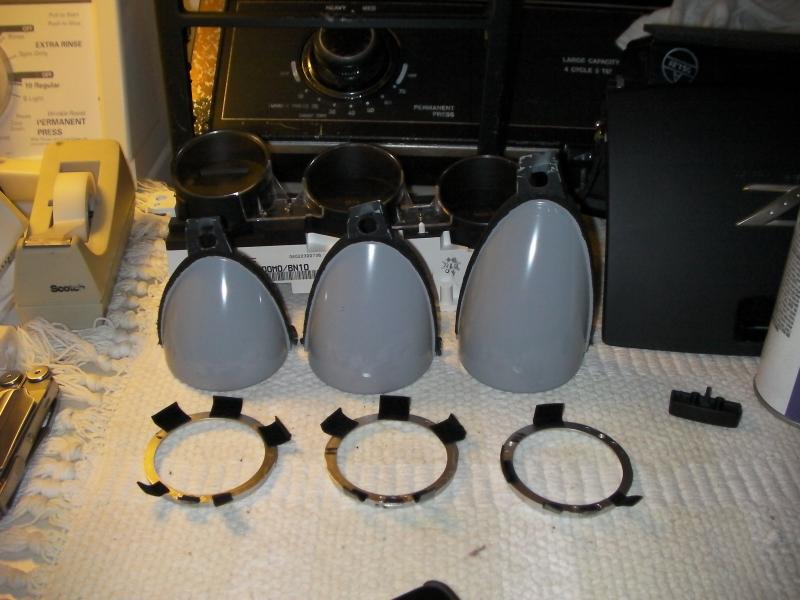
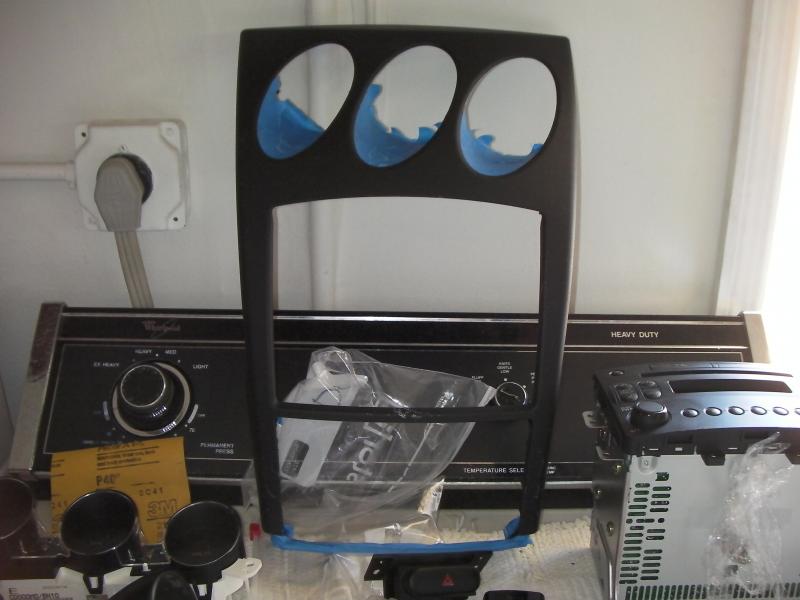
First few coats complete.
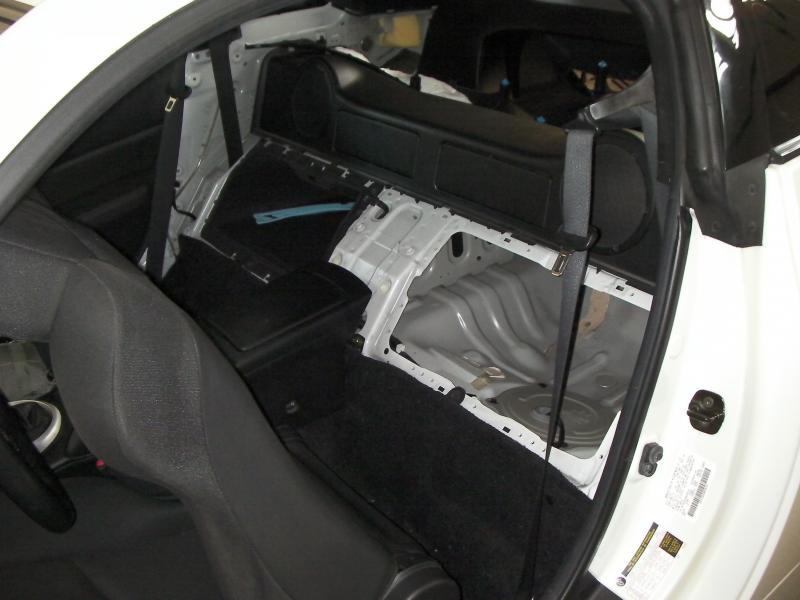
Got bored one afternoon and decided to remove the subwoofer mounting plate behind the drivers seat. Fun way to spend an hour or so in the garage.


PHASE THREE: The Quest for more Power!
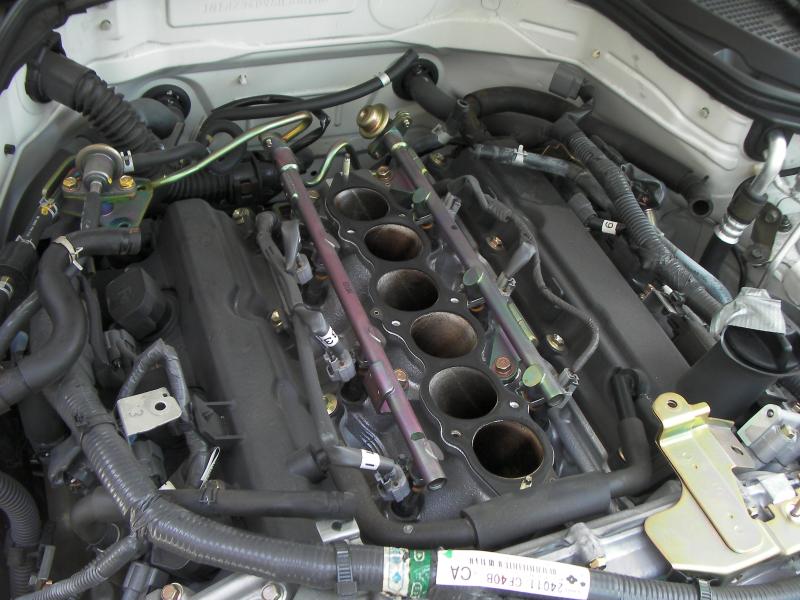
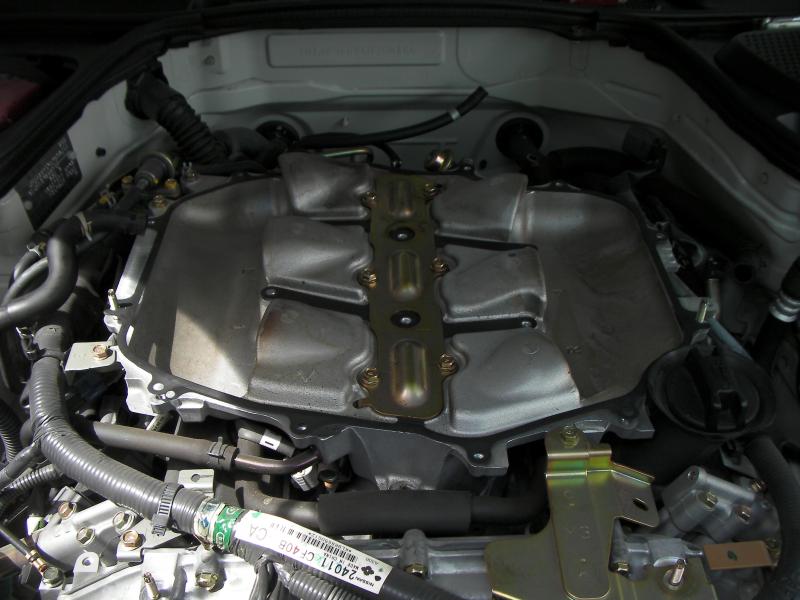
When the urge to start modifying came around again I figured I'd switch my focus towards bolt-on power modifications. Unlike the suspension, which requires a larger array of pieces that then need to be tweaked correctly in order for them to work harmoniously together, bolt-on mods are simple and very straight forward. I started with the Motordyne MREV2 lower plenum and their 5/16th's Iso-Thermal plenum spacer. This was the first of many DIY installs on the Z.
(Note: pictures are of the OE lower plenum, not the MREV2. I guess I was too excited to jump in and go for a spin that I forgot to snap some pics of the new go fast goodies, oh well )
)
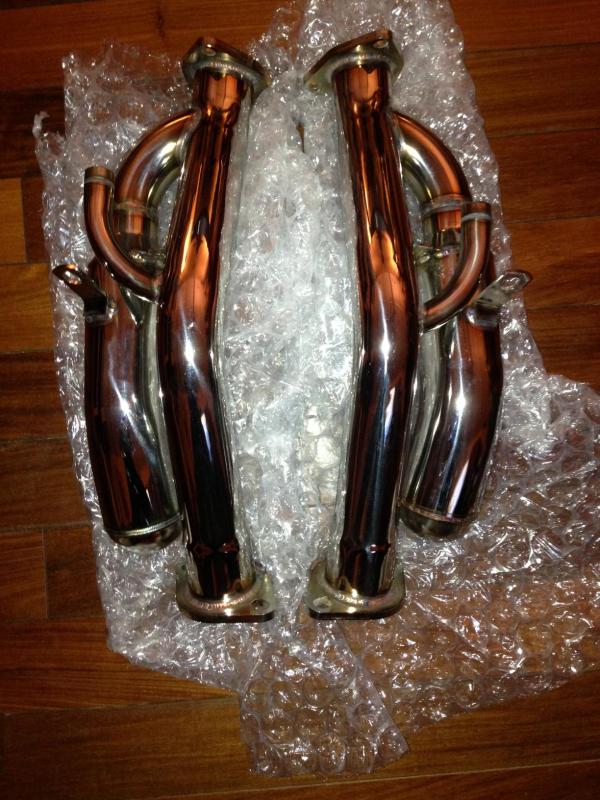
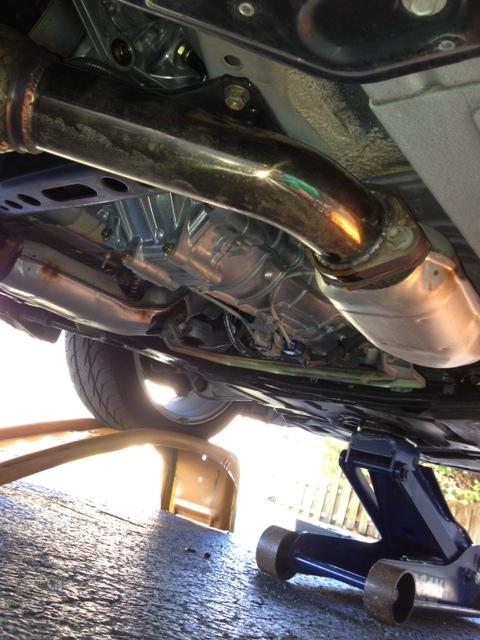
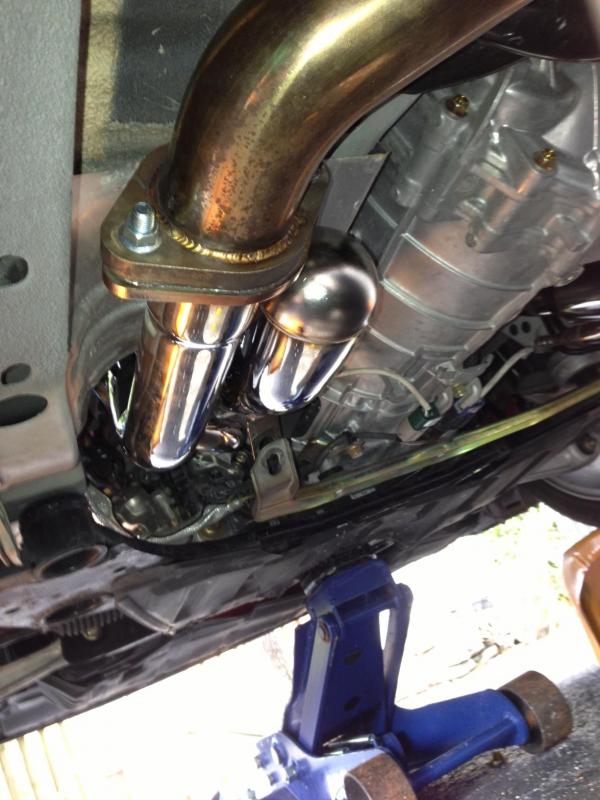
I followed up the plenum mods with a Motordyne Dual Shockwave TDX1 cat back exhaust. The change in sound and reduction in weight really added to the overall driving experience of the car. Eventually added Motordyne ART pipes to finish off the exhaust setup. The install of these parts was really straight forward. The most challenging part was only having two hands.
Motordyne Shockwave TDX1
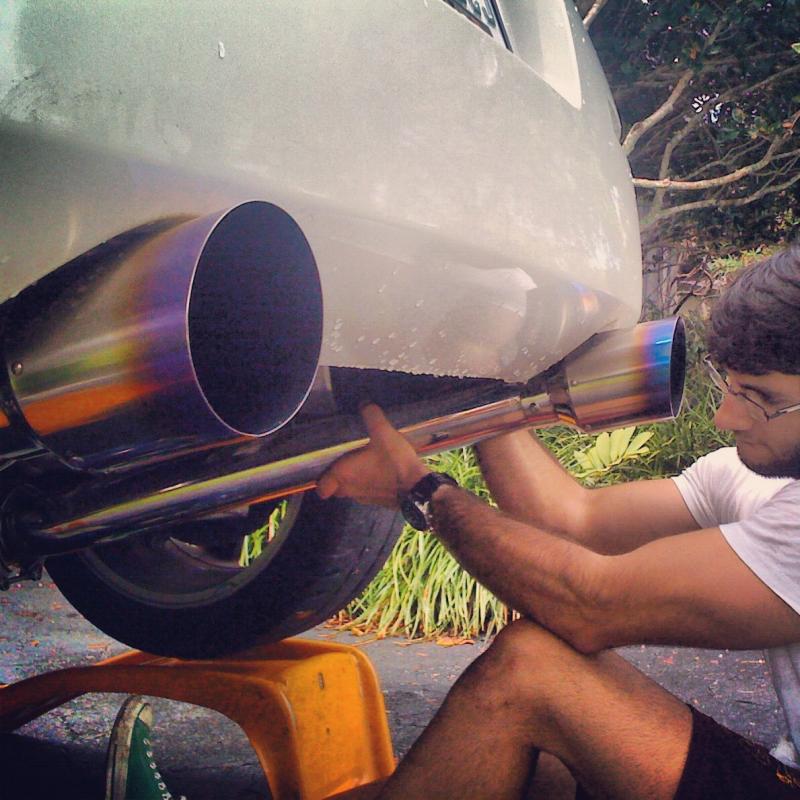
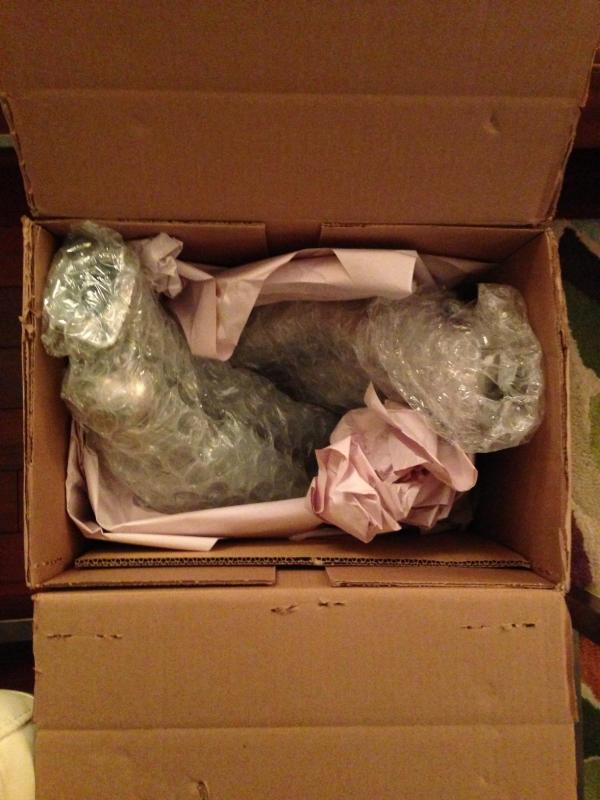
Motordyne ART Pipes
OEM Catalytic Converters
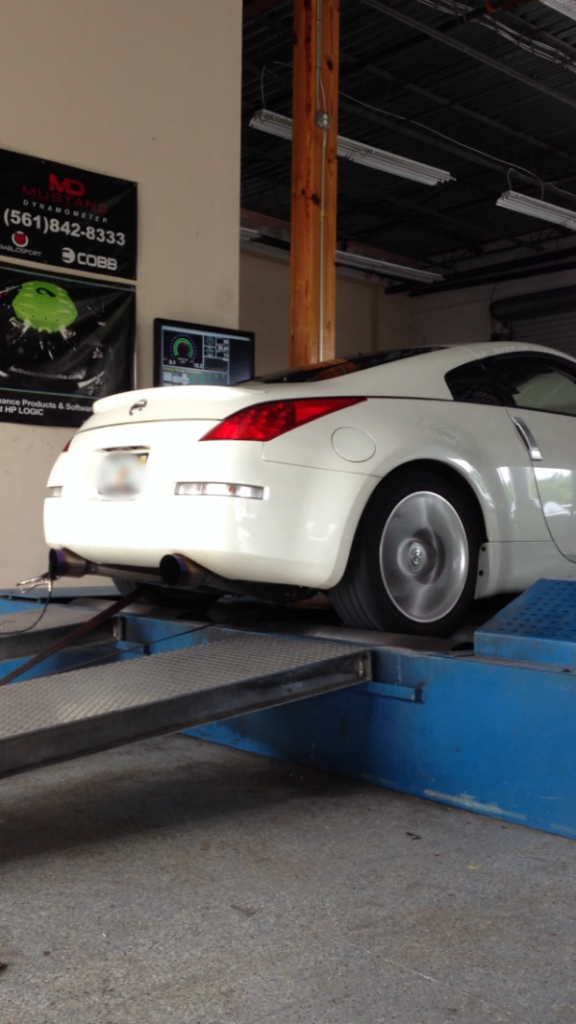
Finally wrapped it all up with an UpRev Dyno tune at HP Logic. The baseline showed a lean air/fuel mixture (huge surprise... NOT really ). After tweaking the fuel to match the increased air flow, there was an instant noticeable difference in how smooth the power delivery through out the entire rev range became.
So thats mostly it! Your all caught up! But the journey has only just begun. I'd like to close this first post by stating the intent of my build as I see it at this point in time. Without giving too much away, the focus is to build a track worthy, daily driven Z. Making sure to have a ton of fun along the way. If you've made it this far, I'd like to thank you for taking the time to read my story. More to come real soon!
I'll leave you with a little tease...
My name is Chris, and the following is a synopsis of the last 8 years of owning my PPW '06 Z.
Here's the first picture of the Z after I brought it home from the dealer and washed it.

PHASE ONE: Blank Canvas. Oh the Possibilities!
It wasn't long before I started to change things just for the sake of changing things (hind-sight is always 20-20). I started with the suspension thinking that on my small budget I could increase performance and the overall aesthetics of my Z. I first purchased Tein Basic Coilovers. Later, I got Cusco Front A-Arms and Rear Camber Arms to fine tune the alignment. I finished it off with Stillen front and rear sway bars. Looking back, the sway bars made the biggest difference to the handling characteristics of the car over any of the other suspension components I added.
Other changes worth mentioning included: JWT Pop Charger Intake, S2000 antenna, Nismo Ti shift ****, and a genuine Fairlady Z badge, which I throughly enjoyed. It might be frowned upon today, but back in '06 I was getting all kinds of positive feedback on the badge.
Tein Basic Coilovers

Cusco Front Upper Arms

Rear Camber Arms

JWT Pop Charger


PHASE TWO: Back to Basics.
I was on that setup for a little over a year. However, spend enough time reading and learning about any topic or hobby and your perspective will eventually mature. The more I learned about suspension and chassis tuning, the more I realized that I would need a much larger budget to really improve upon the stock suspension. I decided to sell off the aftermarket suspension parts with the exception of the Stillen sway bars (which I still have on the Z to this day), and return back to stock form.
I took a break from buying parts and simply focused on driving, maintaing the car, and learning as much as I could about the direction I wanted to take with my future build (more on this later). During this time I refurbished the interior plastics on the doors and the waterfall. This was my first attempt ever at a project like this. It was a great experience and I was extremely satisfied with the results.


Plastics after I removed OE coating.


First few coats complete.


Got bored one afternoon and decided to remove the subwoofer mounting plate behind the drivers seat. Fun way to spend an hour or so in the garage.


PHASE THREE: The Quest for more Power!
When the urge to start modifying came around again I figured I'd switch my focus towards bolt-on power modifications. Unlike the suspension, which requires a larger array of pieces that then need to be tweaked correctly in order for them to work harmoniously together, bolt-on mods are simple and very straight forward. I started with the Motordyne MREV2 lower plenum and their 5/16th's Iso-Thermal plenum spacer. This was the first of many DIY installs on the Z.
(Note: pictures are of the OE lower plenum, not the MREV2. I guess I was too excited to jump in and go for a spin that I forgot to snap some pics of the new go fast goodies, oh well
) 

I followed up the plenum mods with a Motordyne Dual Shockwave TDX1 cat back exhaust. The change in sound and reduction in weight really added to the overall driving experience of the car. Eventually added Motordyne ART pipes to finish off the exhaust setup. The install of these parts was really straight forward. The most challenging part was only having two hands.
Motordyne Shockwave TDX1


Motordyne ART Pipes

OEM Catalytic Converters


Finally wrapped it all up with an UpRev Dyno tune at HP Logic. The baseline showed a lean air/fuel mixture (huge surprise... NOT really
). After tweaking the fuel to match the increased air flow, there was an instant noticeable difference in how smooth the power delivery through out the entire rev range became. 
So thats mostly it! Your all caught up! But the journey has only just begun. I'd like to close this first post by stating the intent of my build as I see it at this point in time. Without giving too much away, the focus is to build a track worthy, daily driven Z. Making sure to have a ton of fun along the way. If you've made it this far, I'd like to thank you for taking the time to read my story. More to come real soon!
I'll leave you with a little tease...

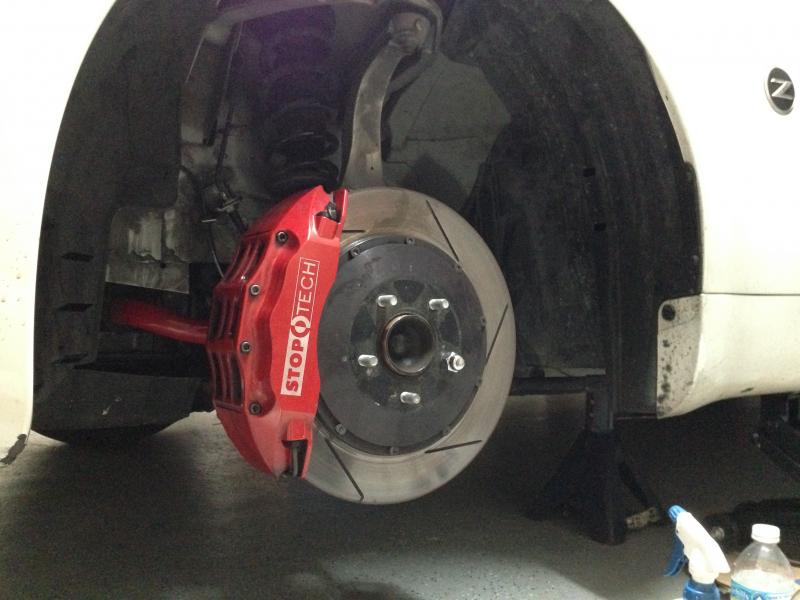
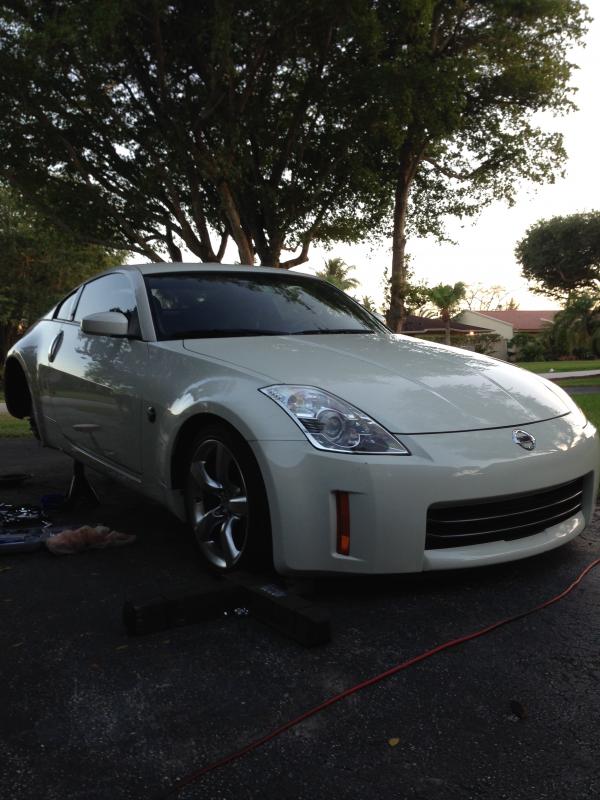
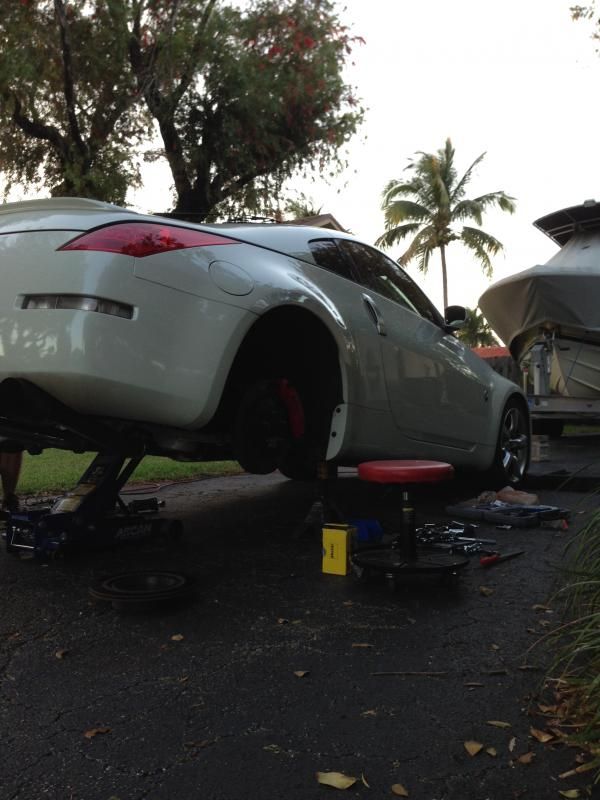
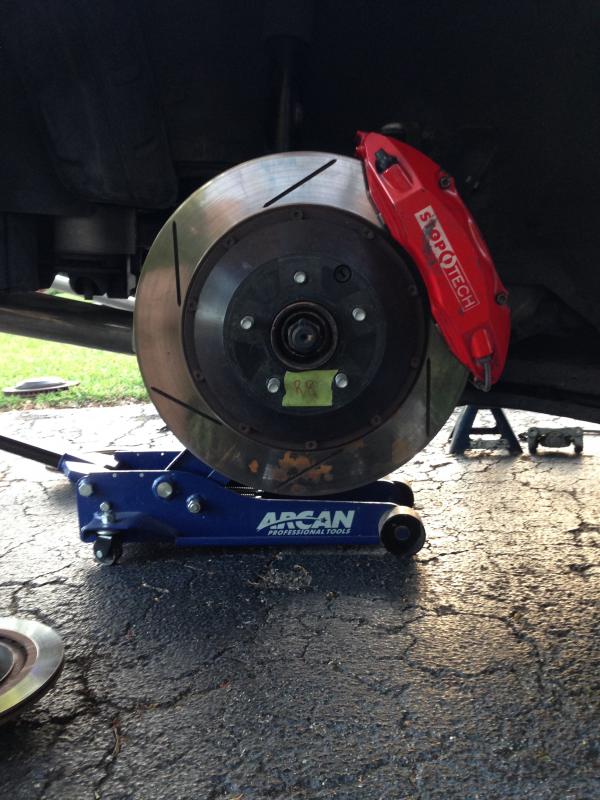
So I picked up a set of ST-60's for the front, and ST-45's for the rear. They both use a 335mm X 32mm sized rotor, so they are pretty massive to say the least. Best part is these rotors weigh less than the stock (front) ones they replaced!

Install Day.

Before...
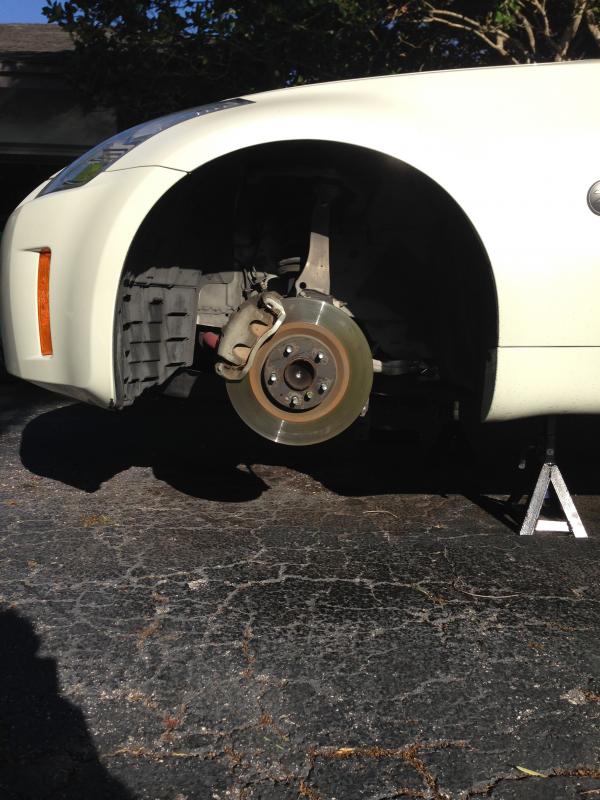
After!!
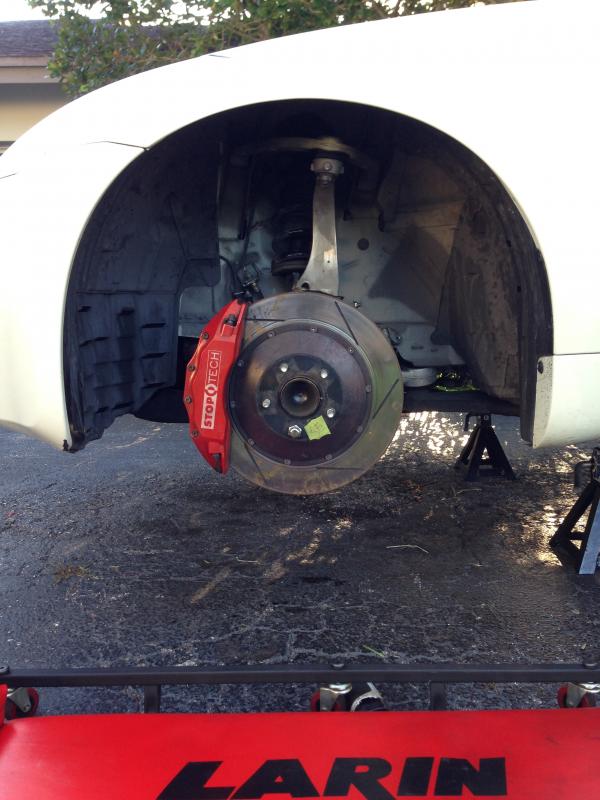
I was able to get the ST-60's on without any issues. The ST-45's are waiting for new pads to arrive before they go on. So an update is pending on that.
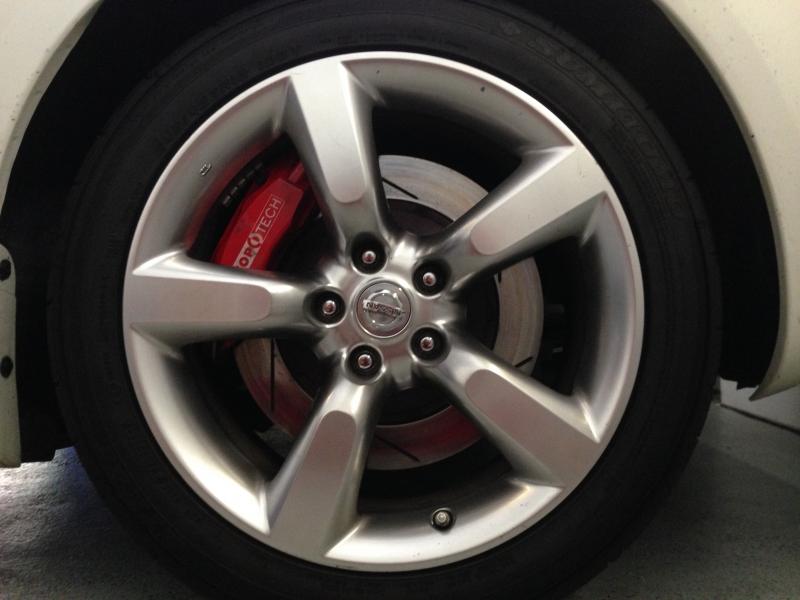
I replaced the Hawk DTC-60 pads yesterday with the StopTech Street pads. The DTC pads had amazing initial bite, but were too noisy because I couldn't get them up to temp on the street.
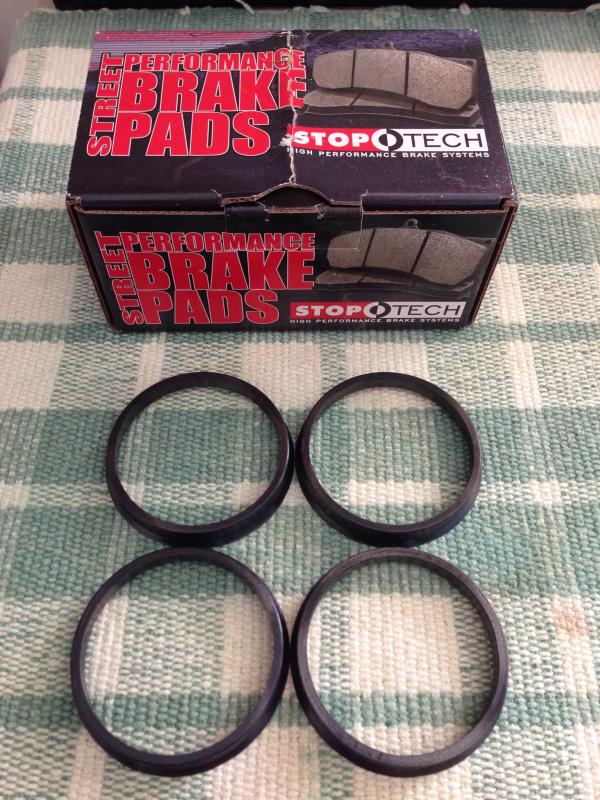
My wheels are caked in brake dust from the race pads, so I'll get some pictures up with the wheels on after I get around to cleaning the car.

Install Day.

Before...

After!!

I was able to get the ST-60's on without any issues. The ST-45's are waiting for new pads to arrive before they go on. So an update is pending on that.
I replaced the Hawk DTC-60 pads yesterday with the StopTech Street pads. The DTC pads had amazing initial bite, but were too noisy because I couldn't get them up to temp on the street.


My wheels are caked in brake dust from the race pads, so I'll get some pictures up with the wheels on after I get around to cleaning the car.
Last edited by ChriZTT; Mar 31, 2014 at 02:51 PM. Reason: Update


Trending Topics
I get that same feeling every time I cold start the car  .
.
Thanks for the kind words! As for the color of the kit, I'll say this, it wasn't what I originally planed on, but I couldn't say no to the trophy kit caliper brackets that this particular kit came with  .
.
Thanks! I appreciate it.
This made me laugh out loud!! Thanks Advan, BTW I'm really digging your new look with the SSR's! Great choice!
Thanks! I don't think I'll disappoint.
.. Thanks! I appreciate it.
This made me laugh out loud!! Thanks Advan, BTW I'm really digging your new look with the SSR's! Great choice!
Thanks! I don't think I'll disappoint.
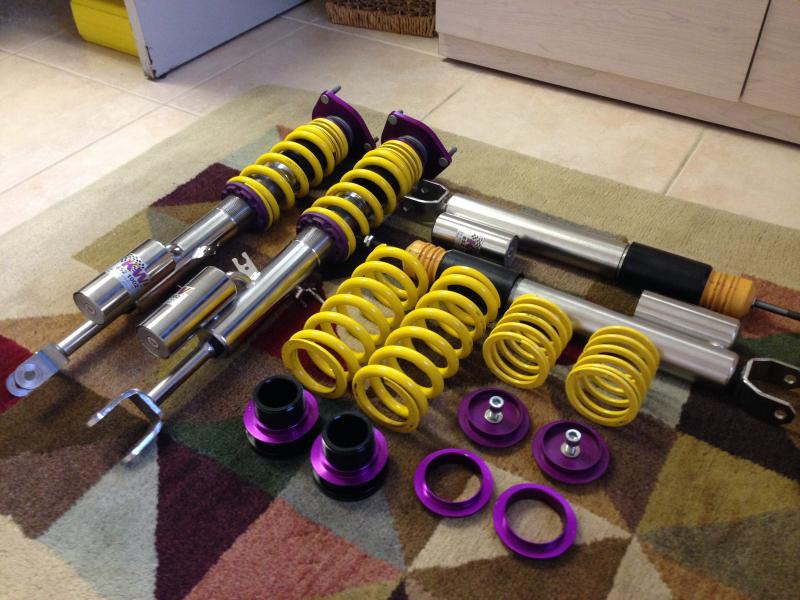
Starting to piece together the new suspension setup. The KW ClubSport Coilovers are the foundation I'm going to be building the suspension around.
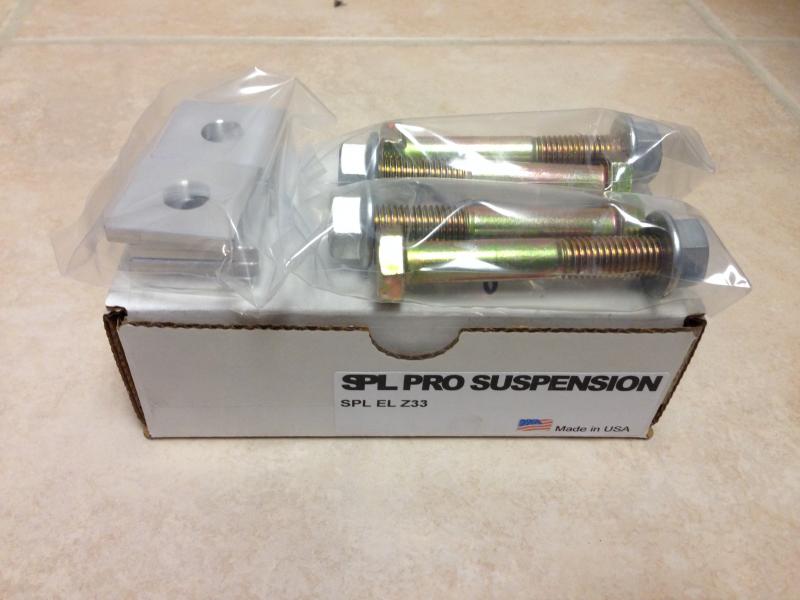
Also got a few SPL goodies to complement the KW's.
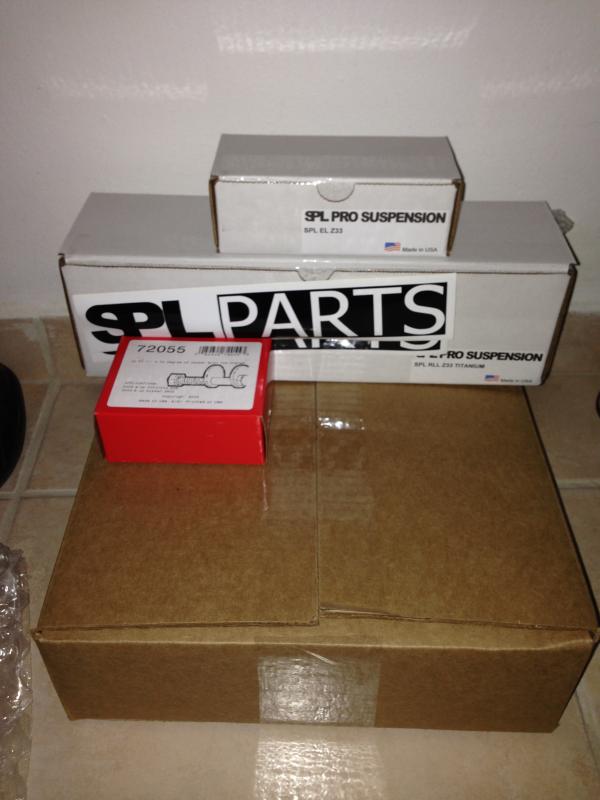
Front A-Arms
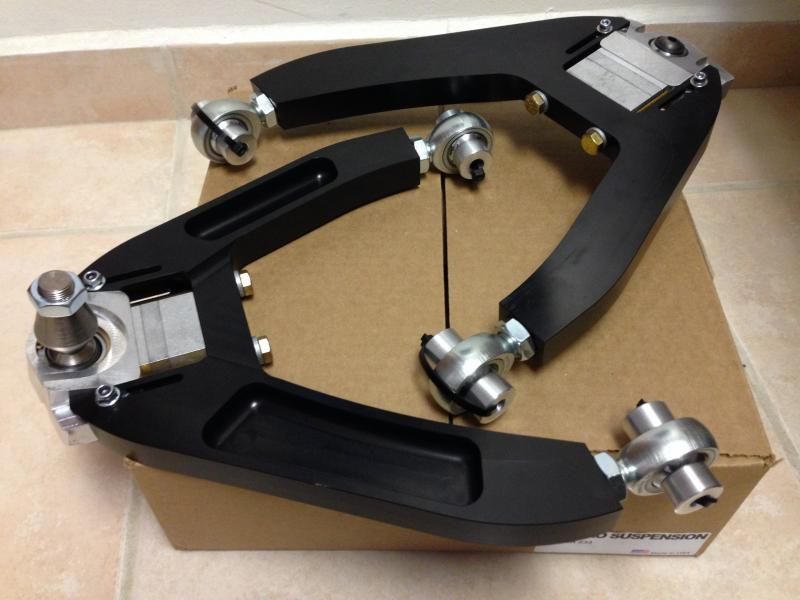
Rear Camber Arms
Eccentric Lockout Kit
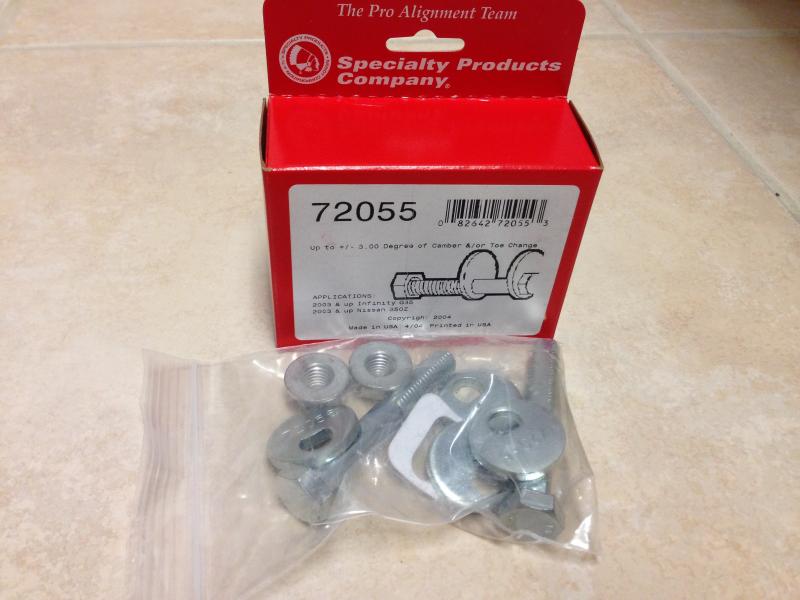
And to round it all off an SPC Toe Bolt Kit.
Down the road I'd like to add front and rear end-links, as well as solid subframe and differential bushings. For those of you who have corner balanced your setups, how necessary or beneficial is it to add adjustable sway bar end-links? How do the end-links aid in the corner balance process?

Also got a few SPL goodies to complement the KW's.

Front A-Arms

Rear Camber Arms

Eccentric Lockout Kit

And to round it all off an SPC Toe Bolt Kit.

Down the road I'd like to add front and rear end-links, as well as solid subframe and differential bushings. For those of you who have corner balanced your setups, how necessary or beneficial is it to add adjustable sway bar end-links? How do the end-links aid in the corner balance process?


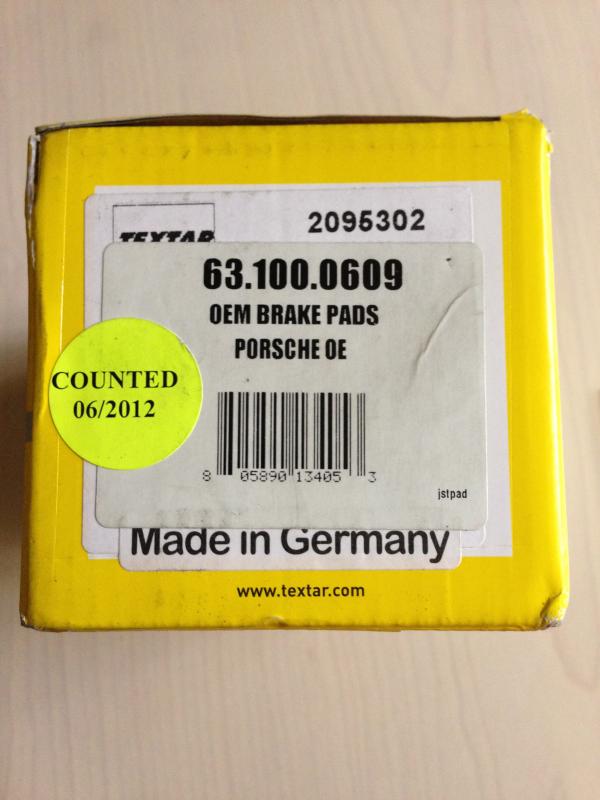
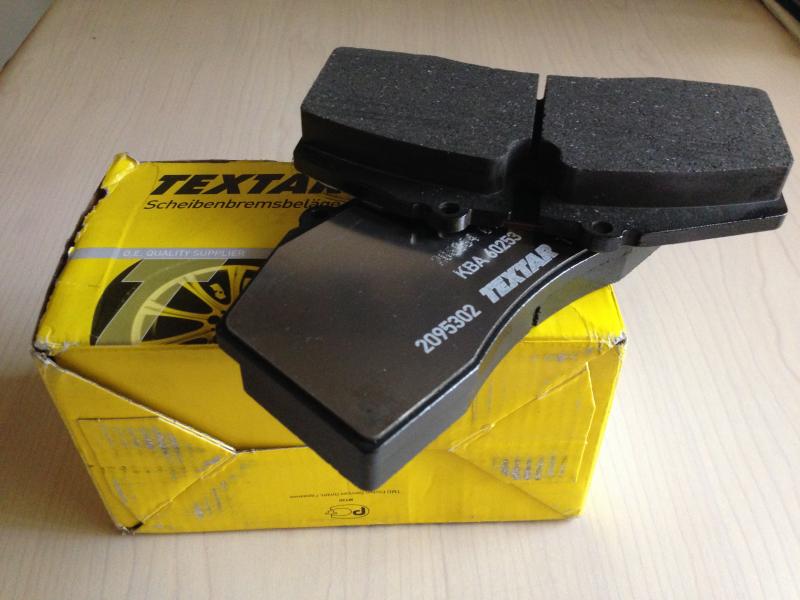
Brake pads for the ST-45 rear calipers came in yesterday. Hopefully I can get the install done on Saturday.
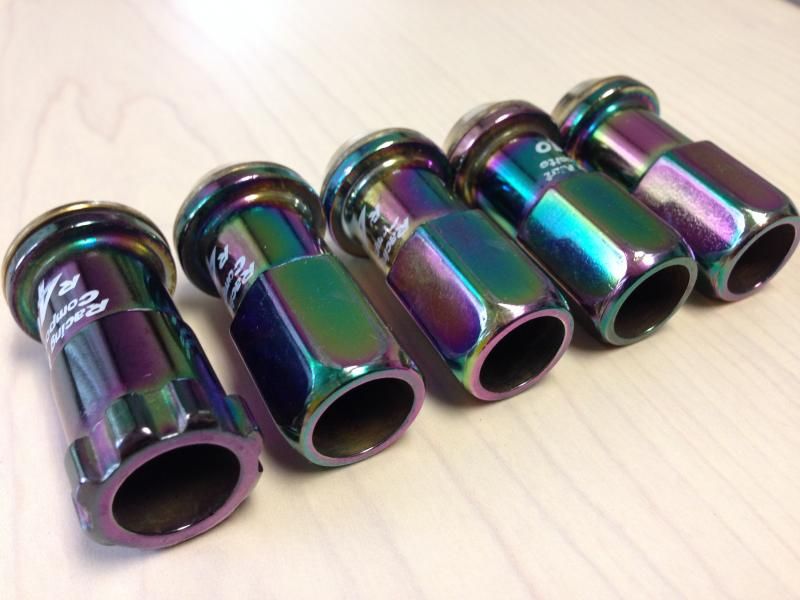
Project Kics R40 lugs.
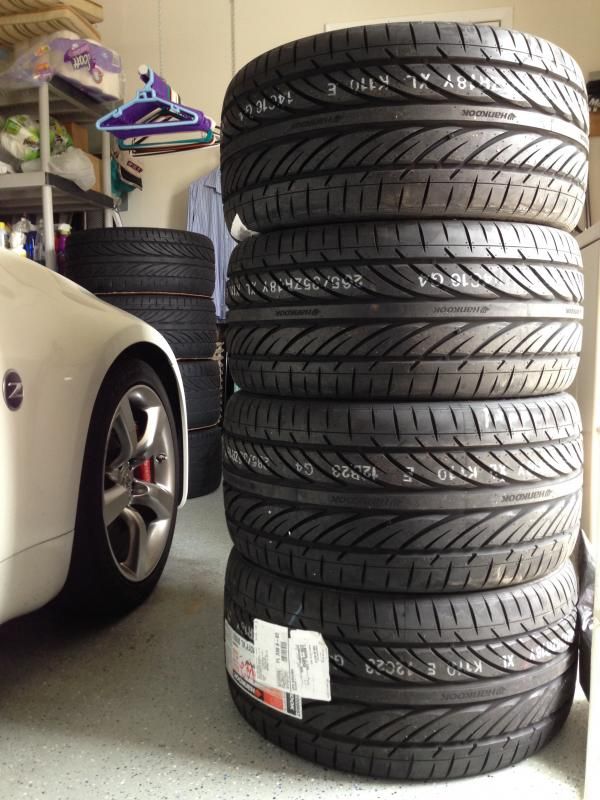
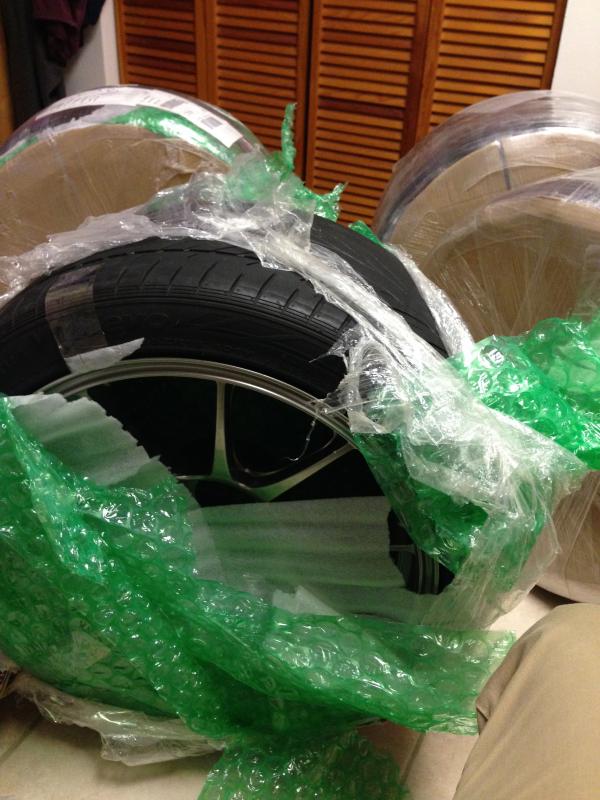
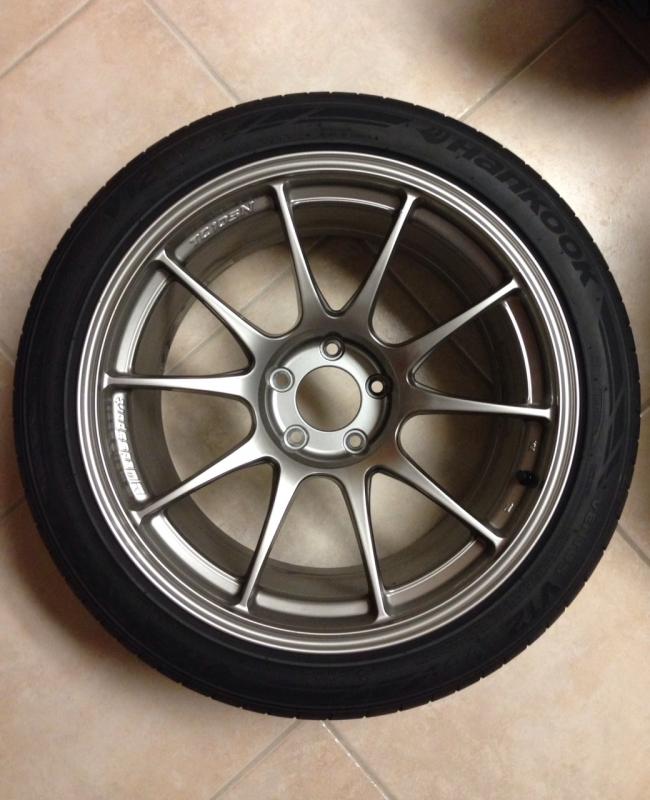
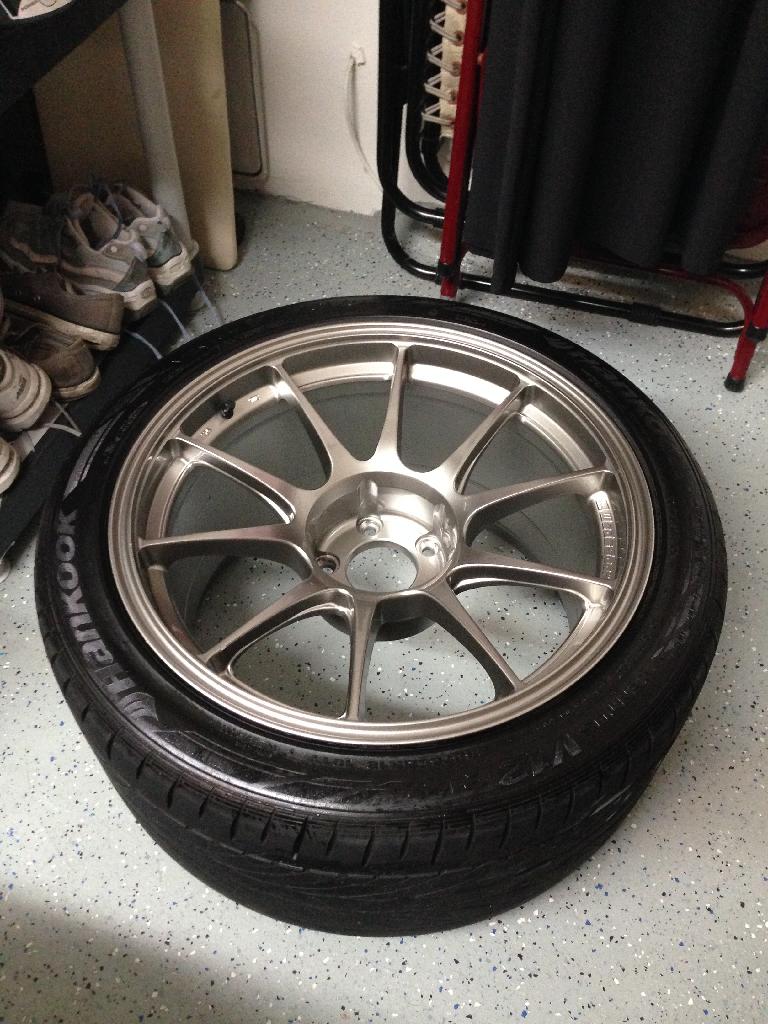
The only remaining items are the wheels and tires. The tires (Hankook V12's) should be here this afternoon. The only thing I'll say about the wheels right now is that they are LIGHT... very light weight. Update on that is coming soon.
4PM Update
Tires have arrived!


Project Kics R40 lugs.

The only remaining items are the wheels and tires. The tires (Hankook V12's) should be here this afternoon. The only thing I'll say about the wheels right now is that they are LIGHT... very light weight. Update on that is coming soon.
4PM Update
Tires have arrived!

Last edited by ChriZTT; Apr 11, 2014 at 12:31 PM.


Thanks! I see your point. The Hankook V12 is in fact a street tire, no doubt. My Z is still very much a street car as well, so the V12's will serve me just fine for the time being.
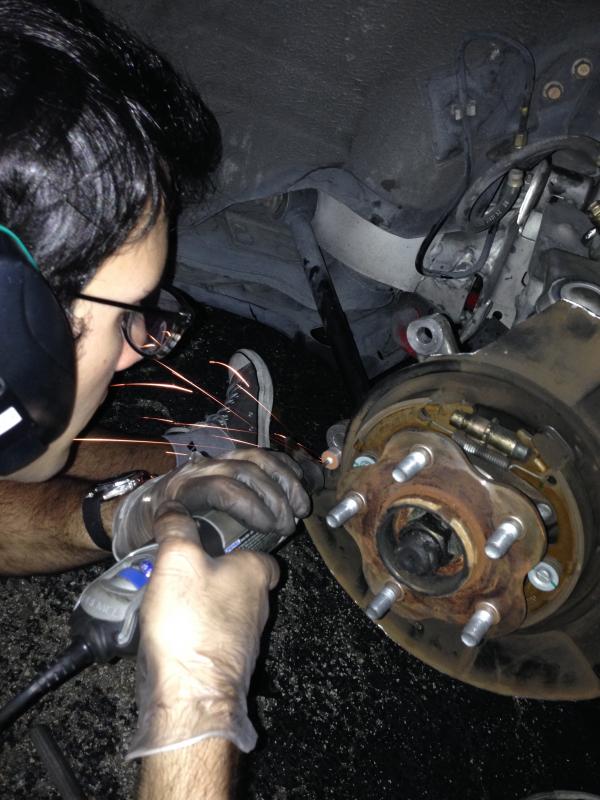
So Saturday I got to work and installed the ST45's. Compared to the front, the rear took a little more finesse. Over all it just required a bit more trimming and grinding to get every thing to fit perfect.
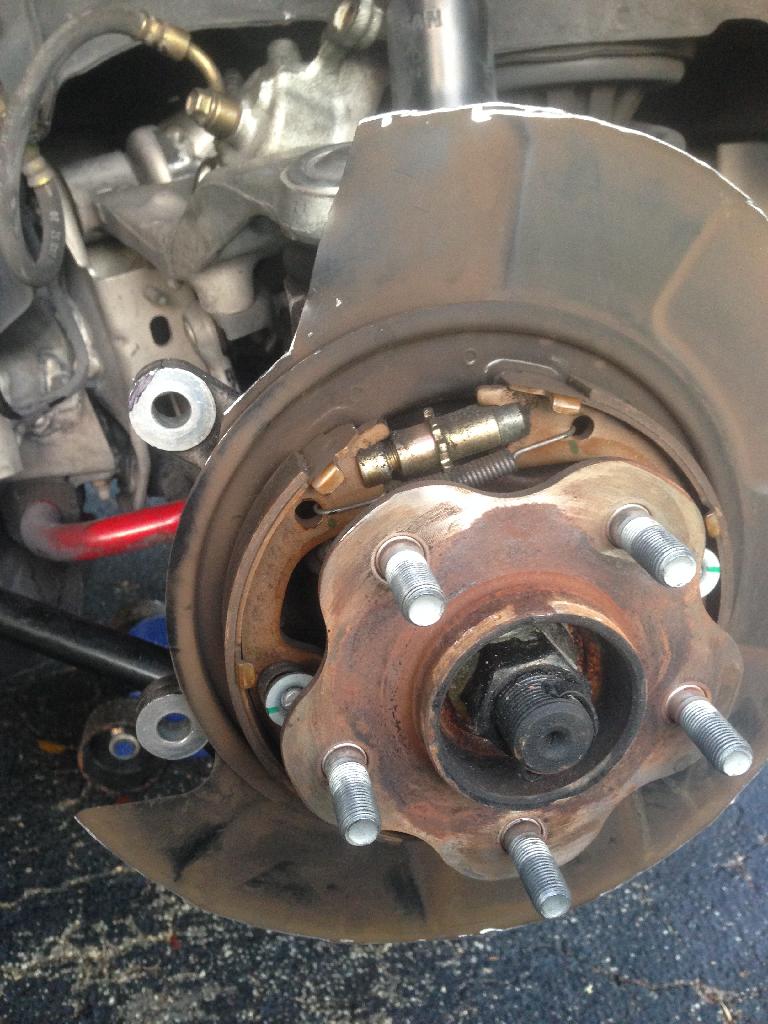
A before and after of the left rear dust shield.

Completed right rear assembly.
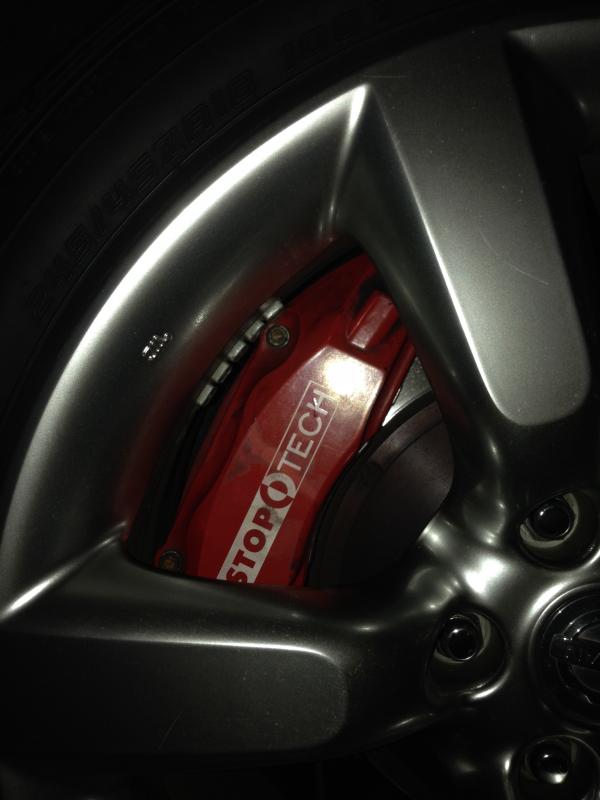
Caliper to wheel clearance on the rear left.


A before and after of the left rear dust shield.


Completed right rear assembly.

Caliper to wheel clearance on the rear left.


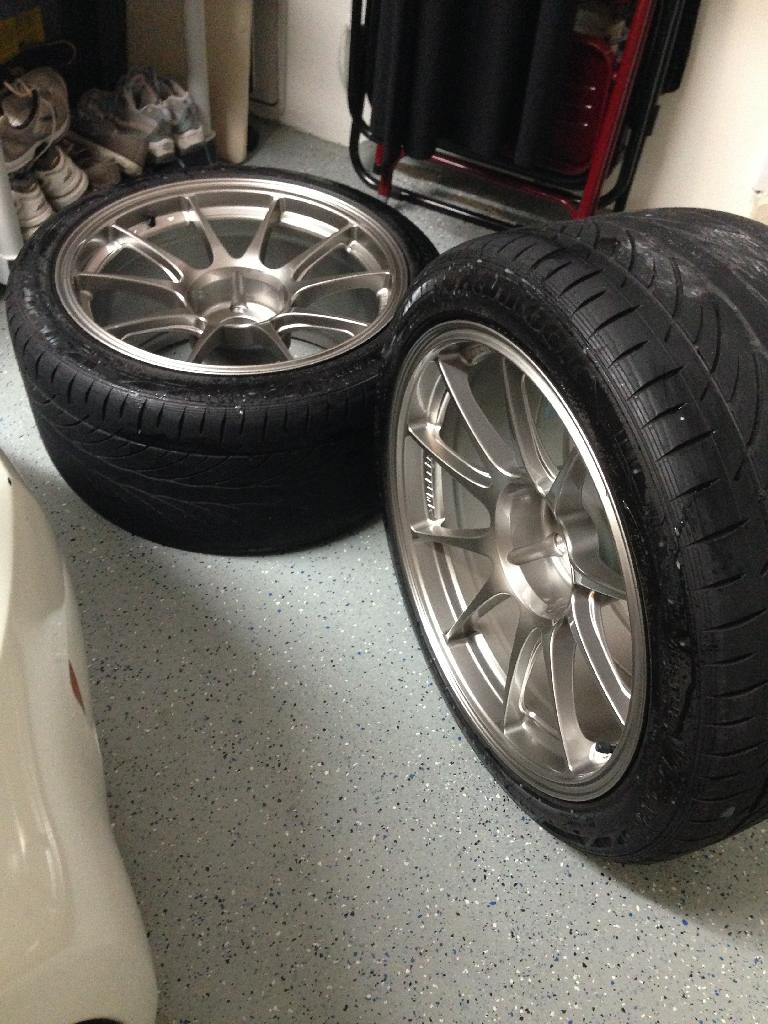
Lightweight has always been at the top of my priorities list when looking at possible wheel options. My brake setup requires an 18" wheel minimum to avoid clearance issues, therefore 17" wheels could not be considered. RPF1's seemed like a logical choice given the price point and weight, but I wanted something a bit different.
I decided on the WedsSport TC105N. Specs are 18x9.5 +10 in the front, and 18x10.5 +12 in the rear. The front wheels weighs in at ~17.6 lbs each, and the rear wheels weighs in at ~18.4 lbs each. I'm not sure you can do much better than that on an 18" wheel.
Cleaned them all up.
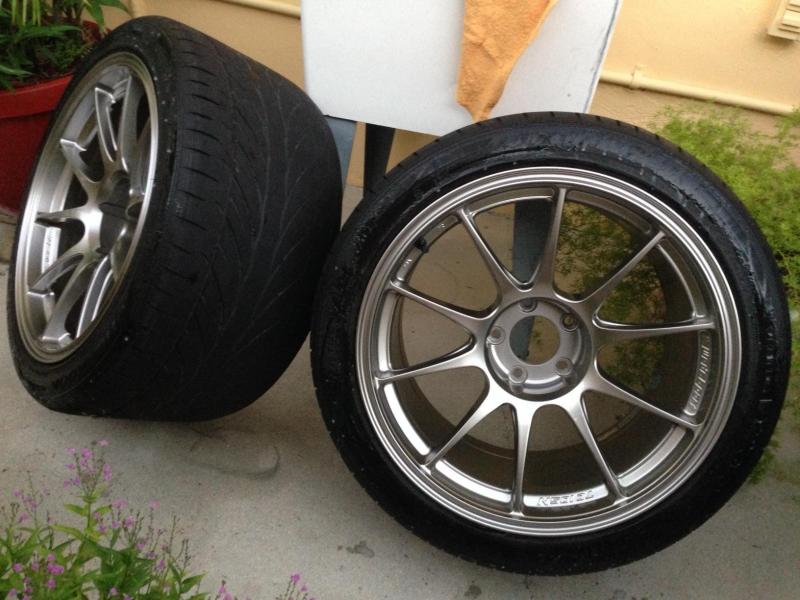
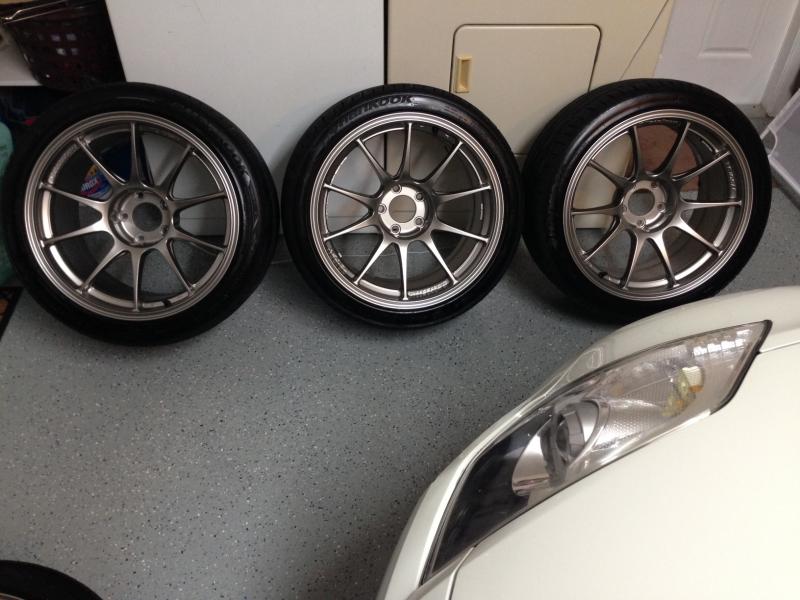
I decided on the WedsSport TC105N. Specs are 18x9.5 +10 in the front, and 18x10.5 +12 in the rear. The front wheels weighs in at ~17.6 lbs each, and the rear wheels weighs in at ~18.4 lbs each. I'm not sure you can do much better than that on an 18" wheel.


Cleaned them all up.


