
Project: Nismo roadster


Im finally making progress on the Nismo front radiator support H-brace. I found a guy who has one. Hopefully it will be on its way this week. I will likely have to do some modifications to the car get the brace to fit since it is meant for the HR engined car (07+) although all the bolt holes exist in the earlier cars like mine, much like the front frame damper holes existed as well. :-)
I have some OEM 06+ headlight shells on their way that I bought from Kno who is a long time member on here. Kno has a really cool orange Z and he had work done to these headlights. They have been blacked out inside and have halos. I just need to transfer my HID wiring, get new HID high beam bulbs, and then wire up the high beam flap. Still looking for wheels.....

I painted my shift bezel (not the silver parts) and the waterfall and clear coated them too. They look brand new.
I have a Z meet tomorrow so I detailed the car. Ill get some pics later.
I have a Z meet tomorrow so I detailed the car. Ill get some pics later.

Productive weekend in various ways for me and the car. I got the rest of the car polished and waxed after power washing it. I also clean the interior and engine bay and polished the metal bits.
I went to the west coast Z meet.
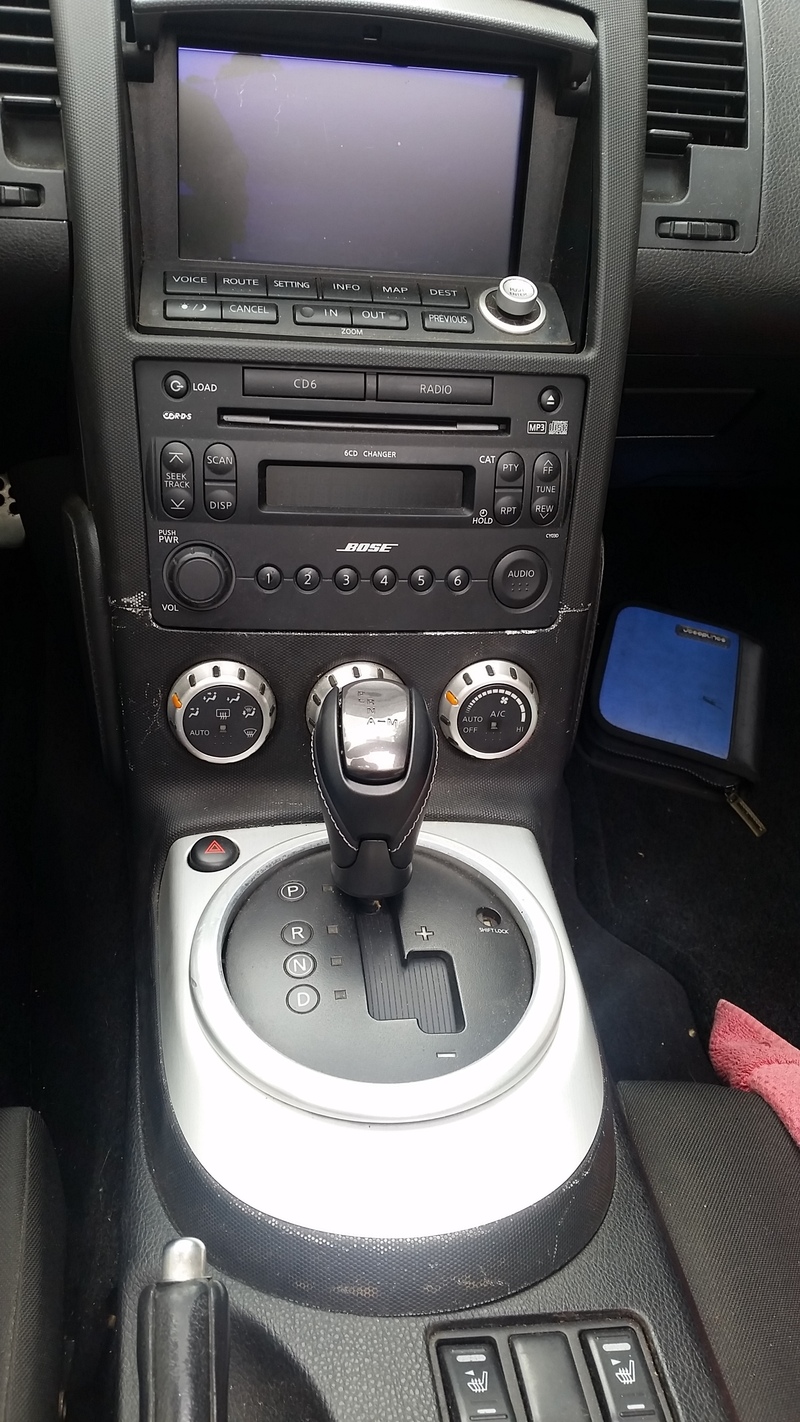
Pic of console before paint:
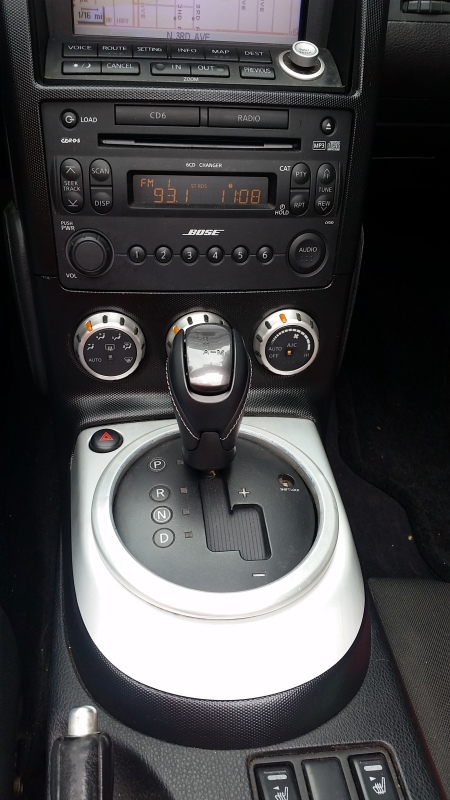
Pic after paint:
After the show, I cruise to Laguna Beach and walked around there. it started to rain which of course ruined all the detail work that I did. it's still the lovely drive up the coast to Newport Beach and then home In on and off light rain. When I got home I found this waiting for me:
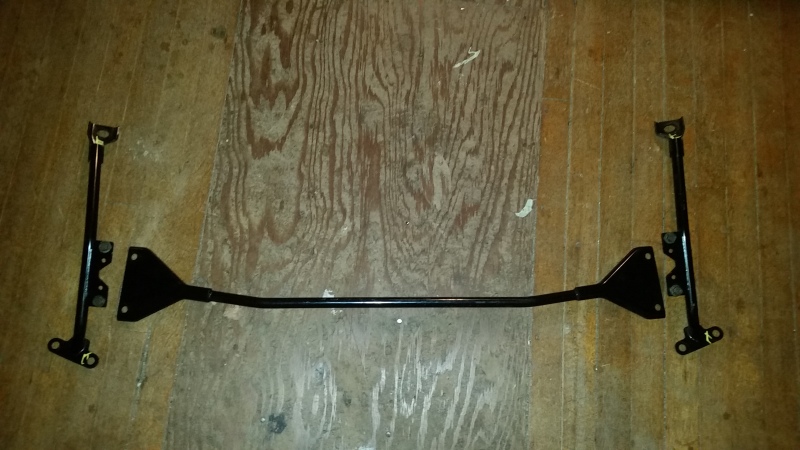
Yes, thats the H brace or radiator support from a Nismo Z. I was anxious to fit it to the car but it was kind of late so I just kind of set it in place on the engine compartment and it looked like it was going to fit.
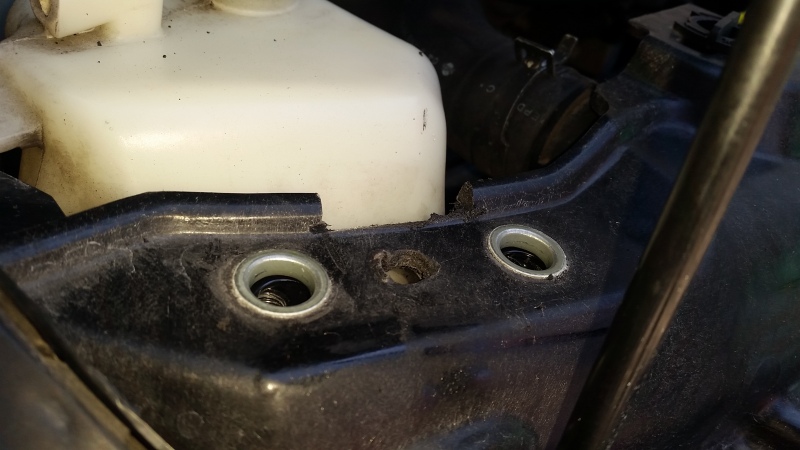
The next morning, I pop the hood and cleaned up the H brace and remove the existing bolts from the car and set the brace in place. The area of the two bolts that held the brace in the front had a lip which would not allow the brace to sit flush on top of the radiator support beam. A few seconds of cutting with a rotary cutter and the lip was gone.
The passenger side brace fit perfectly.
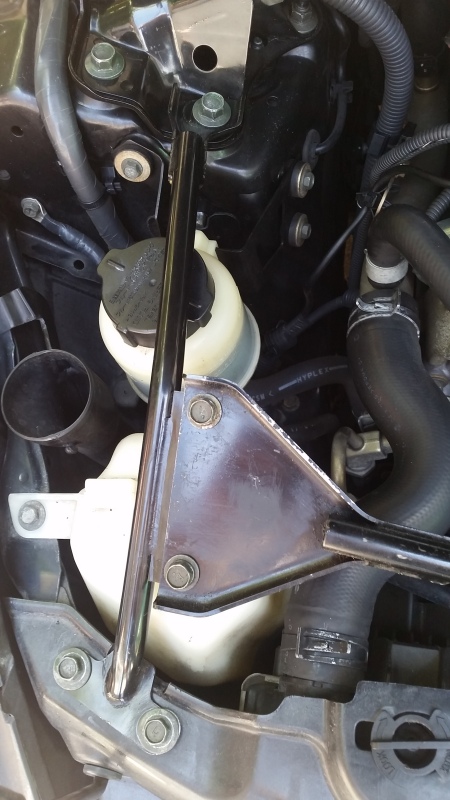
The drivers side required some thought. Although the brace fit fine on the drivers side, the cross brace that connected the left and right brace contacted the air filter box. To remedy that problem, I unbolted the bolt that holds the box and moved it towards the left, which allowed the box to drop down about an inch and a quarter which is the space that I needed to get the cross brace to fit. the air box is still held in place but by the brace instead of the bolt. Here is the end result:
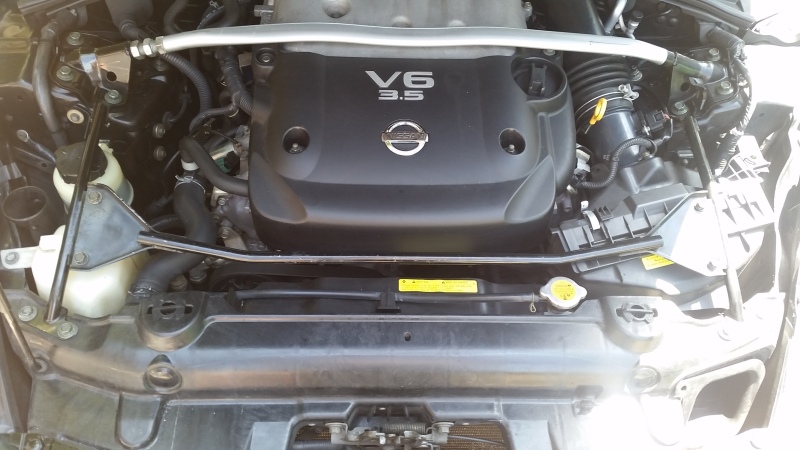
The brace fits great with the minor mods.
While I was at the Z meet, I discovered that the 06 and up navigation has a different keyboard then the prior years, and the waterfall does not seem to have a movable door but instead has a built in Sun shield. I will be on the hunt for one of those. still looking for Nismo rims
I went to the west coast Z meet.
Pic of console before paint:

Pic after paint:

After the show, I cruise to Laguna Beach and walked around there. it started to rain which of course ruined all the detail work that I did. it's still the lovely drive up the coast to Newport Beach and then home In on and off light rain. When I got home I found this waiting for me:

Yes, thats the H brace or radiator support from a Nismo Z. I was anxious to fit it to the car but it was kind of late so I just kind of set it in place on the engine compartment and it looked like it was going to fit.
The next morning, I pop the hood and cleaned up the H brace and remove the existing bolts from the car and set the brace in place. The area of the two bolts that held the brace in the front had a lip which would not allow the brace to sit flush on top of the radiator support beam. A few seconds of cutting with a rotary cutter and the lip was gone.

The passenger side brace fit perfectly.

The drivers side required some thought. Although the brace fit fine on the drivers side, the cross brace that connected the left and right brace contacted the air filter box. To remedy that problem, I unbolted the bolt that holds the box and moved it towards the left, which allowed the box to drop down about an inch and a quarter which is the space that I needed to get the cross brace to fit. the air box is still held in place but by the brace instead of the bolt. Here is the end result:

The brace fits great with the minor mods.
While I was at the Z meet, I discovered that the 06 and up navigation has a different keyboard then the prior years, and the waterfall does not seem to have a movable door but instead has a built in Sun shield. I will be on the hunt for one of those. still looking for Nismo rims

Love your dedication man. Props to you sourcing everything. I wanted the H-brace for my car but it wouldn't work with where I put the hood pins for my Cf good. So I ended up getting the stillen brace which works after work with a drill press.
All you need now is the HR hood and Nismo wheels and this build would be complete!
All you need now is the HR hood and Nismo wheels and this build would be complete!


Thanks guys!! I prepped the console by scuffing it with a "greenie" soaked in denatured alcohol. Then I dusted it with satin black plastic paint, two coats. I used matte clear coat used for engines and dusted it twice and let dry overnight. Total cost was about $12. Its important to use light coats because of the dimpled surface. A heavy coat may fill in the dimples. Next project is prepping and installing kno's 06+ headlights.
Thanks for that. I need to touch up a few places in my interior and I'm debating on paint or trying my hand at vinyl wrap. It seems like the plastic should take the paint pretty well as long as one takes the time to prep right.
Not sure if you covered this in a previous post, but any plans for the Nismo finned differential cover to stay with the Nismo theme?
Not sure if you covered this in a previous post, but any plans for the Nismo finned differential cover to stay with the Nismo theme?
Good question on the finned diff cover. Ive been looking for those but the only ones I have seen are all inclusive to the pumpkin and are in excess of $1,000. If I found a cover that was reasonably priced (for Nismo stuff), Id add it. I have considered shorter gears but I dont want to sacrifice highway comfort.
Regarding, hood and Nismo wheels, at the West Coast Z meet in Orange, I had a great chance to see different Z cars side by side. The 07+ hood is nice but the lines of the 03-06 hood fits with the front of the Nismo bumper, although it does not comport with the Nismo Z. If I find one in good condition for a decent price, Id get it. Its same with the wheels. My wheels are better in every respect except width. If I find a decent set for a good price, then Ill get 'em. I have found nice sets for high price, and really bent sets for low price. Im trying to be patient. Hopefully Ill be contacted if someone sees these items.
I think The Nismo Shop out in your neck of the woods sells only the cover. ConceptZPerformance also has the cover separate.
There may be a few other vendors around here that have them.
Thanks for the tips on the paint. I've experimented some and know what you mean about the dusting. I think that's where a lot of people go wrong. My paint skills are not even close to yours. I would never attempt to paint any exterior body panels like you've done. Very impressive
Its pretty cheap at the Nismo shop...about $124. Looks like ill have to get it. Also, I think I found the 06+ waterfall and navi keyboard. Its much cleaner looking than the 03-05 set up...so I guess im getting that too....
I noticed the right side of my bumper popped out. it just look like anybody hit it so I'm not sure why it popped out. I think ill remove it and paint the metal bumper underneath black.
The front bumper has to come off to install Kno's headlights. That is probably a good time to hook up the LEDs that are in place of the amber reflectors

In for pics after the headlight install.
How do you plan on wiring the LED reflectors? Are you going to splice the wiring into the parking lights or hooked up to a DRL module?
I'd like to run them as DRLs. I think thats a nice look. Any suggestions as to where I can get power for the LEDs and will I need a relay?
The module detects the voltage of the battery and when it is in normal operating range of a running car (somewhere between 13-14 volts, I think), then it will turn on the LEDs. In order to have the LEDs turn off when the headlights turn on, you connect one of the "trigger" wires to the headlight bulb wire which switches the module off when it detects the voltage from the trigger wire, turning off the LEDs.
If you want the LEDs to stay on whenever you have started the car (regardless of the headlights being on or off), you can just leave the trigger wire unconnected. The module I linked also has the optional ability to turn off the LEDs with the turn signals.
OR, you could try a generic 4-prong relay and connect prong-86 to something that is only on when the car is on, like the accessory fuse, or something like that. Not sure if this would burn out the LEDs faster since LEDs don't like fluctuating current.