
backup camera, new option...


CMOS sensors will overheat and become noisy if powered on for too long, so that's why you were getting a "cloudy" image. In the daylight mine is very clear, but the image does get noisy in the dark. Still works more than well enough, though, and I can easily see the area illuminated by the backup lights. Get the brightest LED backup lights you can, and it will work even better.
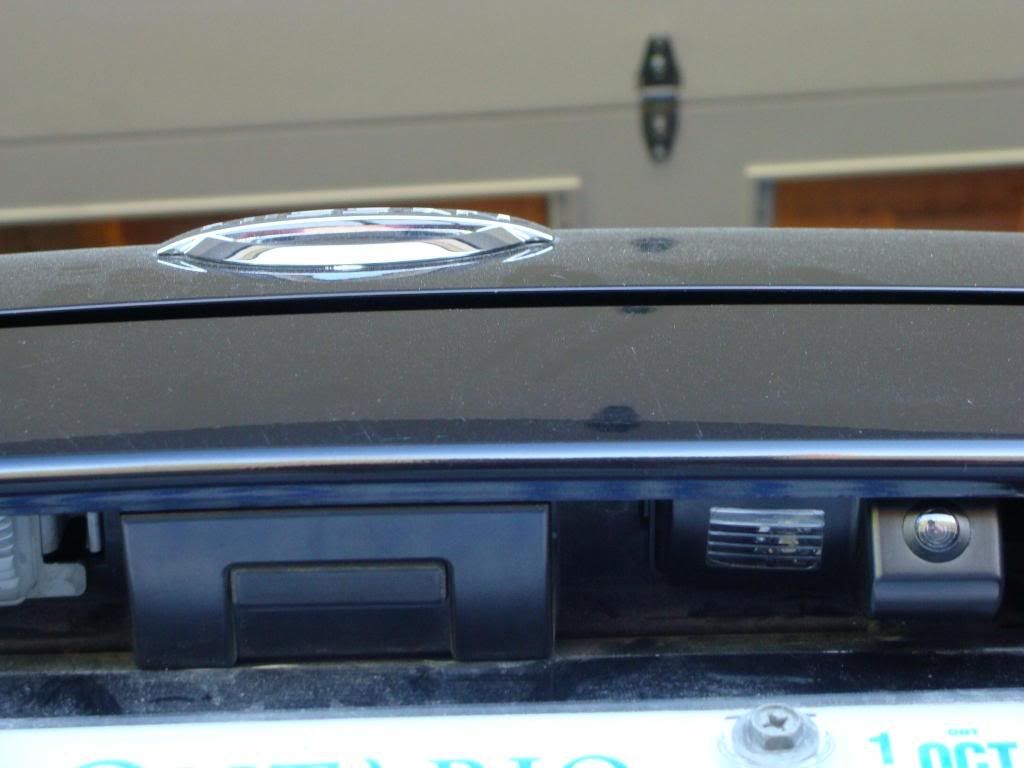
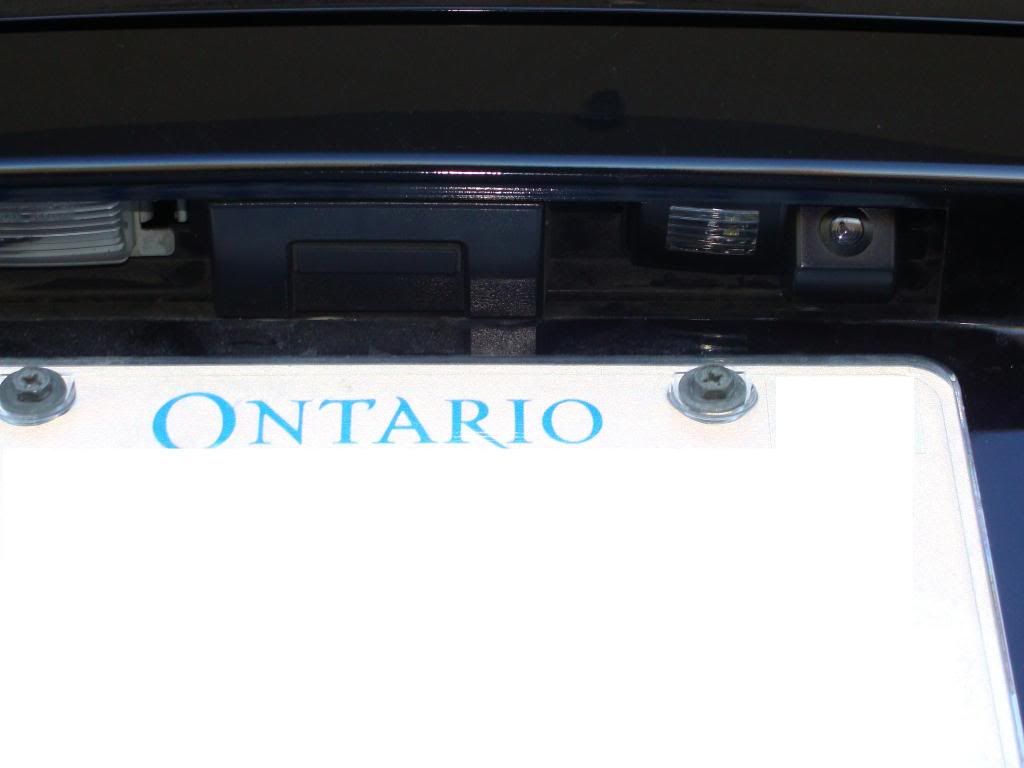
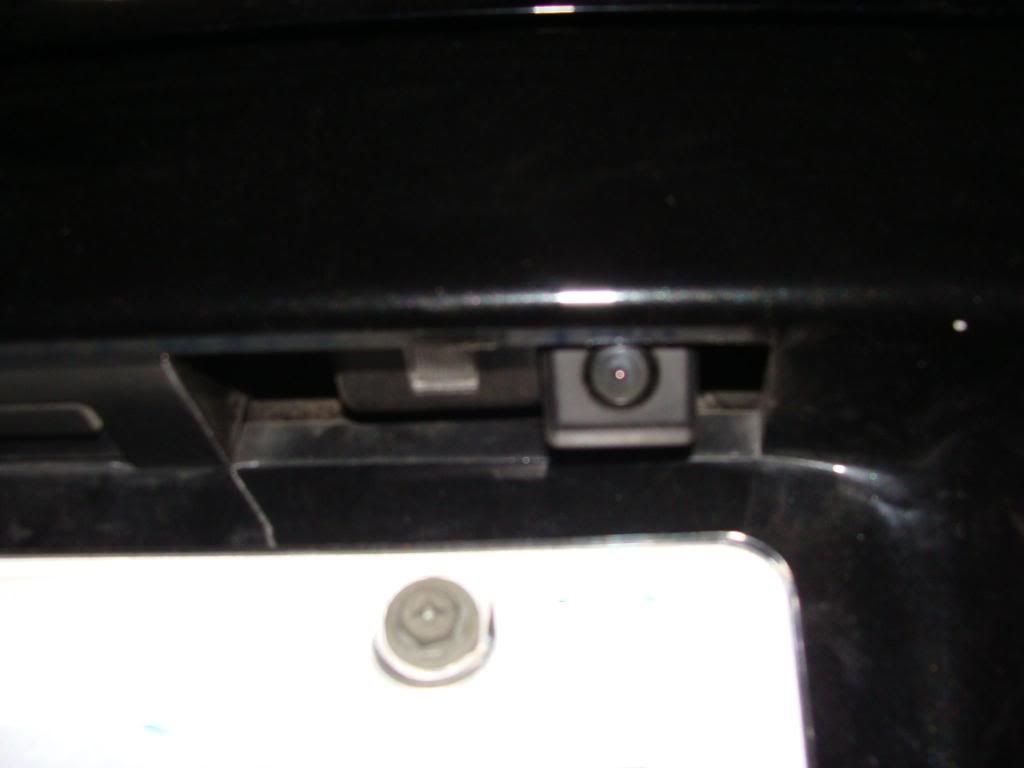
I ran my power/signal wires through the opening the backup light clips into. With the right taillight off I was able to fish a coathanger through the grommet on the rear trunk wall to grab the wires and pull them through. This way you can't see any wiring, and all the connections are made inside the car, so they're not exposed to the weather. There are a bunch of options on how to run the wires once they're inside the car.
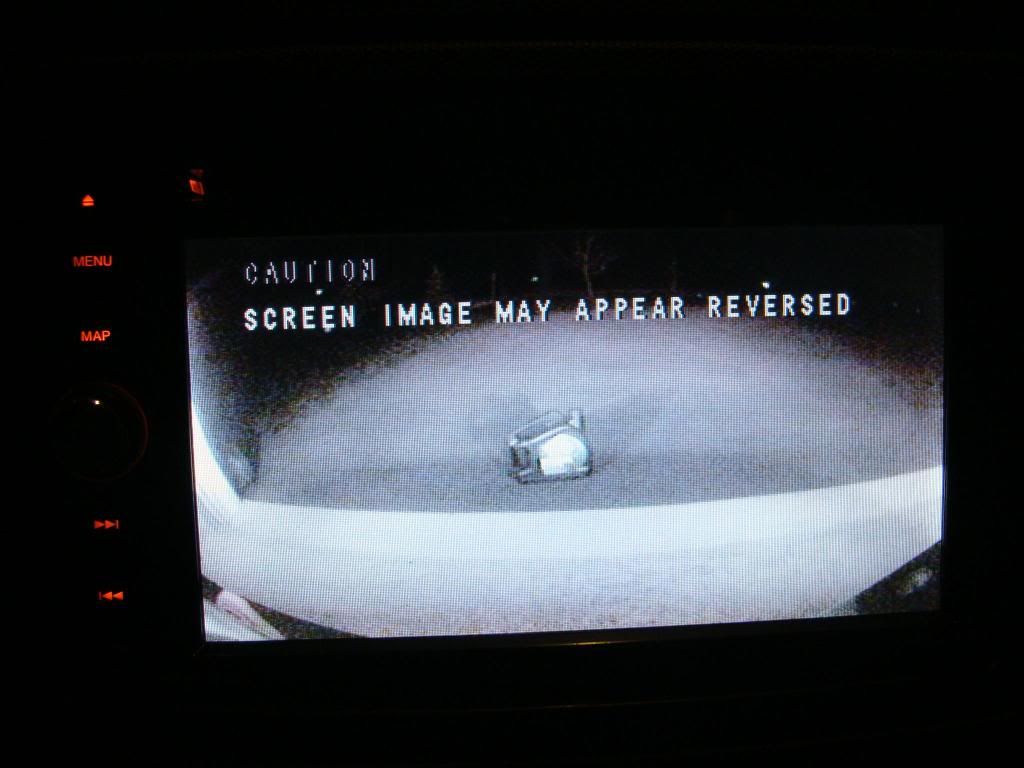
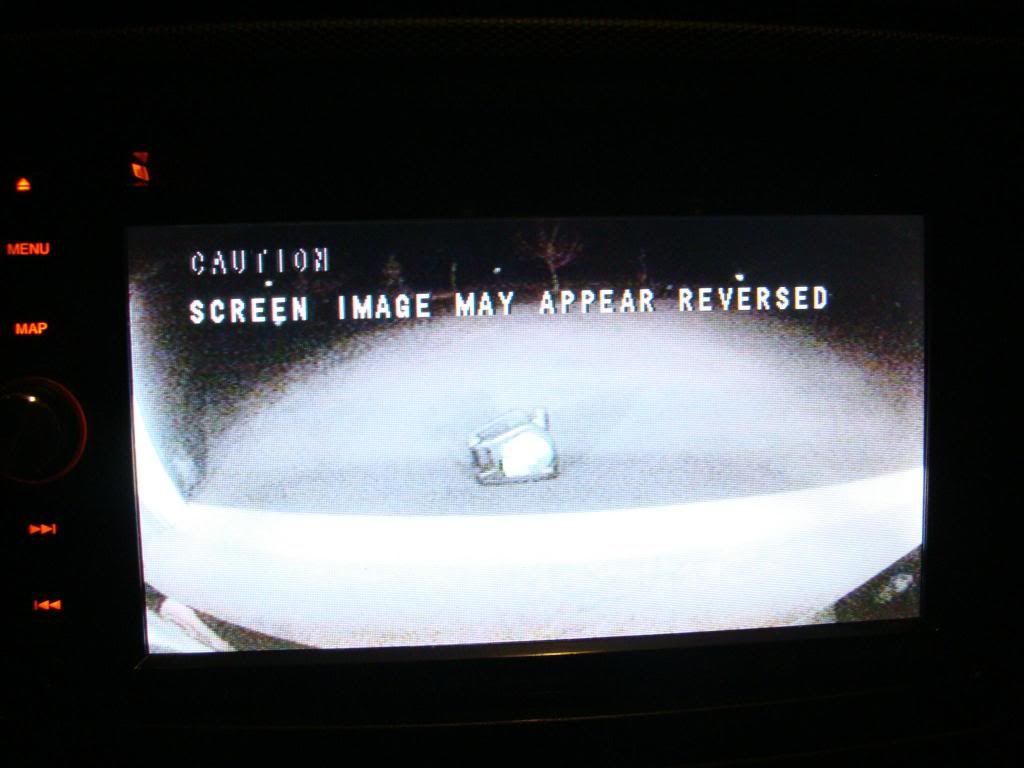
It looks like the distance markers are in meters, at least to me.
I ran my power/signal wires through the opening the backup light clips into. With the right taillight off I was able to fish a coathanger through the grommet on the rear trunk wall to grab the wires and pull them through. This way you can't see any wiring, and all the connections are made inside the car, so they're not exposed to the weather. There are a bunch of options on how to run the wires once they're inside the car.
It looks like the distance markers are in meters, at least to me.

CMOS sensors will overheat and become noisy if powered on for too long, so that's why you were getting a "cloudy" image. In the daylight mine is very clear, but the image does get noisy in the dark. Still works more than well enough, though, and I can easily see the area illuminated by the backup lights. Get the brightest LED backup lights you can, and it will work even better.
I ran my power/signal wires through the opening the backup light clips into. With the right taillight off I was able to fish a coathanger through the grommet on the rear trunk wall to grab the wires and pull them through. This way you can't see any wiring, and all the connections are made inside the car, so they're not exposed to the weather. There are a bunch of options on how to run the wires once they're inside the car.
It looks like the distance markers are in meters, at least to me.
So what would be better for future reference, CMOS or CCD? Would the CCD have better nighttime resolution?
As for the wiring, i actually found the green reverse cable in the big cable wrap going across the rear of the car and tapped into it. That way i dont have even more cables going out. The reverse wire is a solid light green color with what appear to be silver squares.
Last edited by Linuxglobal; Oct 15, 2010 at 10:15 PM.
You could certainly add a separate power circuit with a manual switch, but you'd want to isolate it from the backup light circuit with a diode. That way you'd still have the camera come on automatically with the backup lights, and have manual control, too.
That green wire in the trunk is definitely the best way to go for minimal wiring.
That green wire in the trunk is definitely the best way to go for minimal wiring.
The ccd is twice the cost but im not sure if anyone has seen a difference between the two or how they compare
Here is the link
http://cgi.ebay.com/ebaymotors/NISSA...#ht_4515wt_958
I would be happy if it was just clearer

Edit: Ill wait another month and take pics of the CCD vs CMOS
I just ordered the CCD one for 90$ shipped so ill see how it works out. Anyone want a CMOS camera after im done?
Last edited by Linuxglobal; Oct 15, 2010 at 10:55 PM.
Here is the article looking at the camera technology alone
http://shop.reversingcamerasuk.com/C...-sensor-CAM004
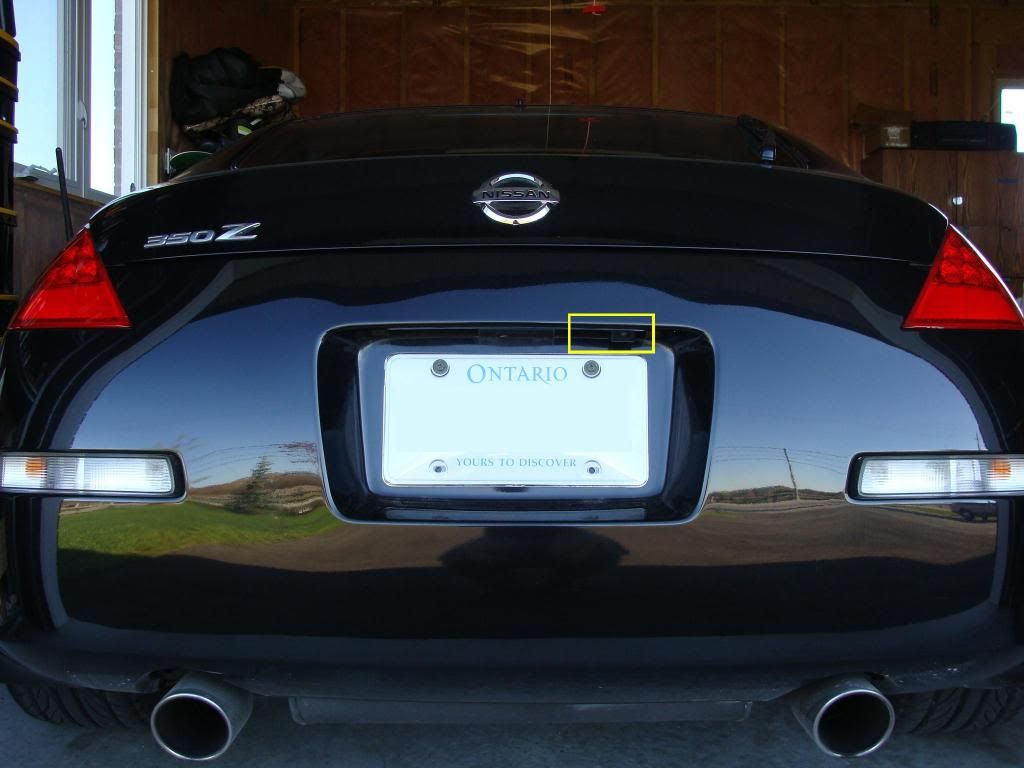
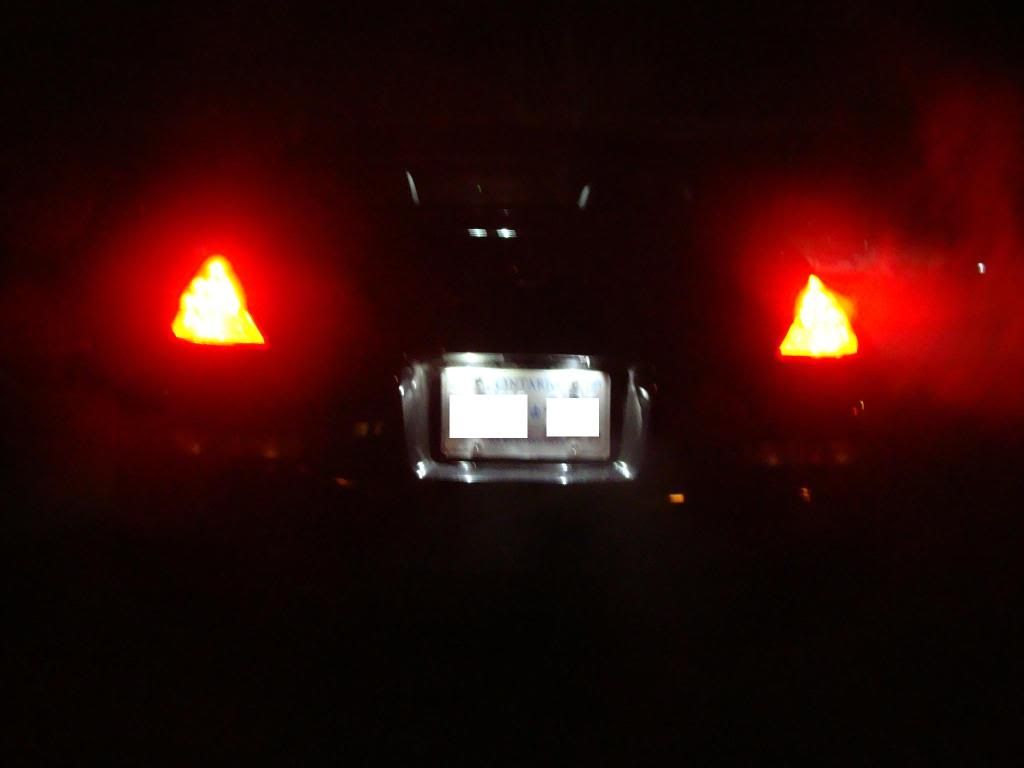
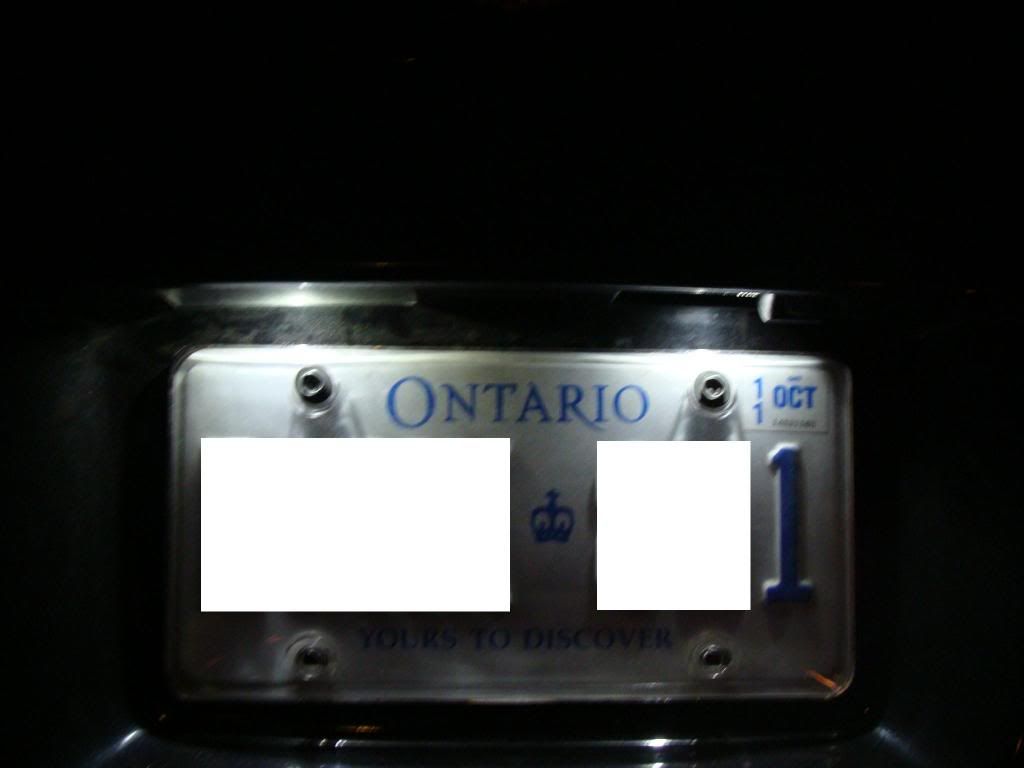
BTW for the time being, here are my install pics and output shots
Installed


Ill get a nighttime shot tonight, but its gonna be terrible
Last edited by Linuxglobal; Oct 16, 2010 at 10:18 AM. Reason: pics


Hmmm. Interesting.
Yours:

Mine:
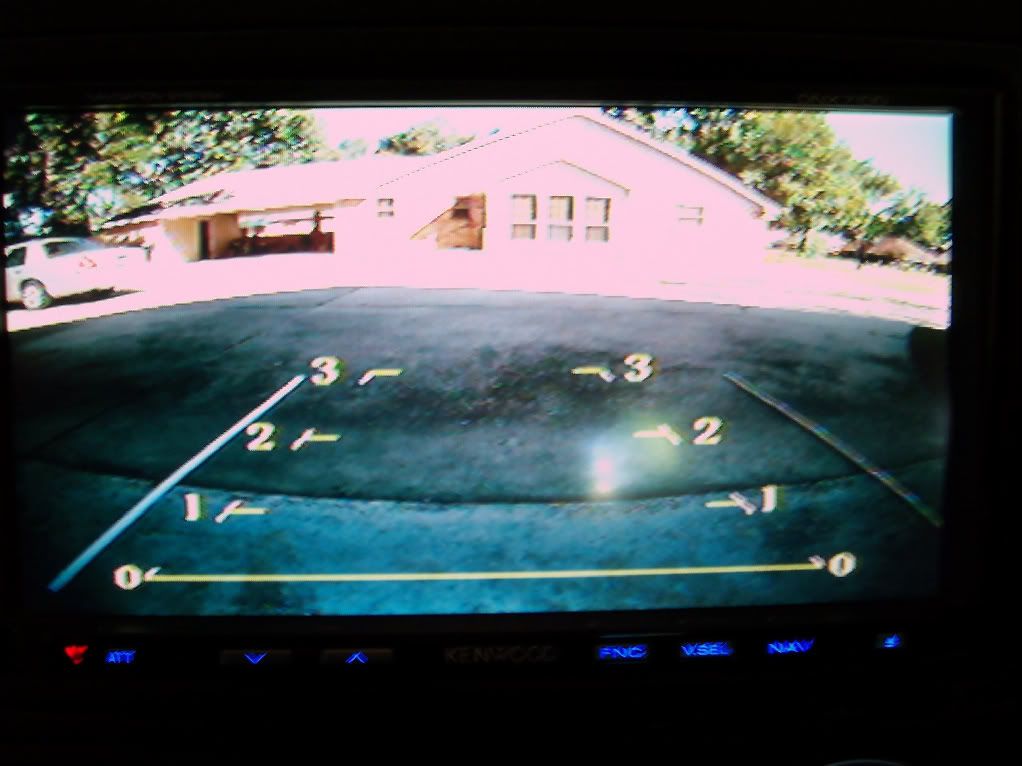
I wonder if you received the exact same camera that I did. Maybe they changed the programming of the lines in the last week or two. I'm guessing the measurements are still meters though.
Try taking a shot like mine where I put two sticks on the ground in line with the outside of the wheel track (or draw chalk lines). I'm curious to see if the passenger side install woudl correct the offset problem that my driver side install shows.
Yours:
Mine:
I wonder if you received the exact same camera that I did. Maybe they changed the programming of the lines in the last week or two. I'm guessing the measurements are still meters though.
Try taking a shot like mine where I put two sticks on the ground in line with the outside of the wheel track (or draw chalk lines). I'm curious to see if the passenger side install woudl correct the offset problem that my driver side install shows.
Last edited by DavesZ#3; Oct 16, 2010 at 10:43 AM.

quick note about the install, im using a pioneer avic d3[/B]
1. installed it in the right (passenger side) plate light. It looks more oem in that position imo and the image doesnt look too offset. Plate lighting is also a lot more even this way
2. I ran the cables through the rubber gourmet behind the plate, you have to remove your license plate and then you will see it quite clearly. I had to cut a small hole in the rubber gourmet and then I used permatex black rtv gasket maker to cover the junction and seal up the new and old cables so water doesnt enter through that opening.
3. Ran the other cables through the side pillars and roof liner around the driver's side.
4. One more note, the little distance legend is maybe in feet? or inches LOL Mine are blue and i have every number from 1-4.
If anyone has any other issues ill try to help as well. Shipping from China was a crazy wait.[/QUOTE]
I have the pioneer avic d3
with the back up camera hooked up but the picture is reversed. things on the right of my car are on the left vis-a-versa. can anyone help with this problem

Hey guys,
Finally got a chance to wire everything up front as I had the day off. HUGE Thanks to dcains for helping me with some wiring issues and questions. Really appreciate it.
Here are the pics:
Finally got a chance to wire everything up front as I had the day off. HUGE Thanks to dcains for helping me with some wiring issues and questions. Really appreciate it.
Here are the pics:
hi slmdchvy05
the camera is at fault if the image is not flipped, the unit simply displays the image (in the case of the avic D3).
I tested my cameras beforehand and they both had mirrored displays (on my PC).
Hope that helps
C
the camera is at fault if the image is not flipped, the unit simply displays the image (in the case of the avic D3).
I tested my cameras beforehand and they both had mirrored displays (on my PC).
Hope that helps
C
Some updates
Installed the CCD camera today, it was 90$ shipped but it arrived here in 4 business days
I didnt have time to pull out my camera, but clarity is NIGHT and DAY !!! Way sharper than the CMOS and its really clear and bright at night, no more fuzzyness
Ill snap daytime and night time pics tomorrow.
From my observations
CCD
- same resolution as CMOS
- auto light adjustment
- reacts better to light sources, doesnt get flooded by flashlights/car headlights
- great for nighttime use (so far)
- no gridlines available on ccd
- no issues being powered for over 30 mins
CMOS
- same resolution as CCD
- auto light adjustment
- heat issues, does not like being on for longer periods of time
- easily flooded by other lights source, very blurry at night/pixelated
- usable at night but not as clear as the CCD
- daytime use is ideal and very good
Pics of the CCD to follow
Cheers
C
Is there any way to flop the pic on my back up camera. I talked to a few car audio places and they mentioned to me that I should try and reverse the wires from the camera to my pioneer unit. Any suggestions on what I should try and do before I ruen a cheap set of wires. Lol I just want the pic to be right because it throws me off when I'm backing up at night due to my dark windows.
i got it installed, its been good so far. Im just stuck at school marking papers until late tonight. Ill try to snap some pics tomorrow before i leave the house.
I cant comment on reliability. I had the CMOS in my car for maybe a few days, then the CCD arrived 4 days later and i use it 2 mins every day
Nighttime is well worth it tho, very nice and crisp, very sensitive too
I cant comment on reliability. I had the CMOS in my car for maybe a few days, then the CCD arrived 4 days later and i use it 2 mins every day
Nighttime is well worth it tho, very nice and crisp, very sensitive too
The camera doesnt make it look all that great but it may be the avic d3 screen as well that is a bit pixelated.
I made a quick video too of me backing up. Ill post it up shortly as soon as it uploads.
Daytime pics coming soon. I get home when its dark now all the time.
C
I made a quick video too of me backing up. Ill post it up shortly as soon as it uploads.
Daytime pics coming soon. I get home when its dark now all the time.
C

i hate the fact that it cuts of half the light emitting from the right side. it makes it look weird, i might just use electrical tape to tape off the other side to make it look even.