When you click on links to various merchants on this site and make a purchase, this can result in this site earning a commission. Affiliate programs and affiliations include, but are not limited to, the eBay Partner Network.
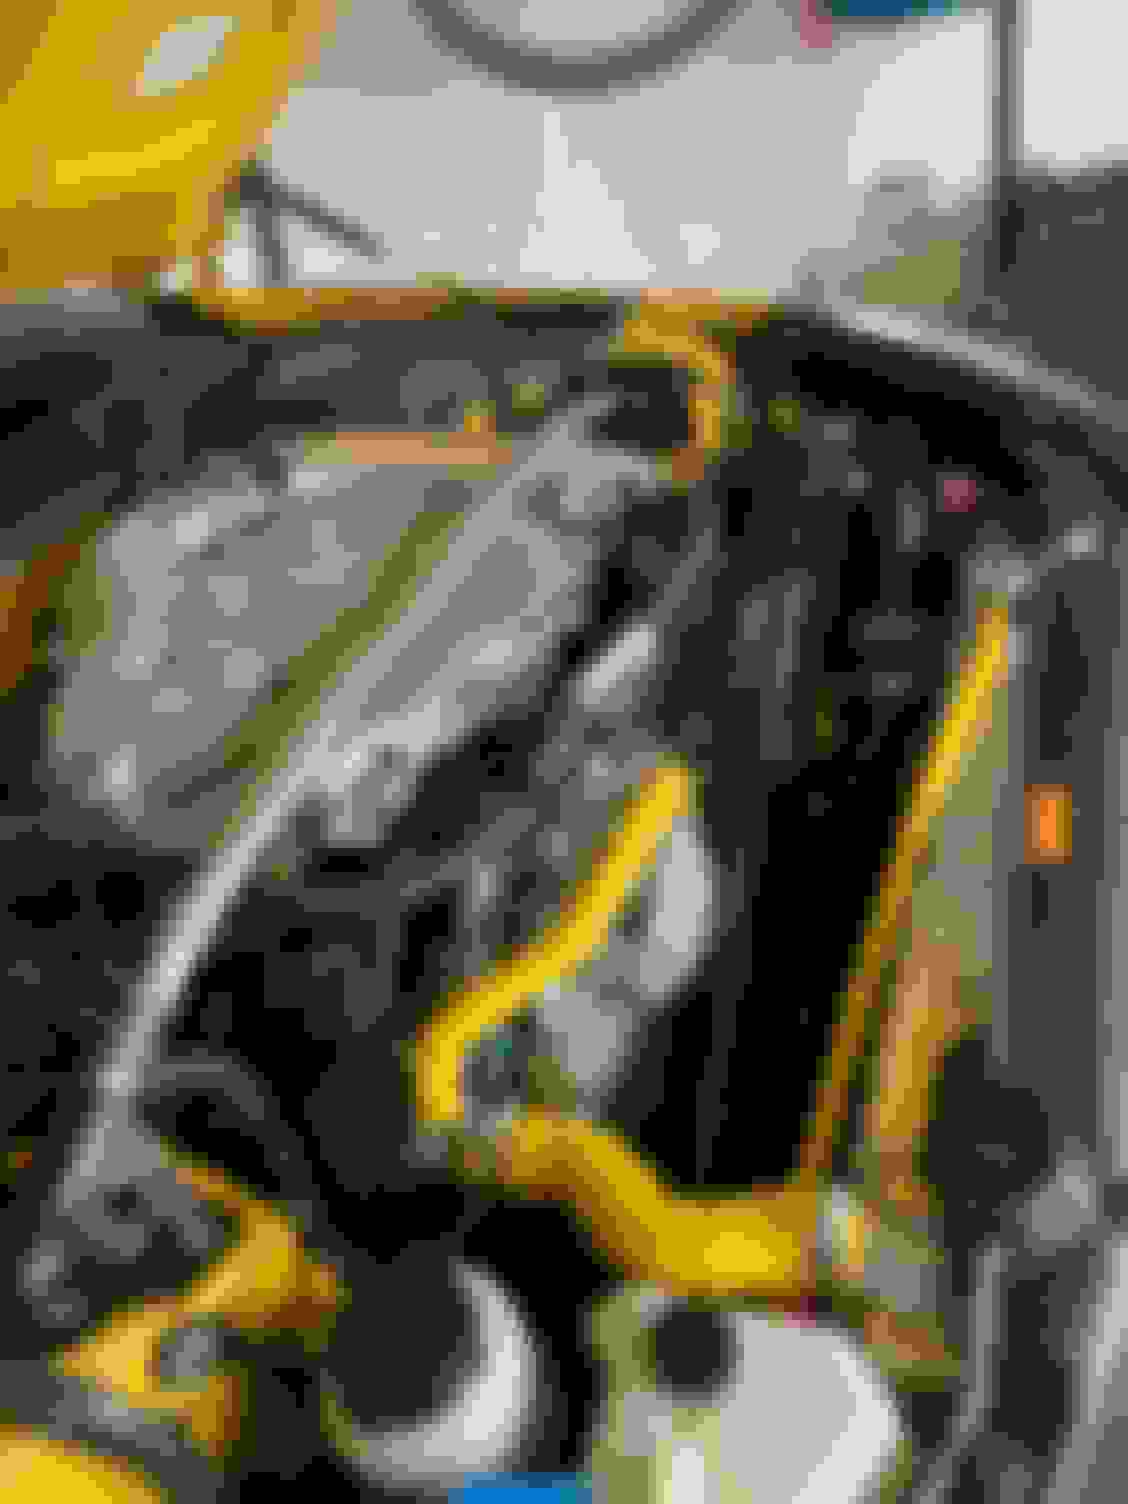
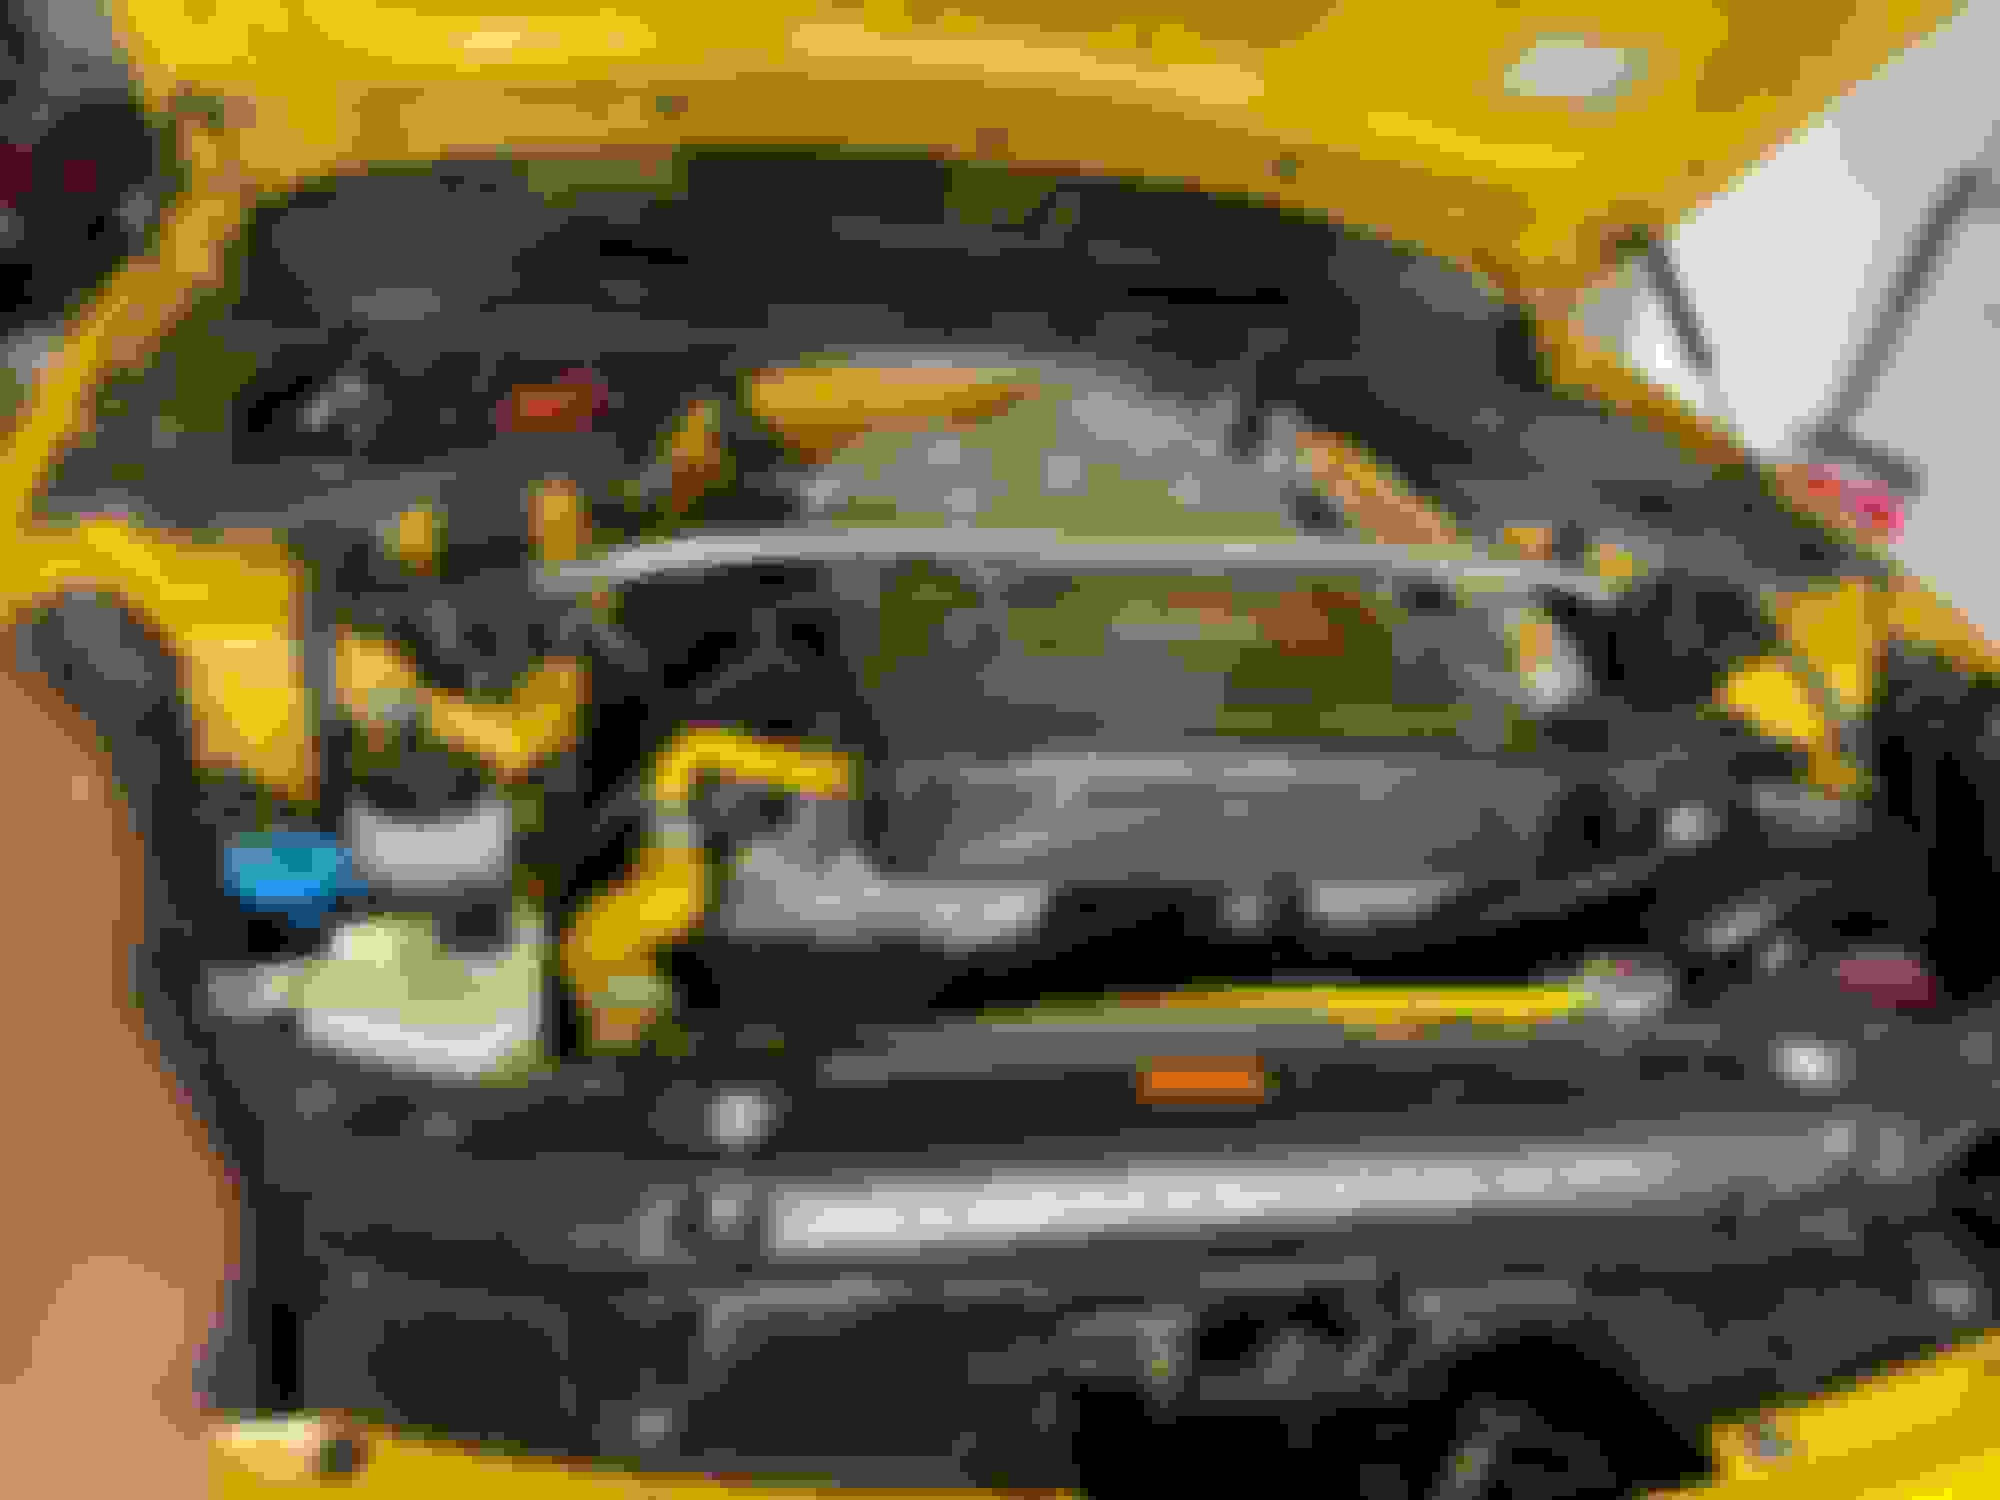
Got the supercharger installed today. Like everyone says, very tight. The fan is slightly in the way of making a nice transition from the blower to the pipe. Might try cutting a little of the fan shroud or getting a slightly longer connector. Thinking about it. Open to any suggestions. Will post this in the super charger forum as well.
So, took a break this afternoon. Went back out to look at the situation again with a light on the fan. I can trim the shroud enough I believe to get a nice fitment or just order a more extended transition piece to bridge it that way. It's close enough that I believe with a bit more fiddling around I can get done. Now that I see how that pipe works to avoid belts and pulleys to make it down in front of the engine I must say someone put a lot of time into the bends to make it fit.
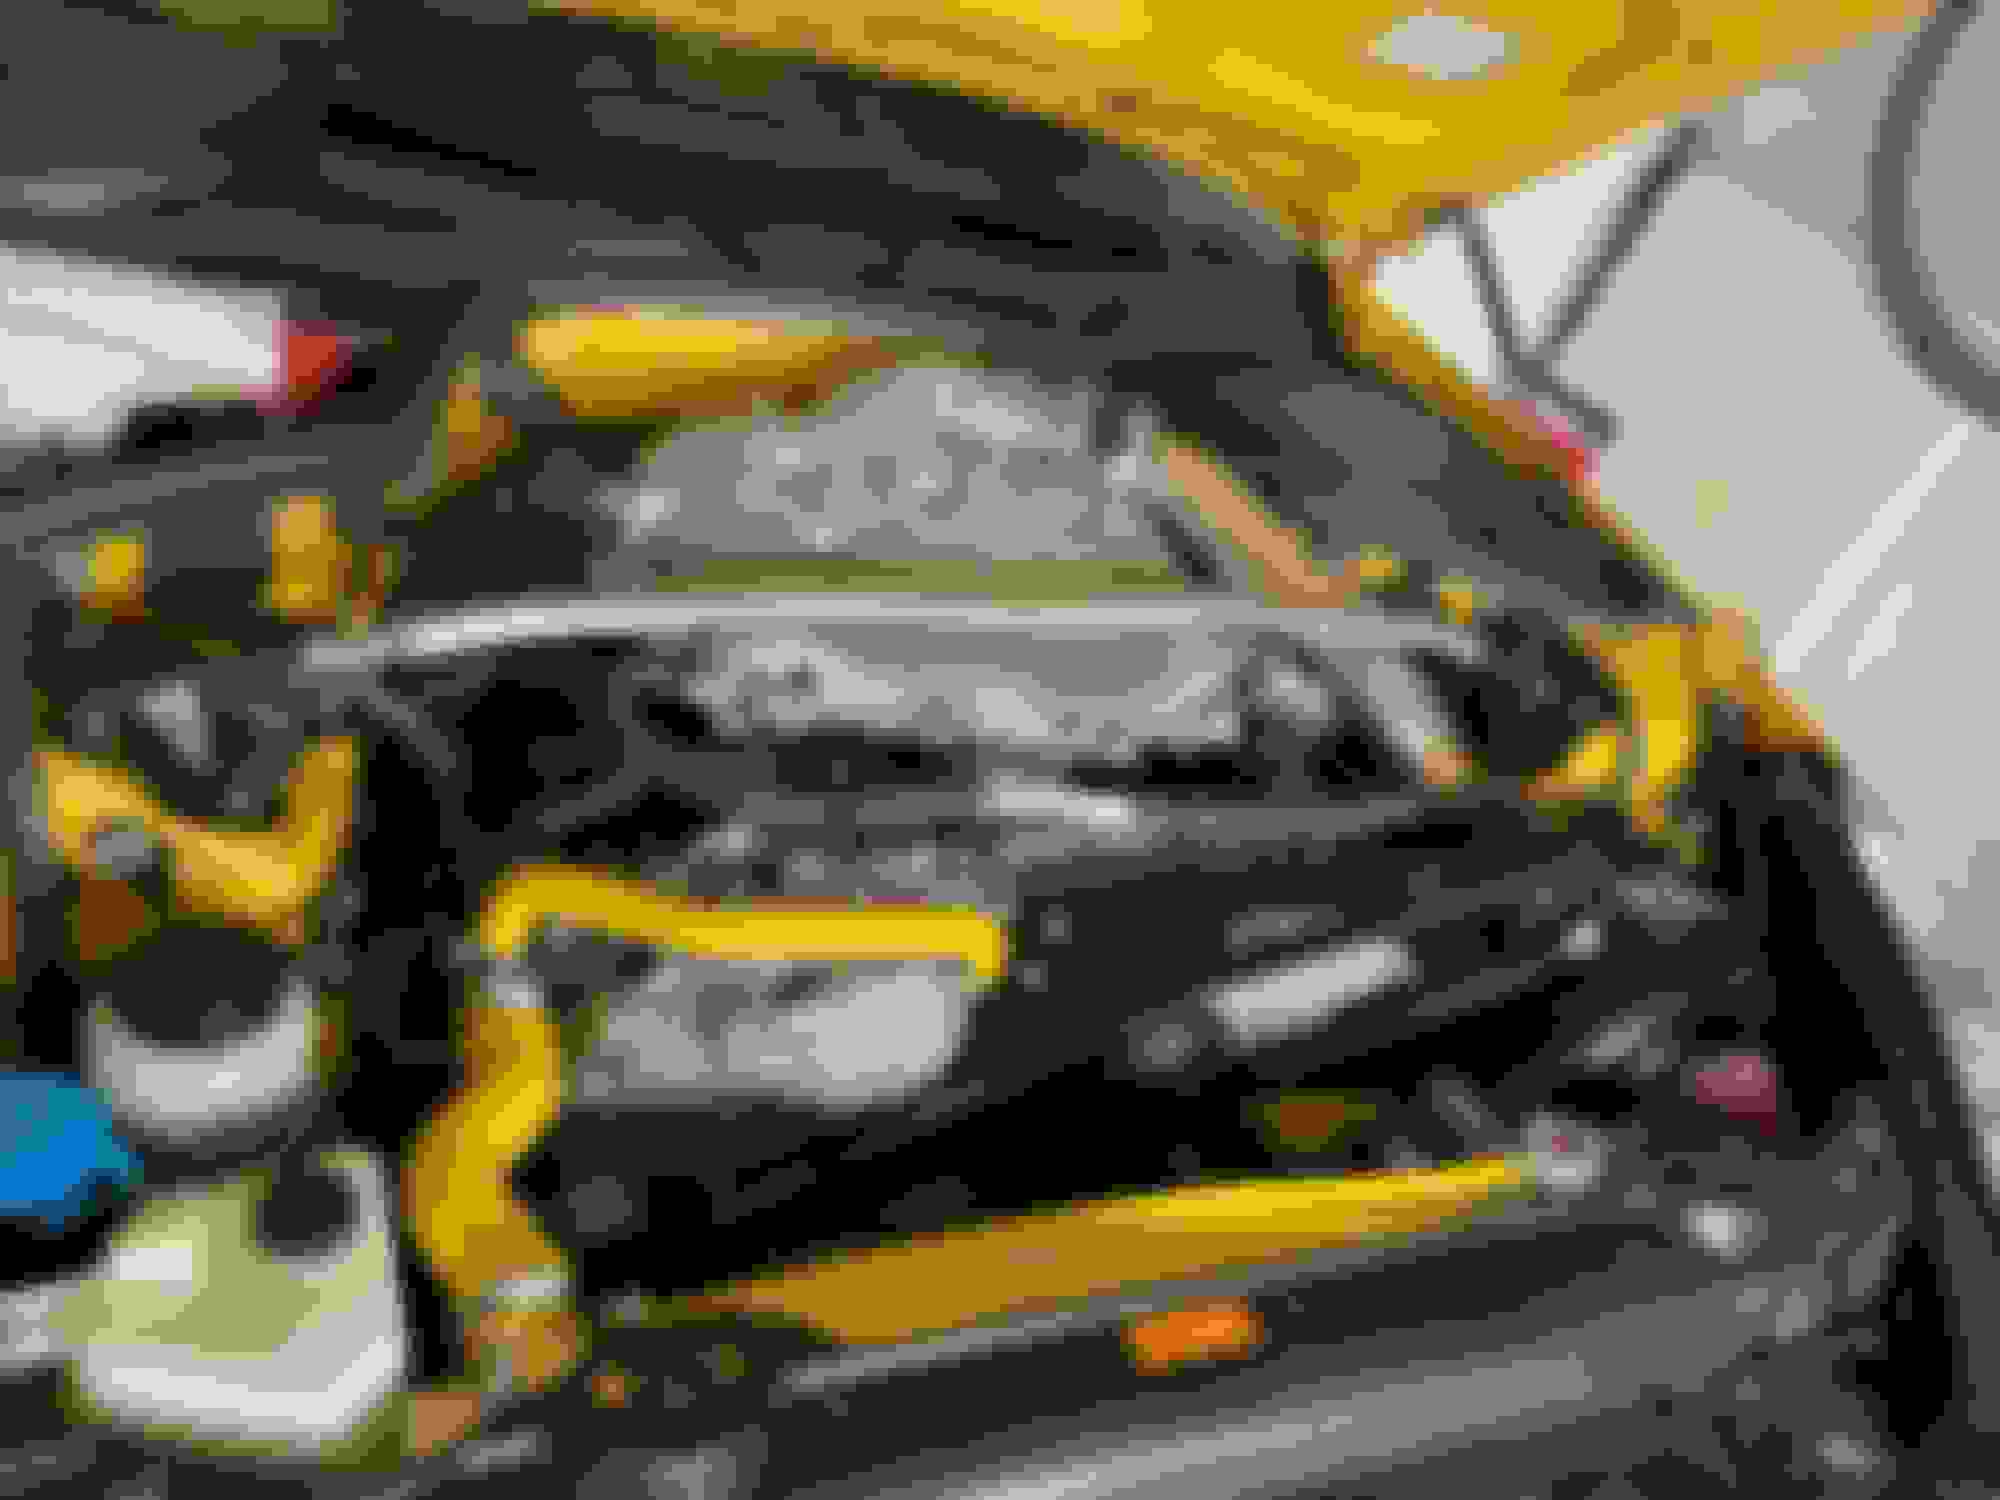
Cut out some of the shroud and that did the trick. Got it lined up. Installed the belt and tightened up the main bracket. . Next the passenger side pipe and several small things to button up underneath and a few things on top. Used a worm clamp in one spot because of the spacing. The T-bolt clamps are way better, but can be a pain in tight places as they are pretty bulky.
Monday Update. Having my first cup of coffee. Well, I look like I am close, but there is still about 100 things to do. LOL. Getting the passenger charger tubing in place may prove to be a bit of challenge because this intercooler is out 2" because of the oil cooler. That is really the last thing to "figure out" as the rest is just installing some clamps, getting the from and to oil lines for the supercharger connected underneath, running the vacuum line from the blow off valve, a bunch of zip ties and then reassembly of the body work. Of course, I will not do the body work until I get the fluids in and hopefully get a the software set up and get a first start done.
My plan is still to get the software download from the Z store here in town to get it started in the hopes of driving to there store after that for a proper tune. Might still end up towing it if it will not start.
Last edited by Jim Stephens; 12-14-2020 at 02:50 AM.
This is awesome progress! I am concerned about where you tapped the new threads on put in a helicoil. Does an Oring go on that fitting, or is it a tapered pipe fitting with teflon? If it is an Oring it will likely be okay, but if it is a tapered pipe fitting like that brass fitting next to it, it will not seal with the helicoil. Its not the end of the world to fix, but probably want to do it before spewing oil all over everywhere.
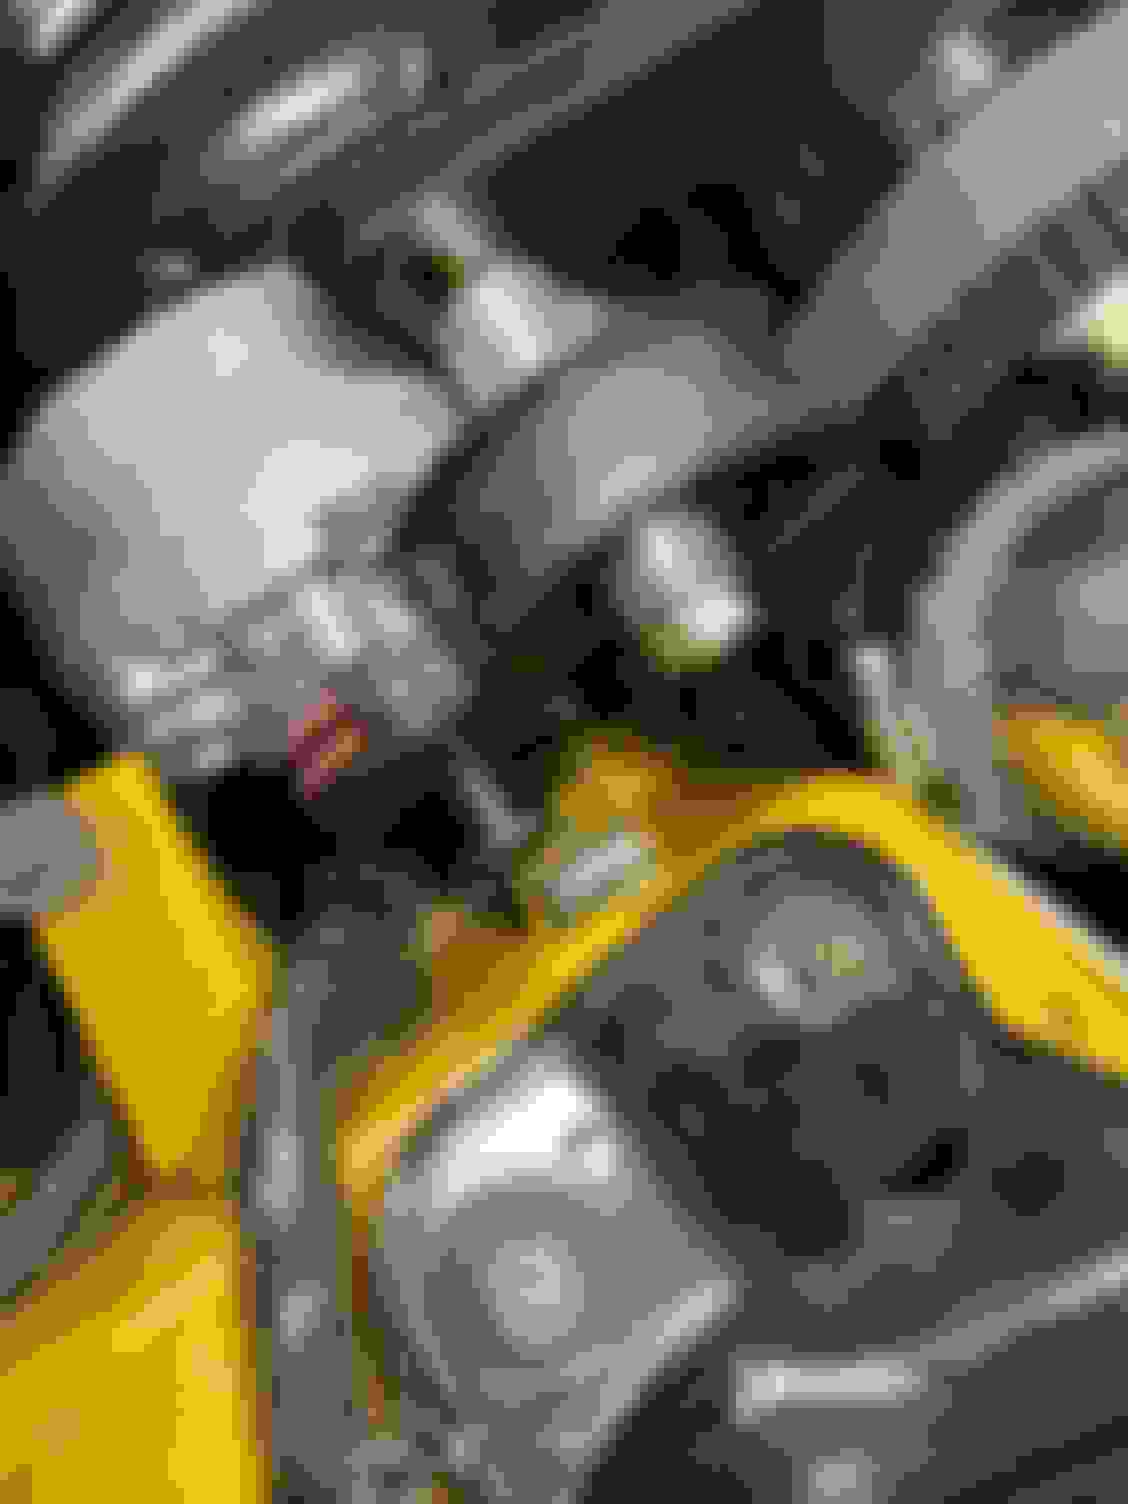
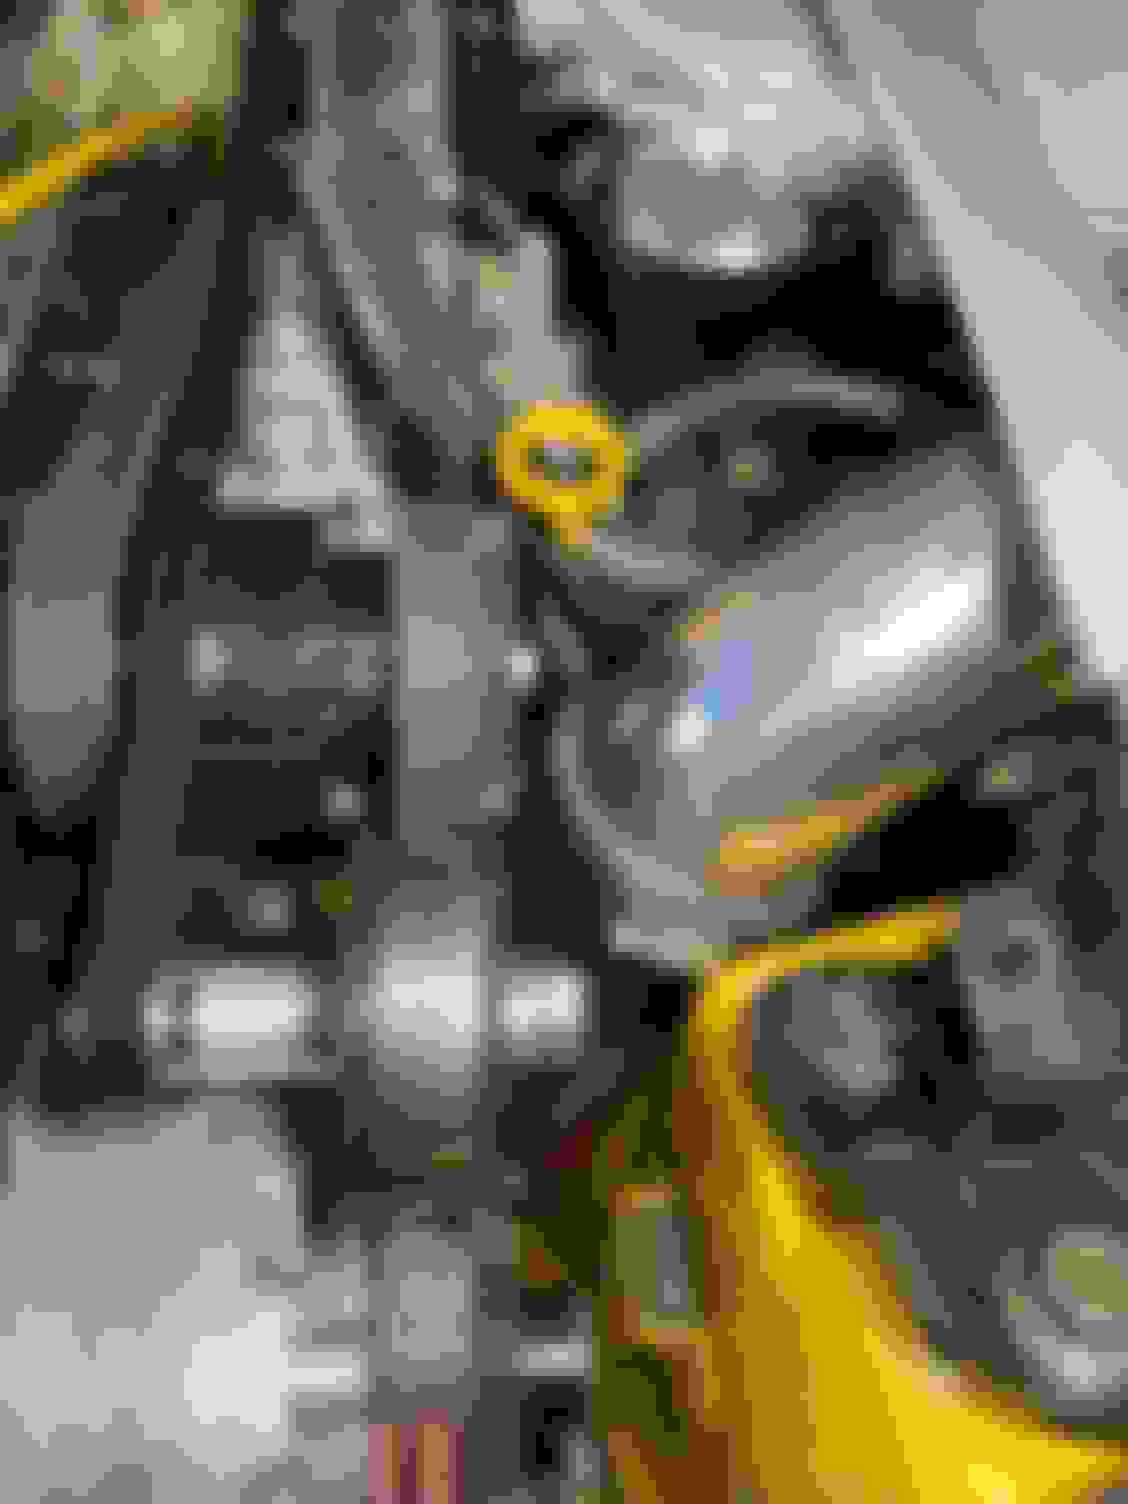
It’s the little things that matter. The entire time I have been doing this install I was wondering why the cog belt was set up to track tight against the inside of the cog. Now I know why. To get the clearance needed for the lower belt from the the intake pipe. If you look at the belt down on lower side of it you can see just clearing the intake tube. Check out the clearance of the cog shaft to that little piece of metal sticking out. When you look at video's for this blower there is usually a bolt at the end of the cog gear. Not in this case, they used a flat screw to get the clearance there.
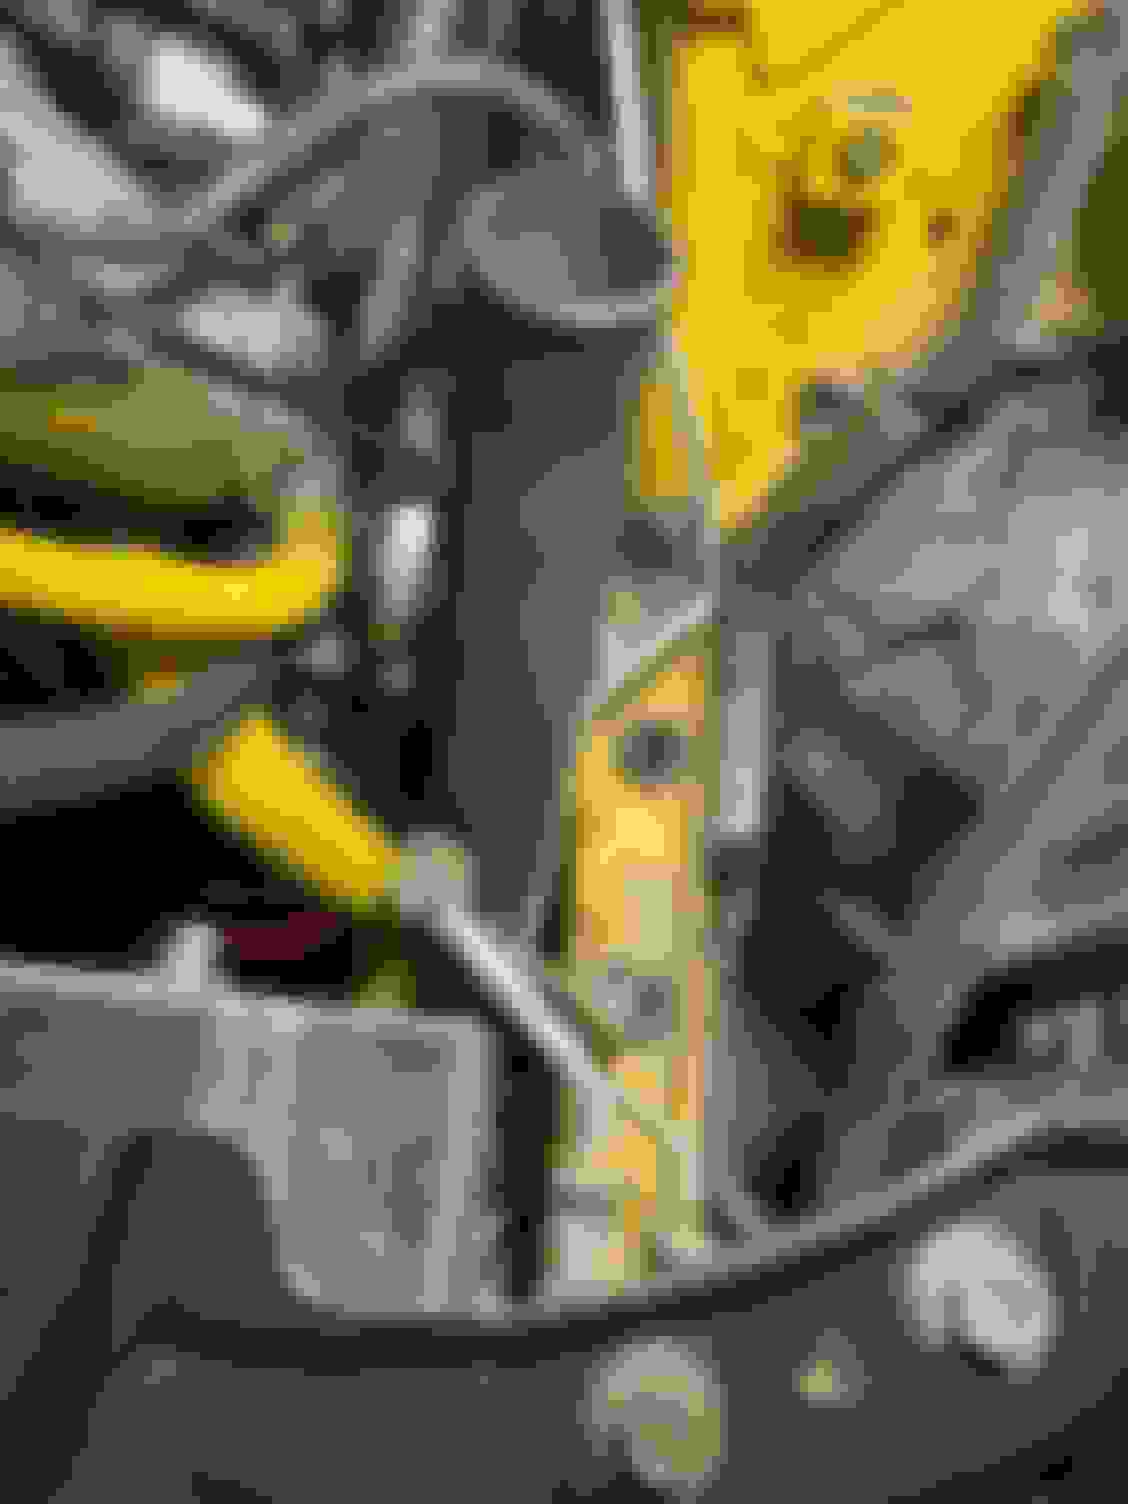
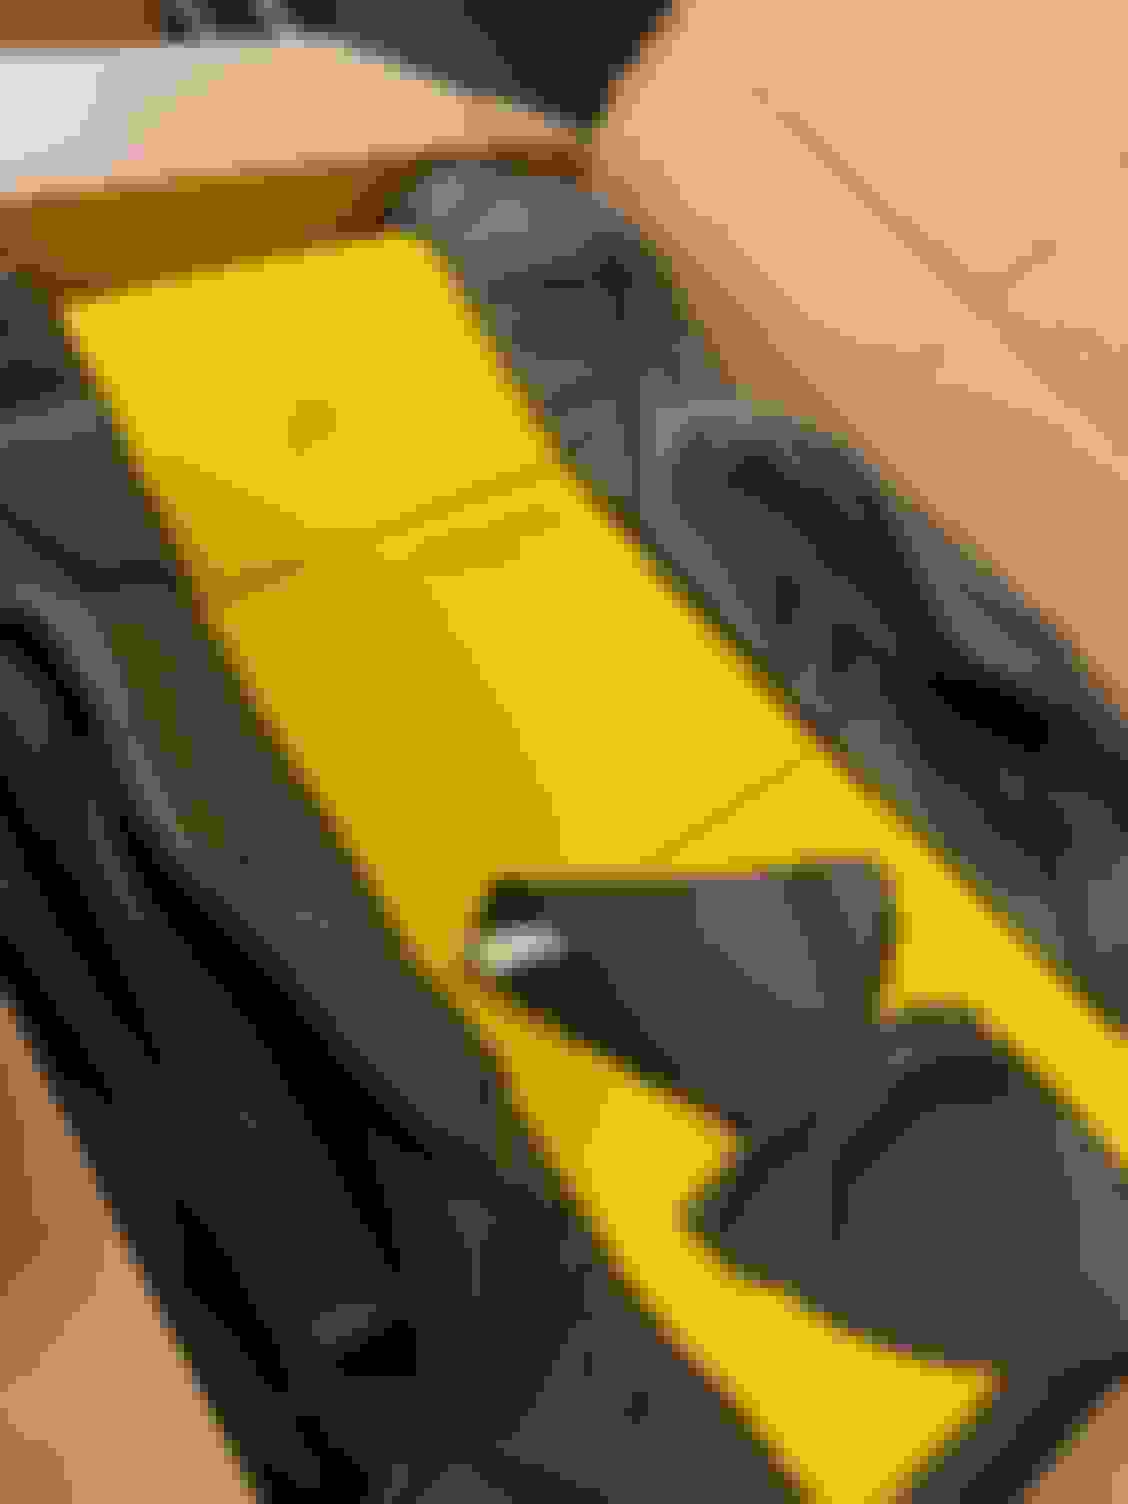
Ran into an issue as I was looking it over at lunch break. This wiring bundle is making contact. Need to see if I can break it loose of the plastic holder beneath the cog shaft and move it over just a bit. It looks like you might be able to pop the clip off and move the wire over. The stakes are a bit higher with this one as it would require removing entire blower unit if I can't get it to it with some tools and move it over. I am not talking about the zip tie up top, this is plastic clip underneath the cog. Luckily, I have not installed the oil lines below.
Update: Check out this last picture I took. This why I take lots of pictures. That thing I am seeing is not a clip, but the top of an entire plastic piece that holds the wiring harness that is rubbing the cog. At this point, my best bet is to un-clip that top zip tie and then see if I can move it around a bit and get it clear of the cog. I wonder if heating that entire harness up a bit with a heat gun will make it more pliable to change it.
By the way notice rubber tubing wrapped and zip tied around the very small aluminum A/C line. Someone warned me that can develop a pin hole leak over time from the rubbing.
Update 2: I read through the documentation and i did not miss a step on this wire hitting the COG issue, BUT then I go look at the installation manual for the RevUp motor and low and behold, they show the wire being moved to the other side of the tab! So, I am going to see if I can pull that off by reaching in there and popping the tab loose with a screw driver. See the last picture for that.
Last edited by Jim Stephens; 12-14-2020 at 12:56 PM.
This is awesome progress! I am concerned about where you tapped the new threads on put in a helicoil. Does an Oring go on that fitting, or is it a tapered pipe fitting with teflon? If it is an Oring it will likely be okay, but if it is a tapered pipe fitting like that brass fitting next to it, it will not seal with the helicoil. Its not the end of the world to fix, but probably want to do it before spewing oil all over everywhere.
Can't wait to see this thing fired up.
I am concerned about the whole thing as well. Actually, there is not an O-Ring there. They use a copper washer with a normal thread. Quite similar in design to the oil pan bolt, but the copper washer is not a crush type washer. It is not like the copper brass fitting next to it at all. I really will not be be at all surprised if this leaks and am mentally prepare to pull it back out if needed. I did sink the helicoil in a bit so that he washer could seat, but not certain it will work. Kind of a difficult situation, since I could not just purchase a new supercharger because there is no supply right now at all from Vortech, so I decided to go forward and try my best with it. If it works, well it works. I have thought through it and pulling it out is not such a big deal once you have fitted everything the first time around. I would have to undue the mounting plate bolts, loosen the main belt, drain the oil, disconnect the two oil connectors underneath and one clamp. Not a small thing, but probably a morning job to pull the unit back out if needed.
Found a picture of what we are talking about. What do you think? I was thinking that copper washer would seal to the metal on the blower housing and then to the oil injector itself when you tighten it?
Last edited by Jim Stephens; 12-14-2020 at 10:31 AM.
One more issue resolved. Was able to go into the brake area and pop a few clips loose and then pull out some of the harness. This enabled me to move the harness over the metal tab and get clear of the cog.
I am concerned about the whole thing as well. Actually, there is not an O-Ring there. They use a copper washer with a normal thread. Quite similar in design to the oil pan bolt, but the copper washer is not a crush type washer. It is not like the copper brass fitting next to it at all. I really will not be be at all surprised if this leaks and am mentally prepare to pull it back out if needed. I did sink the helicoil in a bit so that he washer could seat, but not certain it will work. Kind of a difficult situation, since I could not just purchase a new supercharger because there is no supply right now at all from Vortech, so I decided to go forward and try my best with it. If it works, well it works. I have thought through it and pulling it out is not such a big deal once you have fitted everything the first time around. I would have to undue the mounting plate bolts, loosen the main belt, drain the oil, disconnect the two oil connectors underneath and one clamp. Not a small thing, but probably a morning job to pull the unit back out if needed.
Found a picture of what we are talking about. What do you think? I was thinking that copper washer would seal to the metal on the blower housing and then to the oil injector itself when you tighten it?
I would definitely get someone else's opinion, but if it was me I would cover the threads and washer with a high temp rtv.
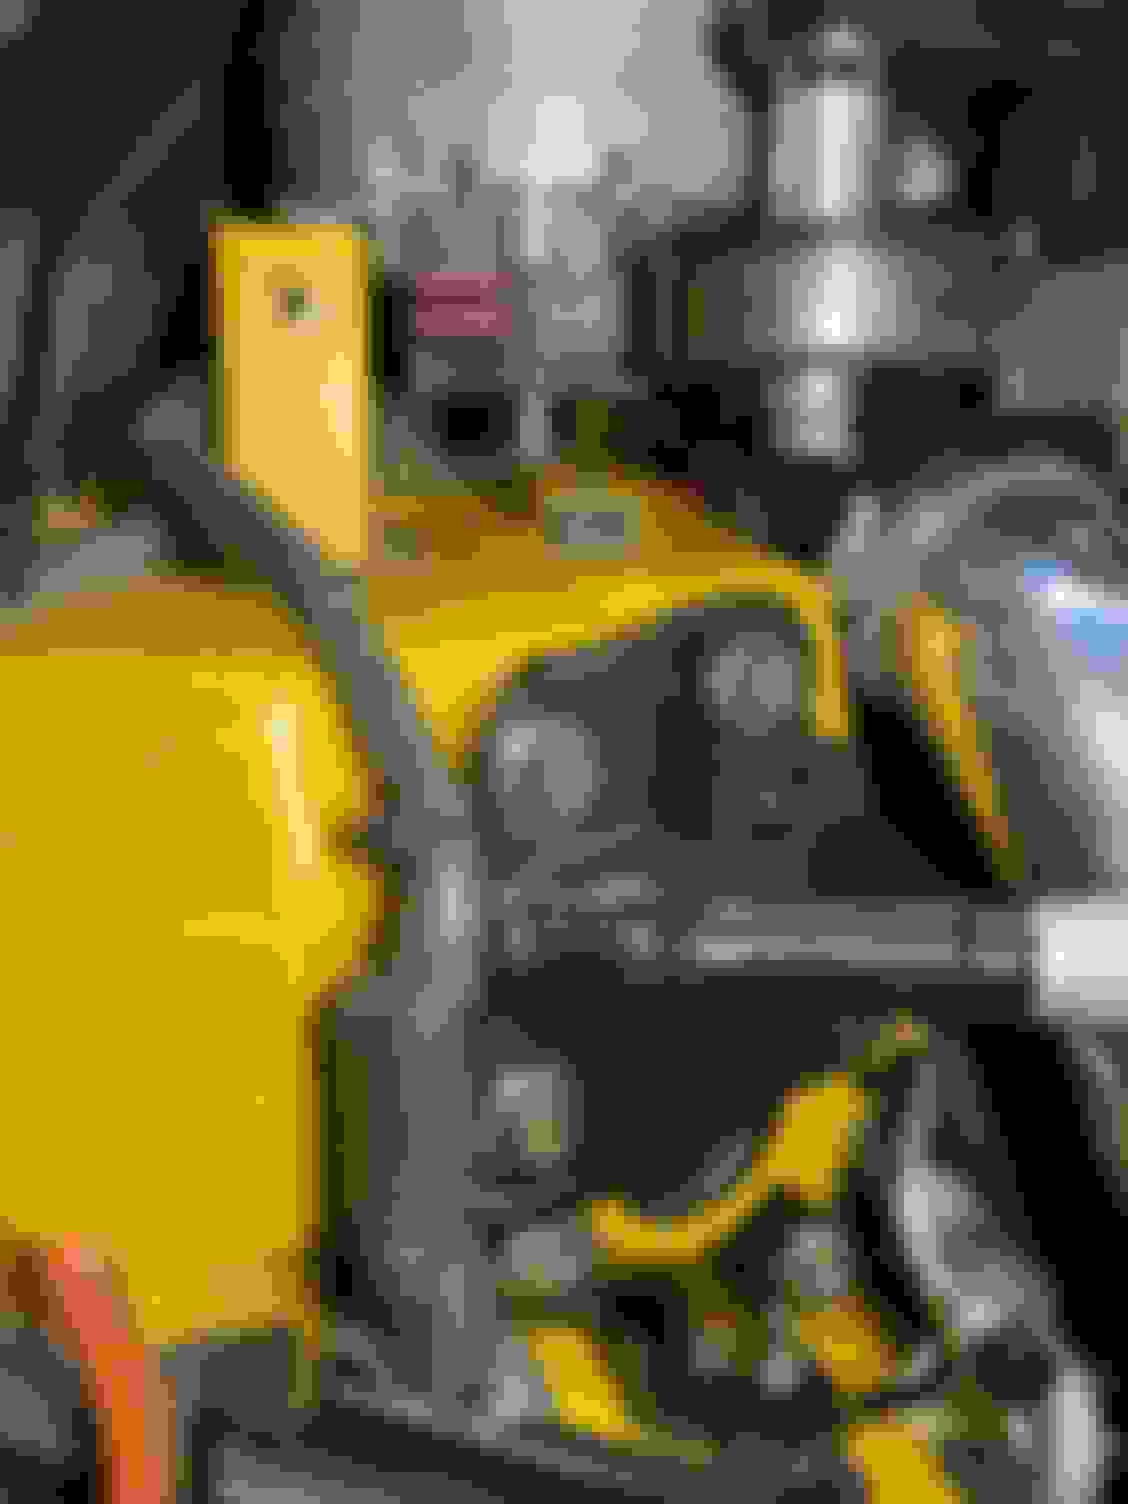
Just cleaned up the wiring harness and got it positioned. Hooking up the oil lines underneath and then I will figure out the passenger piping that will finish it up. Just doing small amounts of work each day. Figure I will have it ready for the initial start first of next week. Going to see if I can get a tune downloaded to see how it goes.
Got the oil lines for the supercharger installed underneath. Moving on to the last hurdle. Just had enough daylight to get some plastic out of the way and eyeball this last pipe. I have already ordered two 2.5 inch 1/2� offset connectors that will be in on Friday. That should help me out on getting the piping to connect. This is a result of moving the inter-cooler forward for the oil cooler. Those black oil lines are not very flexible at all. That pipe really needs to be where the oil lines are. Will have to mess with it a bit to sort it out.
Last edited by Jim Stephens; 12-16-2020 at 02:50 PM.
Ok. Got some parts in! Got the offset connectors that got it all together! This little offset connector was a compromise to get it all to fit, but if you see the inside of the connector it makes smooth transition at least. Still figuring out piecing the plastic back in around the fender well. Did not have any free time today, but I should get it in ready to test start shape this weekend if I can get my hands on the set up for the initial start.
Last edited by Jim Stephens; 12-19-2020 at 05:04 AM.
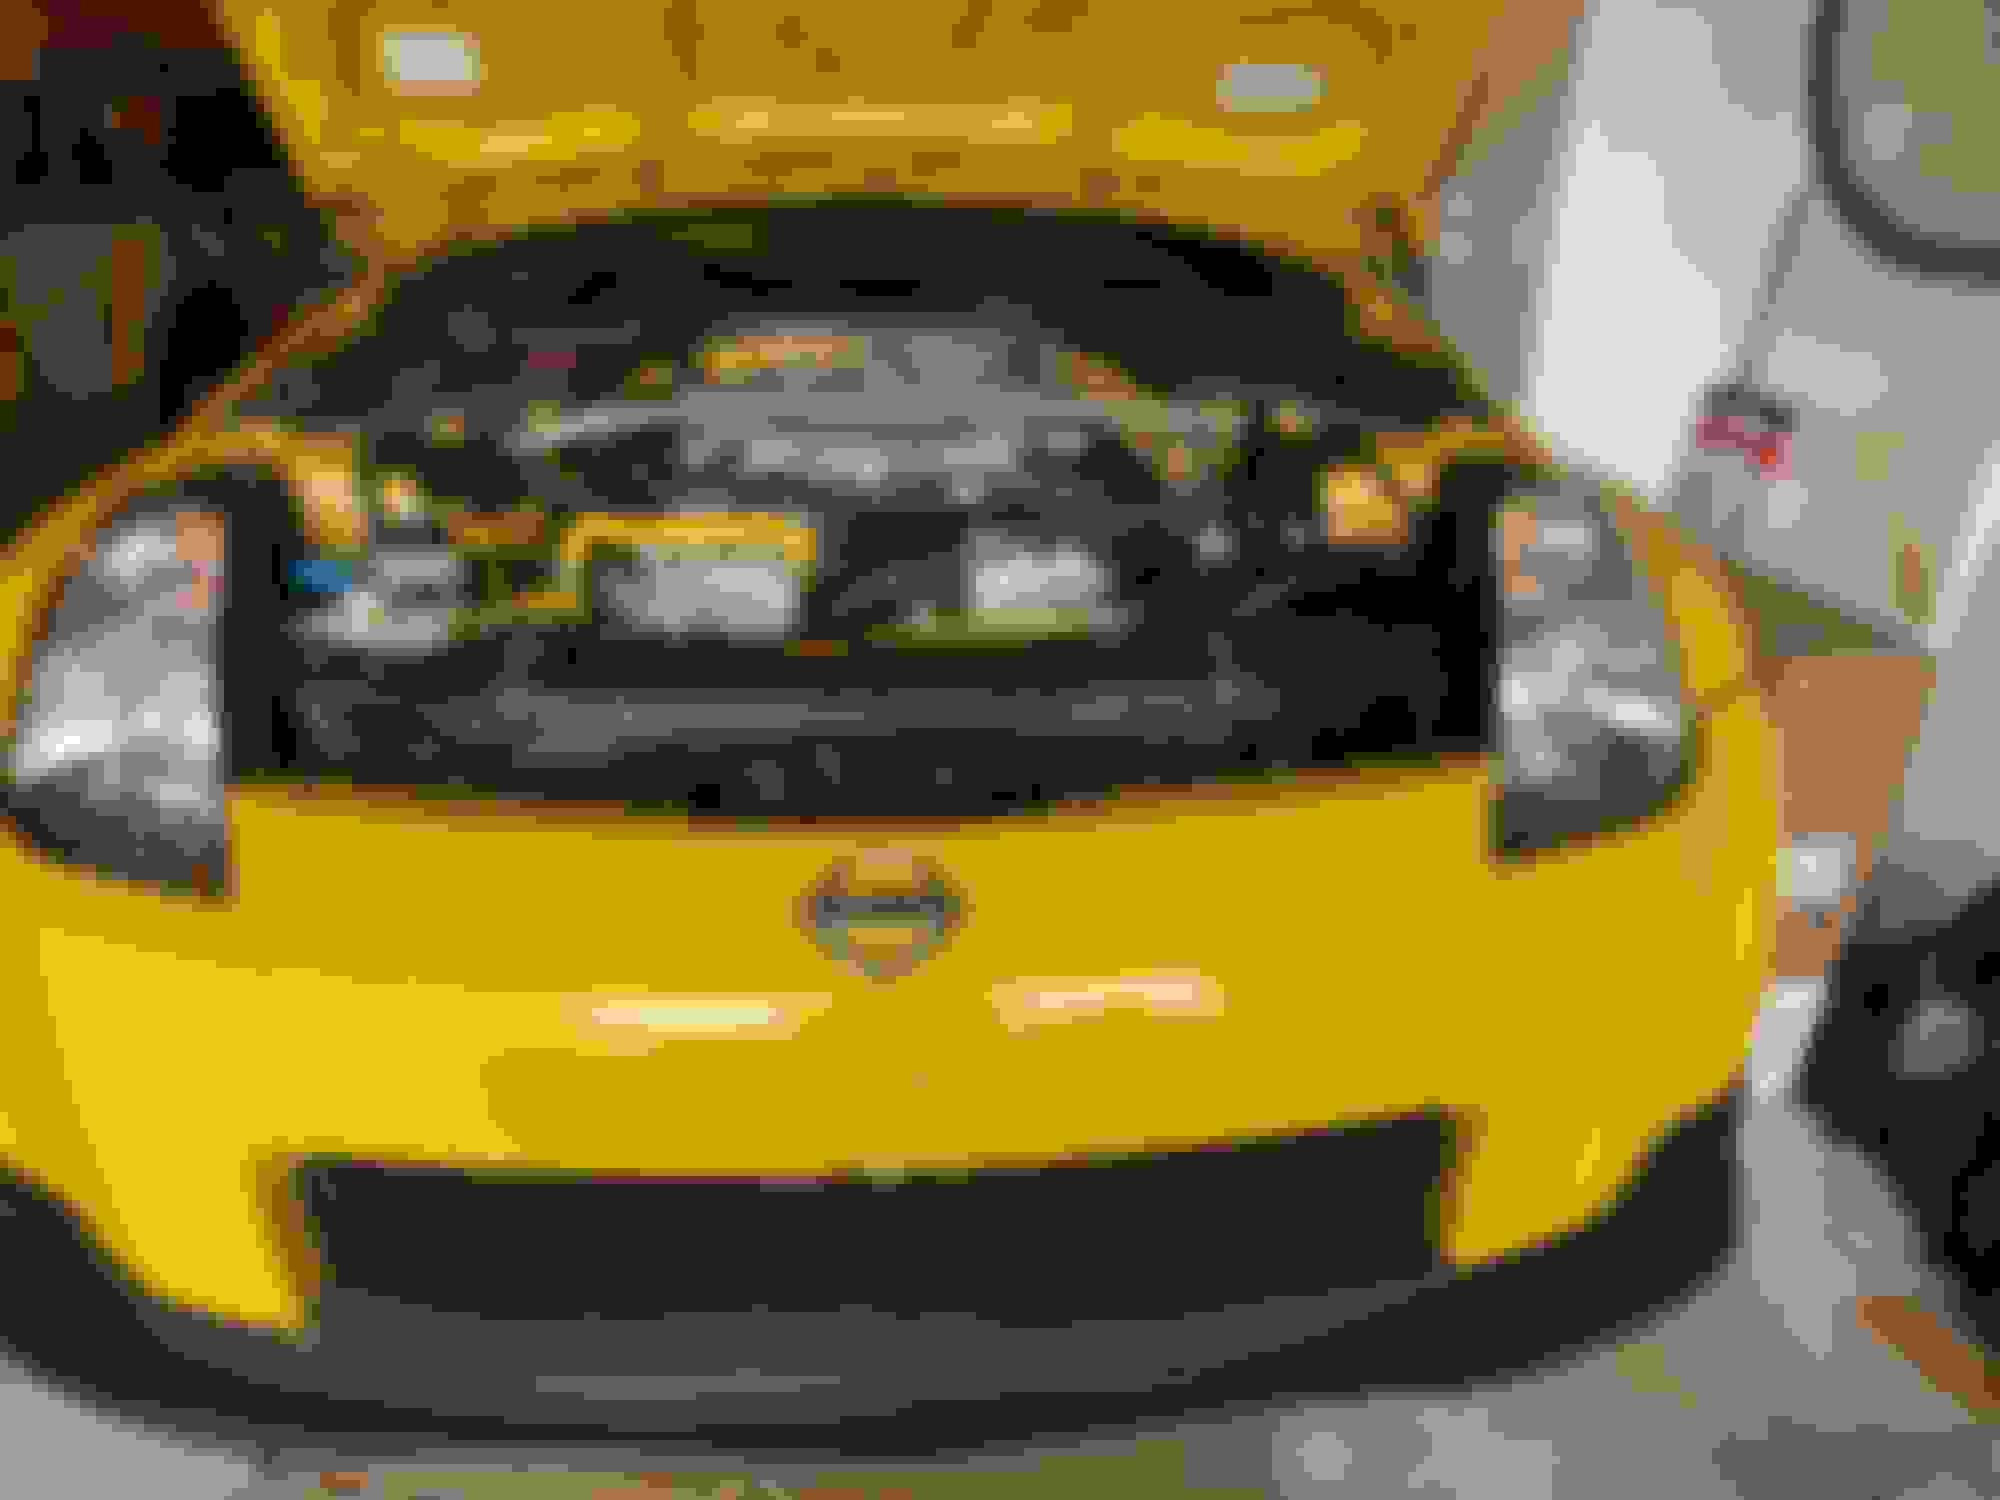
Finished up the piping. Installed the blow off valve and vacuum line. Going to need to spend some time fitting all the plastic in place underneath. Decided to test fit the front to check the clearances. It all looks good! So, the fluids are going in to get ready to start it up. The oil is in, but I need some distilled water. I connected with the Z shop and they are going to send me a tune probably Monday to see if it starts. If that goes well, I will drive it in to have some gauges installed and a full tune done. Also going to have them look my work over as I have done a lot to this car over the last year.
I downloaded the uprev software on Friday and hooked up the battery for the first time in a month. That feeling you get when you need to half click the key to turn on the car for the first time. Got the info needed by the shop for the software and nothing tragic occurred.
I am going to trim the carbon fiber cover a little tomorrow and get that fitted. Also will will go over everything one more time. Santa is bringing me a new strut brace.
Going to be tense moment when I attempt to start it.
Last edited by Jim Stephens; 12-19-2020 at 11:51 AM.
That first start is always such a good feeling. It also sounded like it started pretty easily which is good. Who did you end up going with for tuning? The first start is almost as exciting as the first full pull.
They provided the tune today to get it started. Super great feeling to have it start well. Will take if off the jacks tomorrow to take a lap around the block and then have the log checked before I drive it to the shop for a dyno and tune.
Drove the car 18 long tense miles to SRZ Pro to get a tune. The car actually ran great. I kept it below 3k rpm the entire drive. Going to get a tune for premium and E85. Also taking advantage of having it there to get two gauges installed in the cubby and have them fix a door handle. Also having then just go through the car and check my work. Told them to take their time with it.
Had a great talk with Dane and he did a great job asking what my goals were for the car and my expectations for the tune. Learned a lot more about the wonders of E85 and decide to go with that as my primary and premium as my secondary.
Stopped by the shop today. My suspension has been squeaking and the bushings need replacing. Looked it over. Putting in new energy bushings. Also agreed to have them install high flow cats(took me some time to talk myself into that) We are going to do a little bit of custom piping around the passenger side to make that all fit better. Installing a basic oil temp gauge and an innovate gauge for the fuel( https://www.z1motorsports.com/innova...ge-p-8996.html ). My son also managed to break the passenger door handle mechanism which they will repair. And lastly, I am going to see how comfortable they are replacing the rubber seal around the passenger door. I have not done it because you have to remove that plastic trim piece above the window which tends to break easily. The car should be set up well when I get it back.
Last edited by Jim Stephens; 12-30-2020 at 03:28 AM.
Santa is a great guy. Once I get the car back. I am going to pull the bucket seats out and have these leather seats installed at a shop. Thought I about doing it myself, still may, but the leather guy said it is pretty tough with this car. Sent me this video.
Also plan to put a bit of insulation under the carpet myself to sound deaden it a bit more. My son objects anytime I add weight to the car which I know is counter productive, but I am looking for a fun, quick street car that I occasionally may take to the track. Tough to balance those two competing desires and it requires some compromises.
Last edited by Jim Stephens; 12-30-2020 at 03:40 AM.
Stopped by the shop today. My suspension has been squeaking and the bushings need replacing. Looked it over. Putting in new energy bushings. Also agreed to have them install high flow cats(took me some time to talk myself into that) We are going to do a little bit of custom piping around the passenger side to make that all fit better. Installing a basic oil temp gauge and an innovate gauge for the fuel( https://www.z1motorsports.com/innova...ge-p-8996.html ). My son also managed to break the passenger door handle mechanism which they will repair. And lastly, I am going to see how comfortable they are replacing the rubber seal around the passenger door. I have not done it because you have to remove that plastic trim piece above the window which tends to break easily. The car should be set up well when I get it back.

 12-12-2020, 10:58 AM