
My Build: The Good, The Bad & The Progress
 03-08-2009, 07:34 AM
#541
Registered User
iTrader: (11)

Join Date: May 2005
Location: New Jersey
Posts: 1,301
Likes: 0
Received 0 Likes
on
0 Posts
Sorry - I've been off the forum for a few days pulling long days in the shop with Frank trying to get things wrapped up. There has been a lot of progress, not all of it good  .
.
I will have a full update and lots of pics and maybe a short vid (if I can figure it out) later today/tonight.
.I will have a full update and lots of pics and maybe a short vid (if I can figure it out) later today/tonight.
Hopefully you can let us know what is not good.
Someone on the forum might have a solution.
I have been following your progress and read it everyday.
Give you props for all the work your doing at once and sorry
for you being burned on that motor.
 03-08-2009, 08:03 AM
#542

Oh oh don't like hearing that.
Hopefully you can let us know what is not good.
Someone on the forum might have a solution.
I have been following your progress and read it everyday.
Give you props for all the work your doing at once and sorry
for you being burned on that motor.
Hopefully you can let us know what is not good.
Someone on the forum might have a solution.
I have been following your progress and read it everyday.
Give you props for all the work your doing at once and sorry
for you being burned on that motor.
03-08-2009, 09:55 AM
#544

 It really becomes quite expensive once you push the 500 envelope and then even more so with each jump from there.
03-08-2009, 10:03 AM
It really becomes quite expensive once you push the 500 envelope and then even more so with each jump from there.
03-08-2009, 10:03 AM
#545
I think I posted the equation before. Maybe people thought it was tongue in cheek, so they don't take it seriously. I'll create a new equation that factors in HP goals. It really becomes quite expensive once you push the 500 envelope and then even more so with each jump from there.
It really becomes quite expensive once you push the 500 envelope and then even more so with each jump from there.BTW, you interior mods are teh shizzle. Very nice.
 03-08-2009, 10:48 AM
#546
In theroy, the build was supposed to be wrapped up on Thursday..... not even close. There was so many details to be done that it was hard to get any one part of the build fully completed.
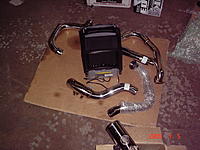
I got started in the morning by doing the grunt work, its nice that APS inspects all the parts before they are shipped, but whats with using sticker that dont peel off . I spent some time scraping off the stickers and then cleaning the pipes with acetone to remove the excess adhesive - this job sucked.

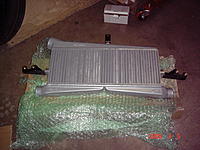
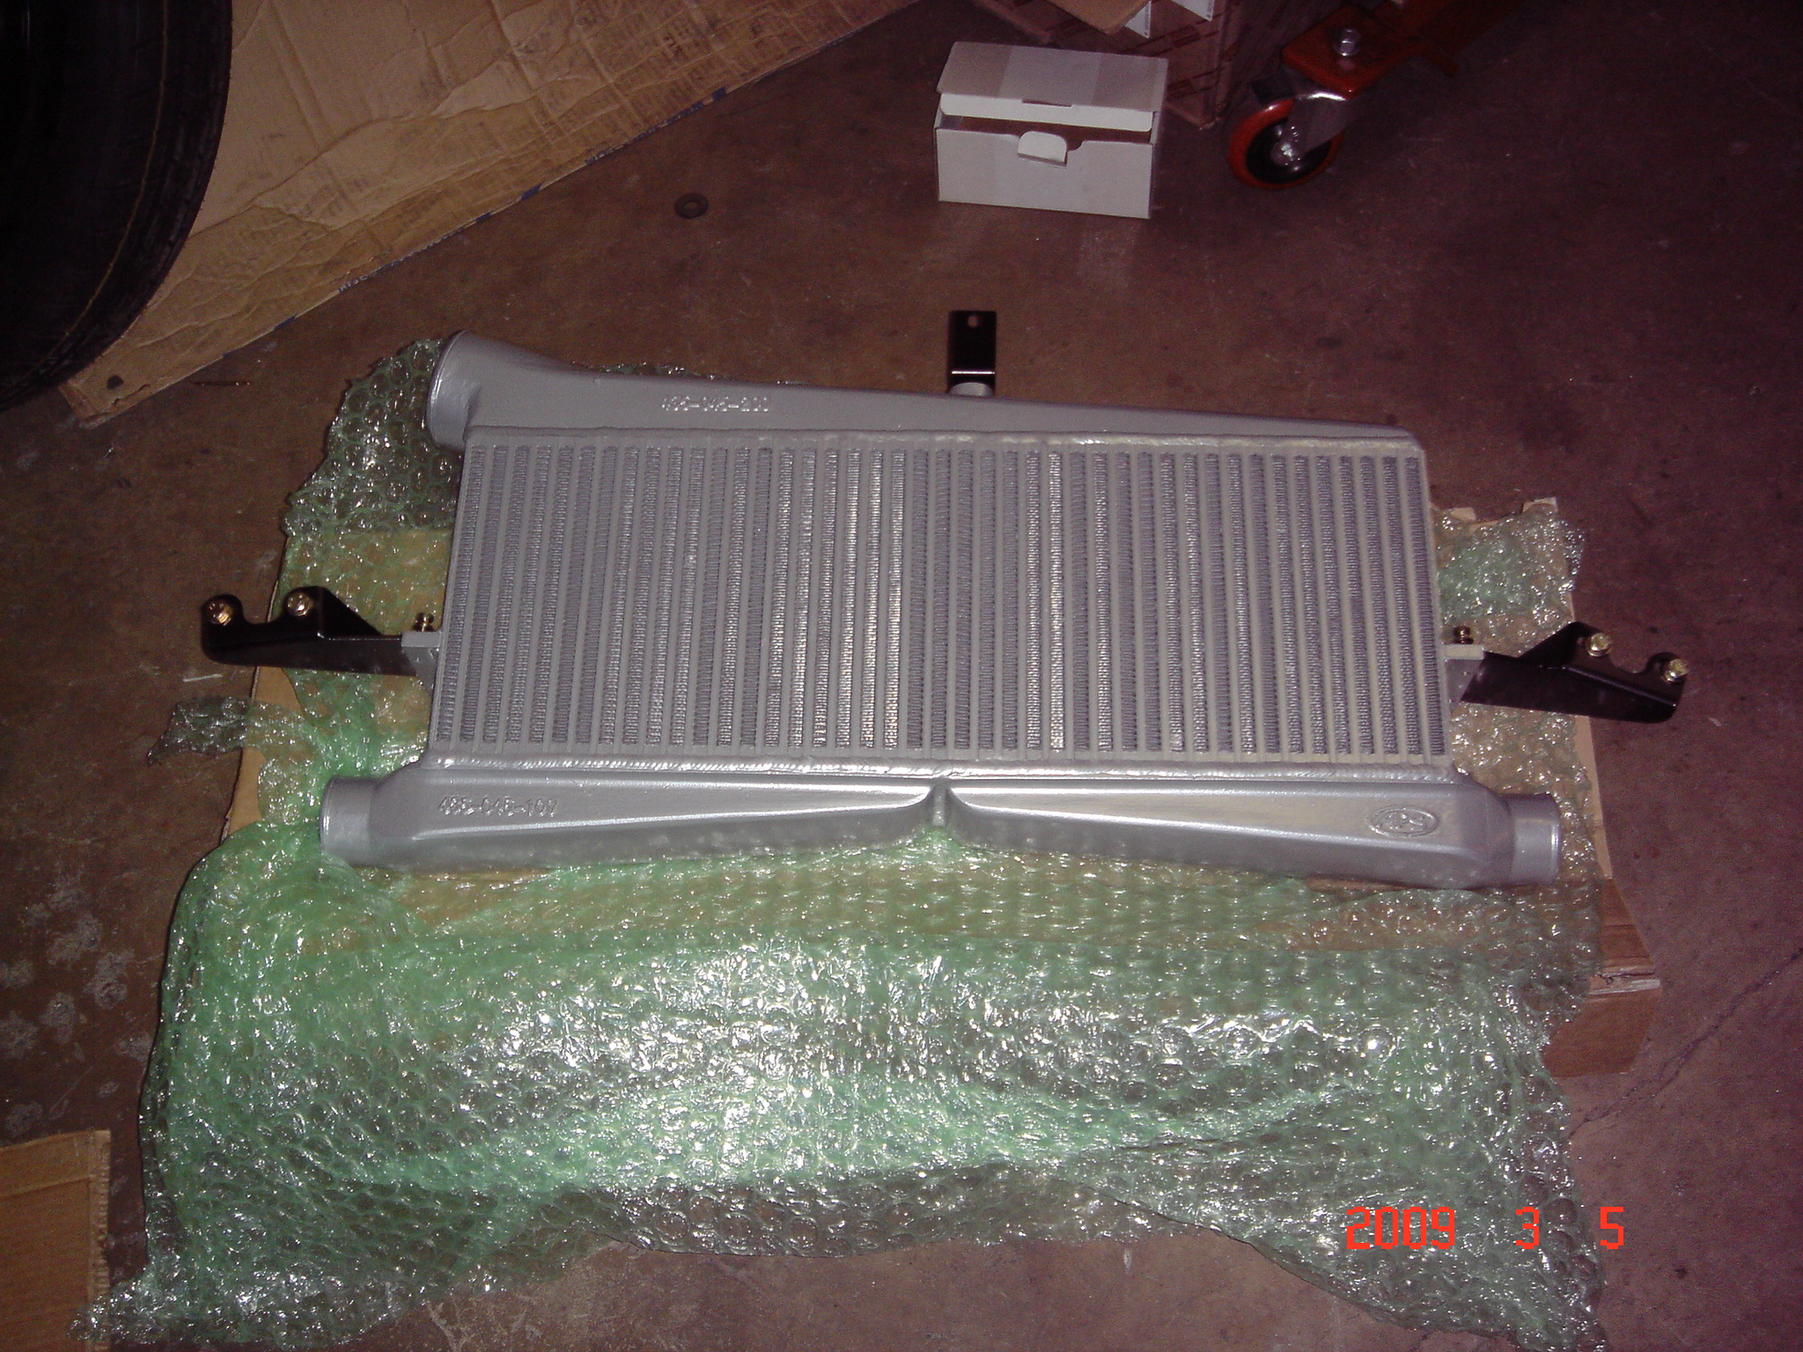
Intercooler unpacked and ready for assembly - heavy for all aluminum IMO.
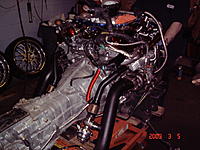
Frank has the motor all prepped for install and up it goes, actually I think we lowered the car onto it.... SLOWLY.

I got started in the morning by doing the grunt work, its nice that APS inspects all the parts before they are shipped, but whats with using sticker that dont peel off
. I spent some time scraping off the stickers and then cleaning the pipes with acetone to remove the excess adhesive - this job sucked.

Intercooler unpacked and ready for assembly - heavy for all aluminum IMO.
Frank has the motor all prepped for install and up it goes, actually I think we lowered the car onto it.... SLOWLY.

Last edited by Cass007; 03-08-2009 at 06:38 PM.
03-08-2009, 10:58 AM
#547
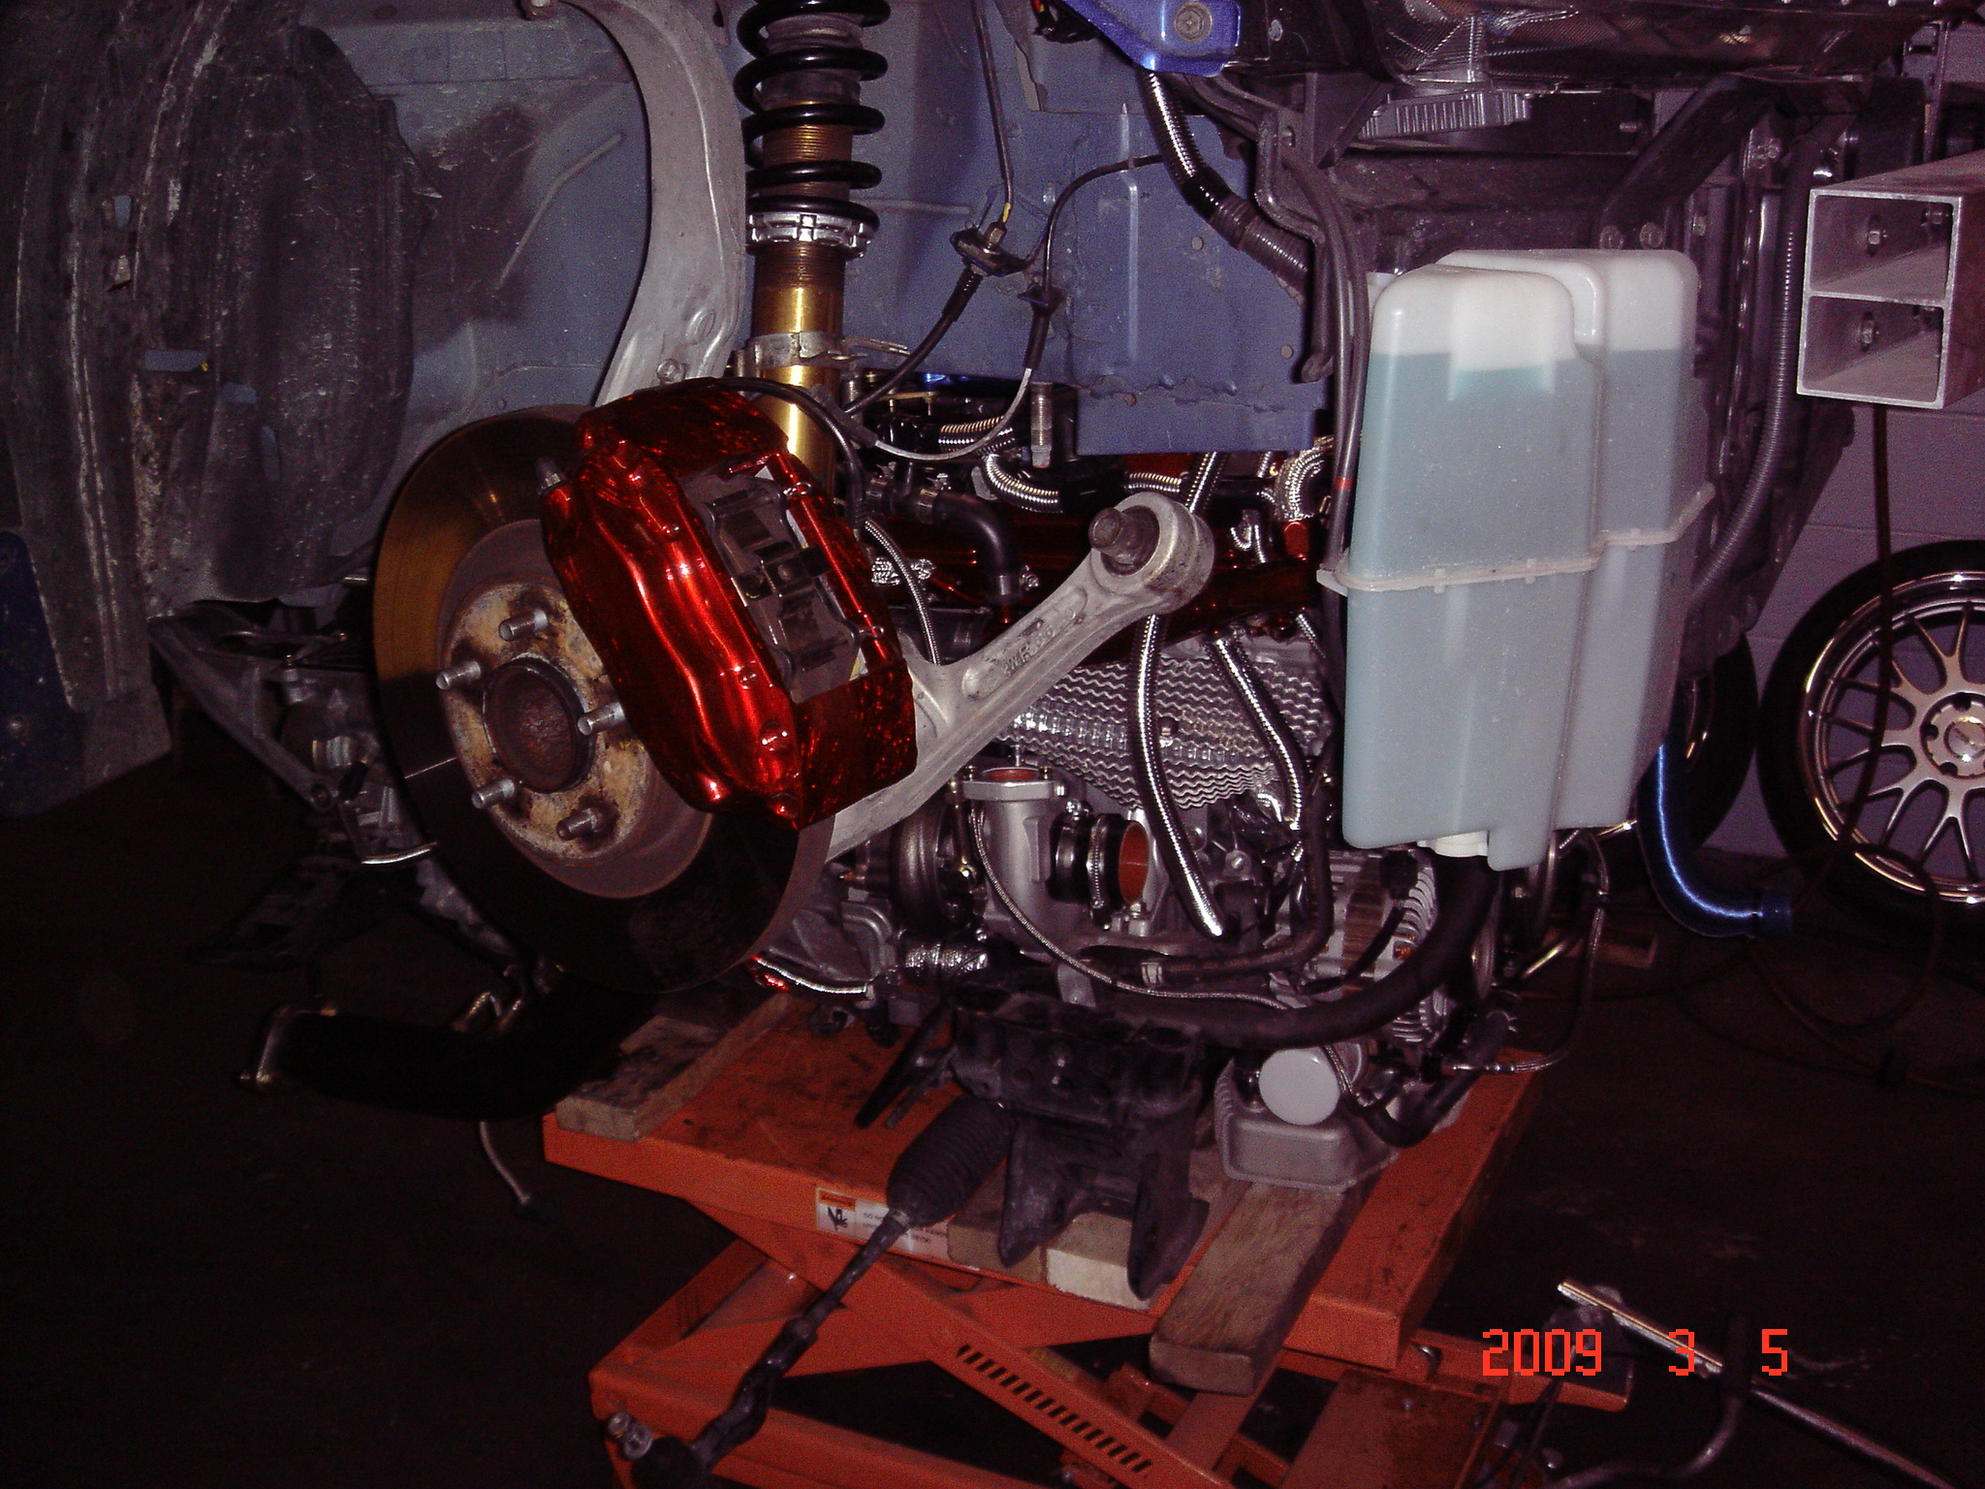
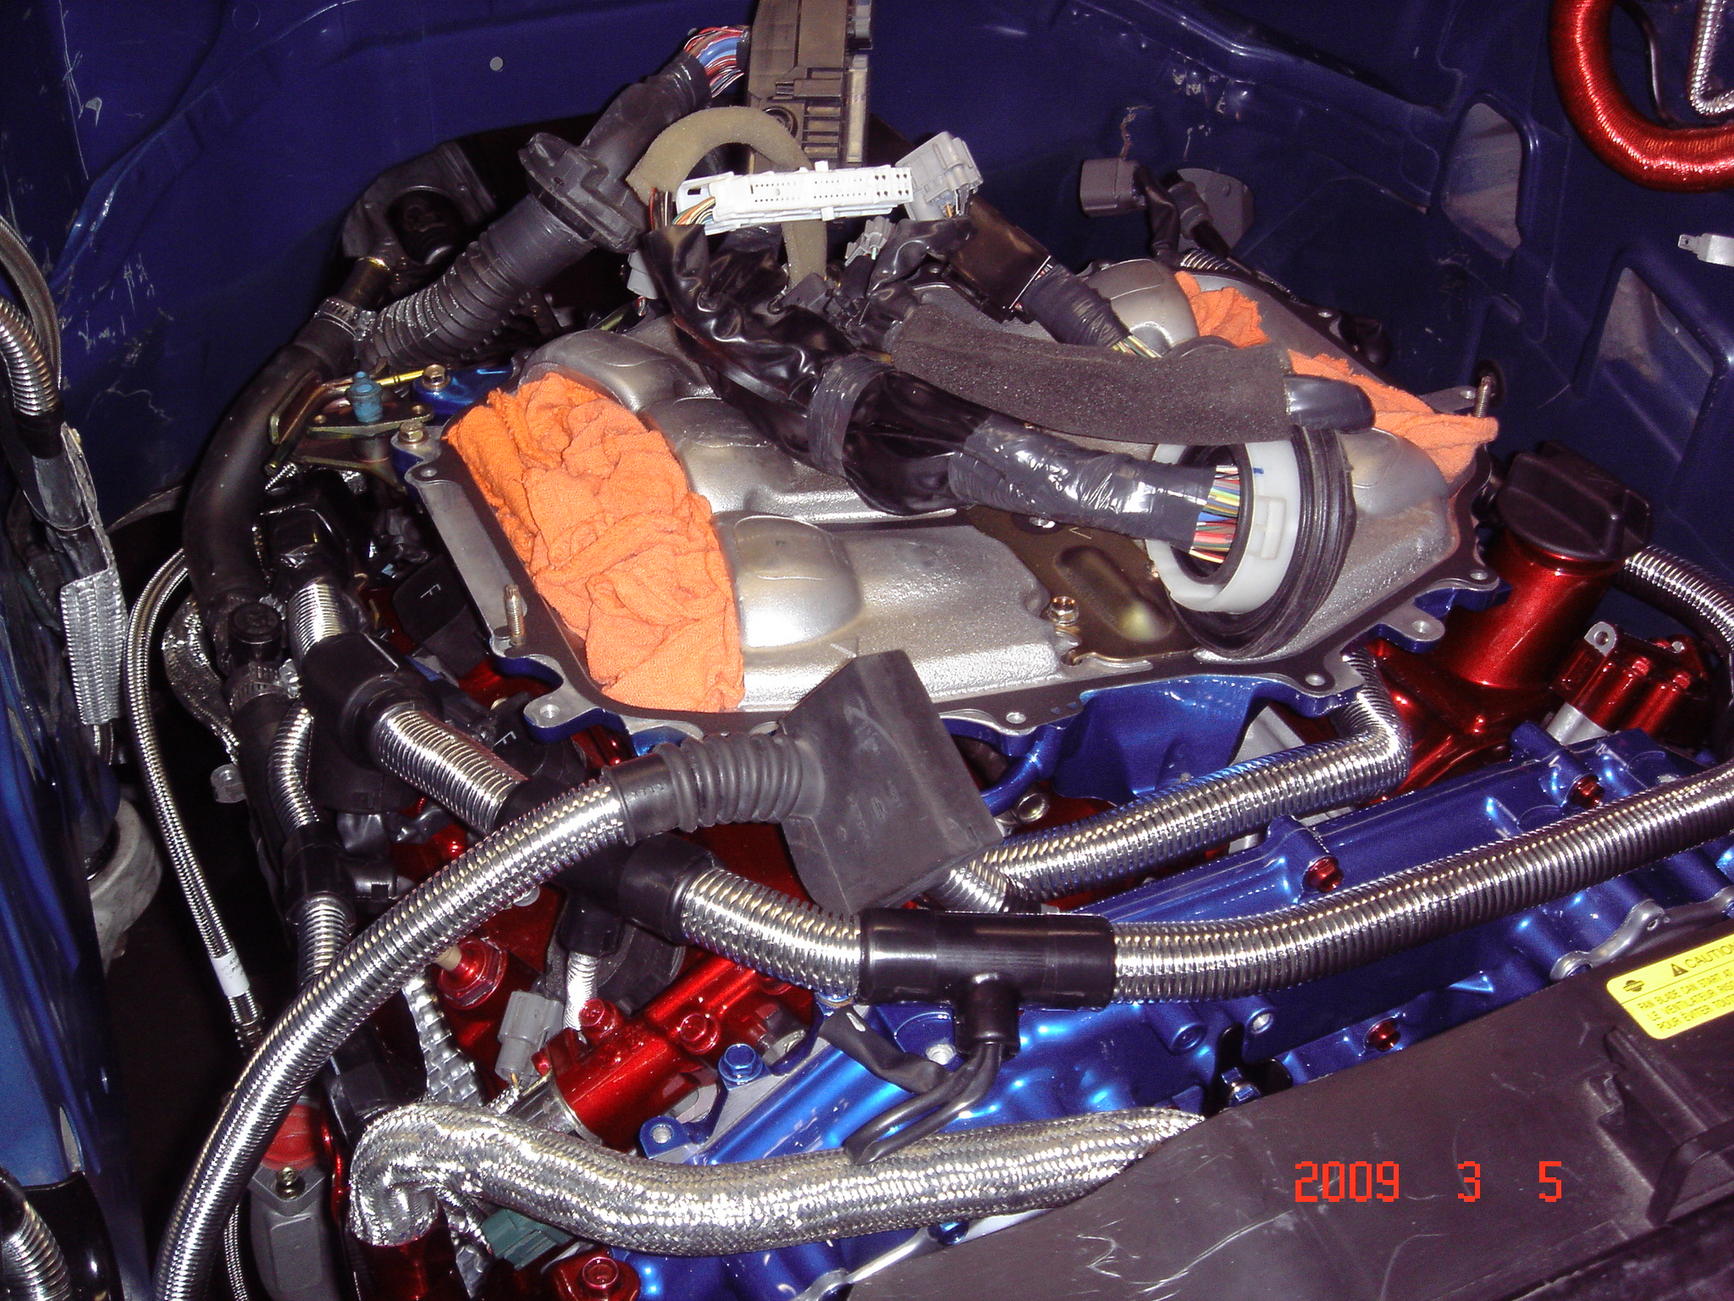
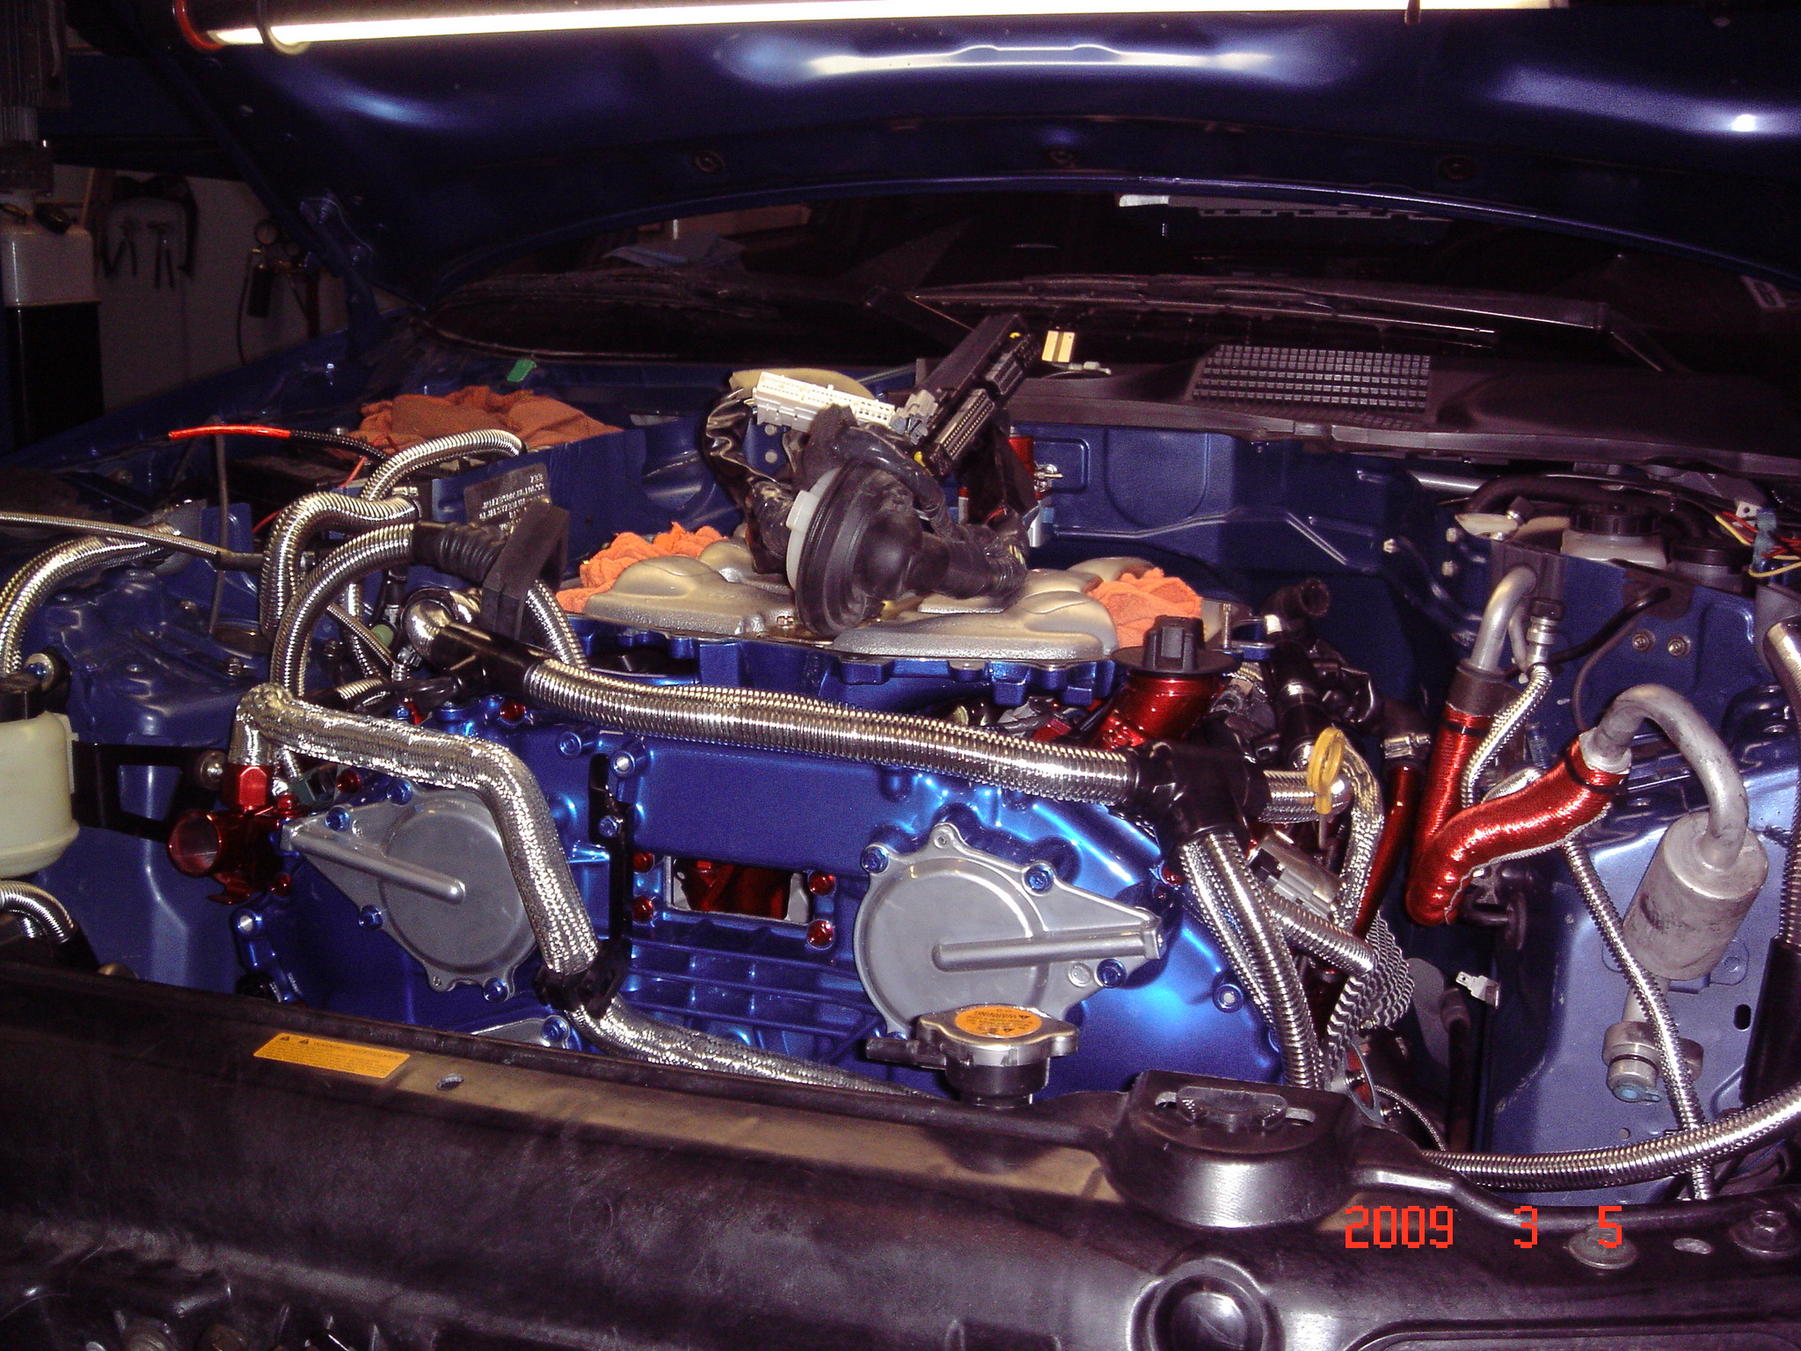
Some pics of the motor going in, its a tight fit. Note my custom made ITB air filters that mount in the plenum  .
.
You have to get the bolts from the frame to line up with the sub-frame that supports the motor.

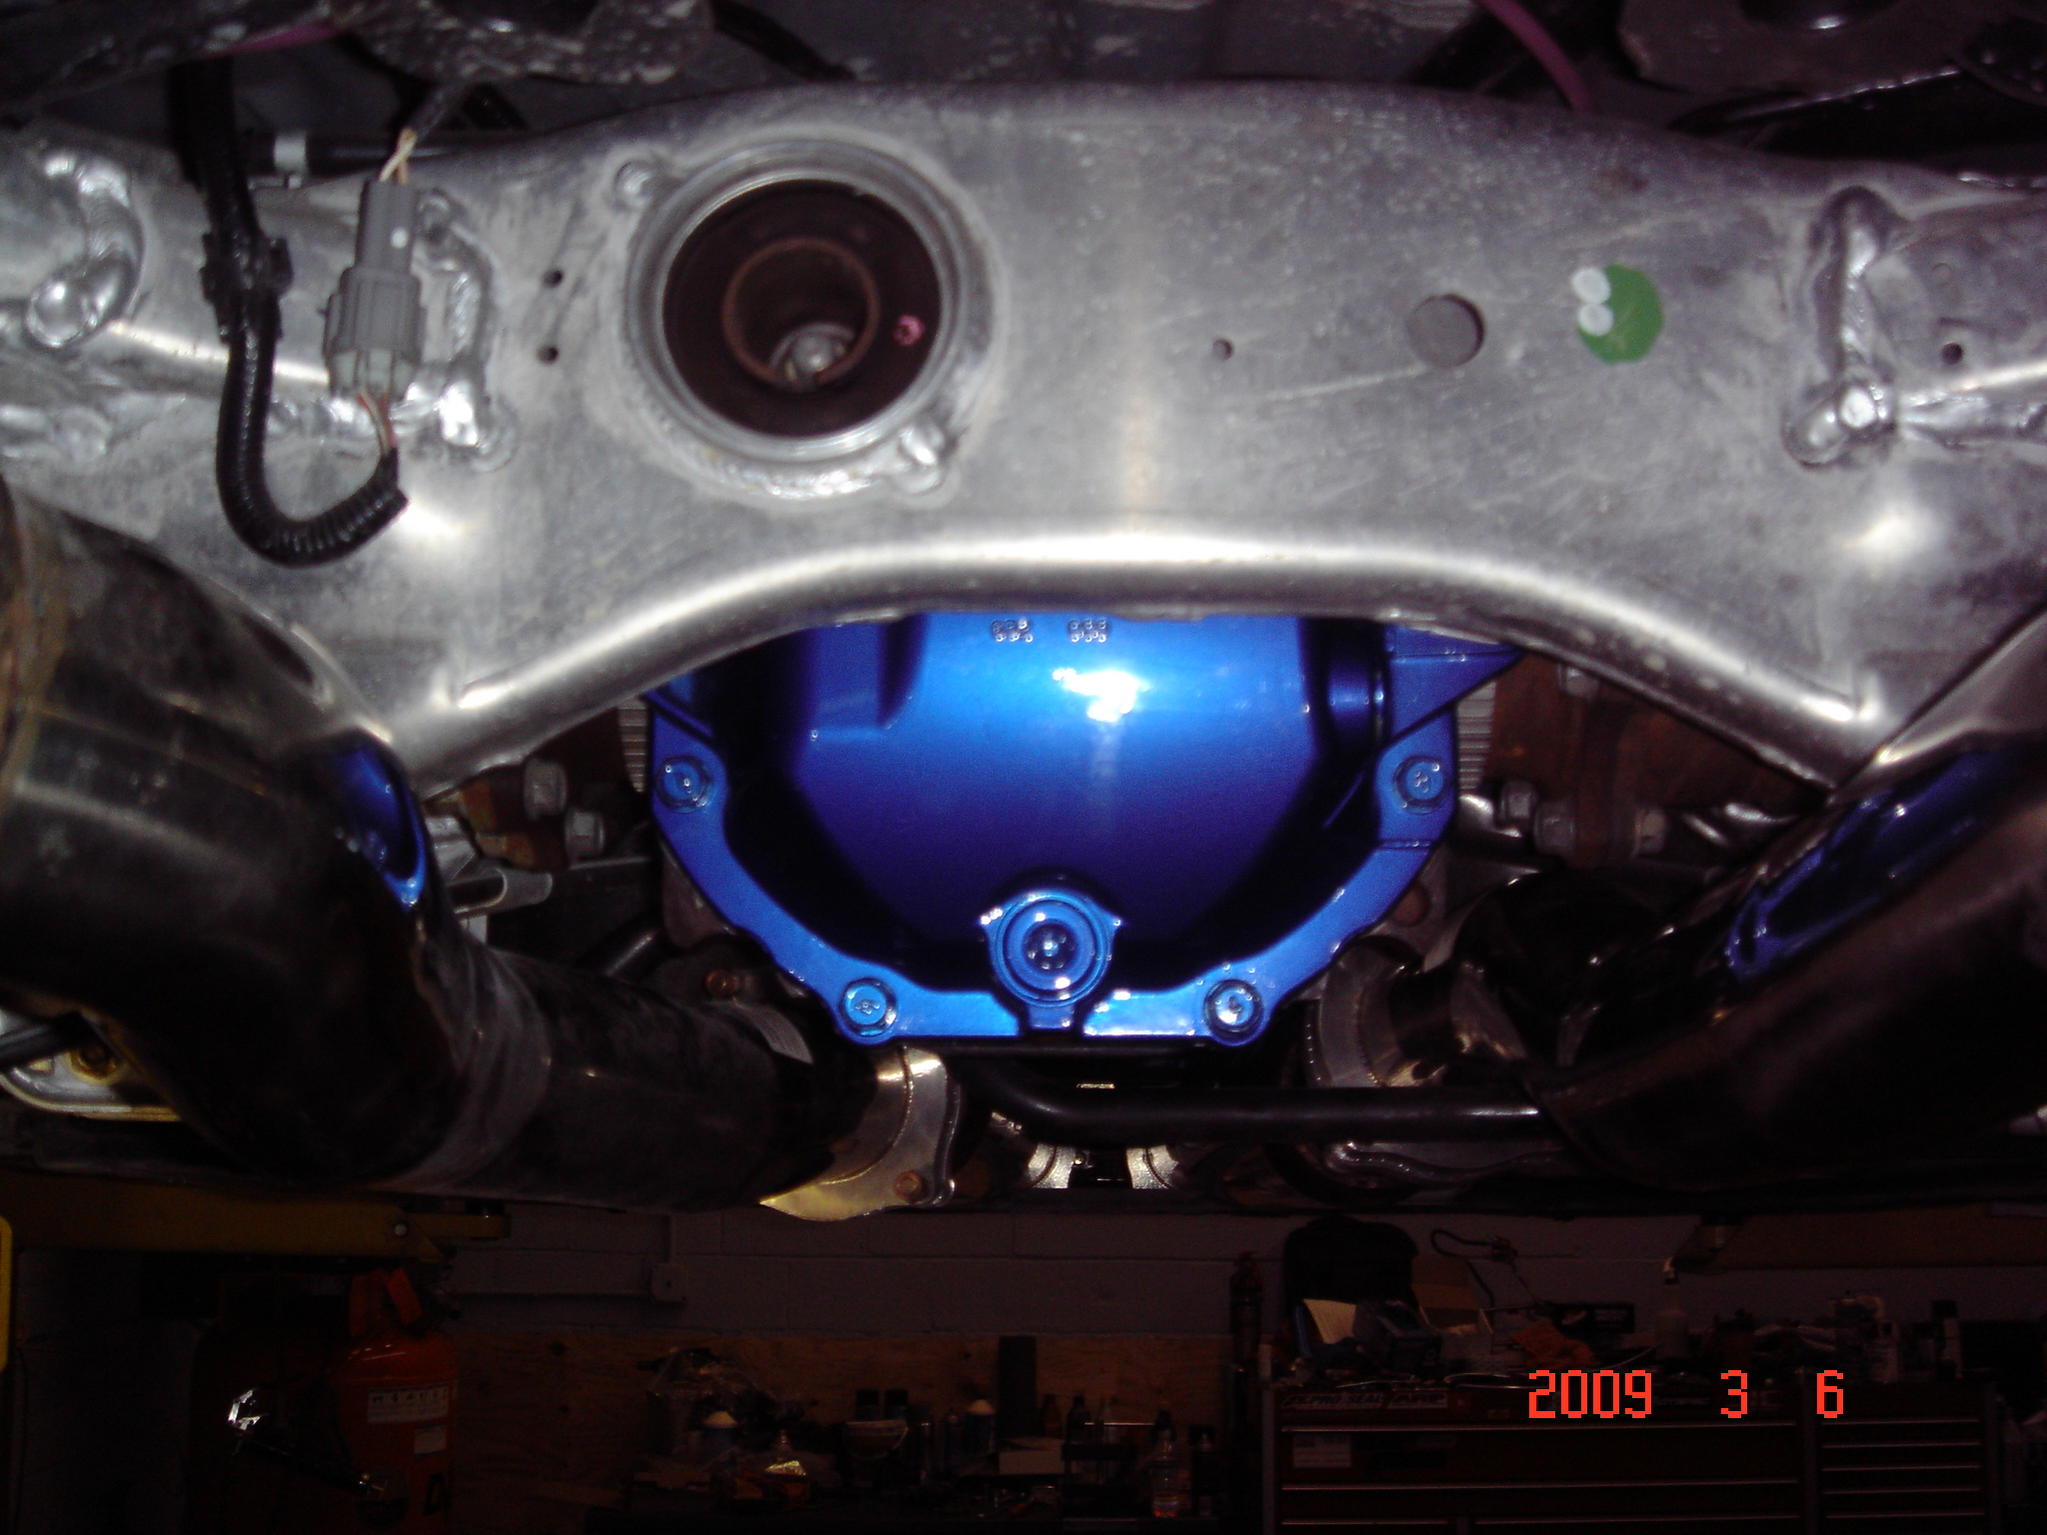
A pic of the Fumoto oil valve installed. Frank had to grind down some of the fins on the APS pan so it would screw in properly.
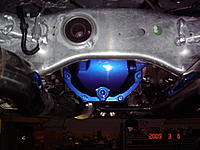
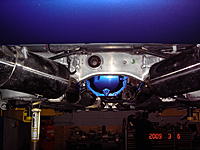
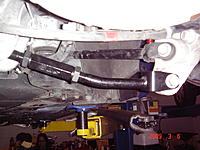
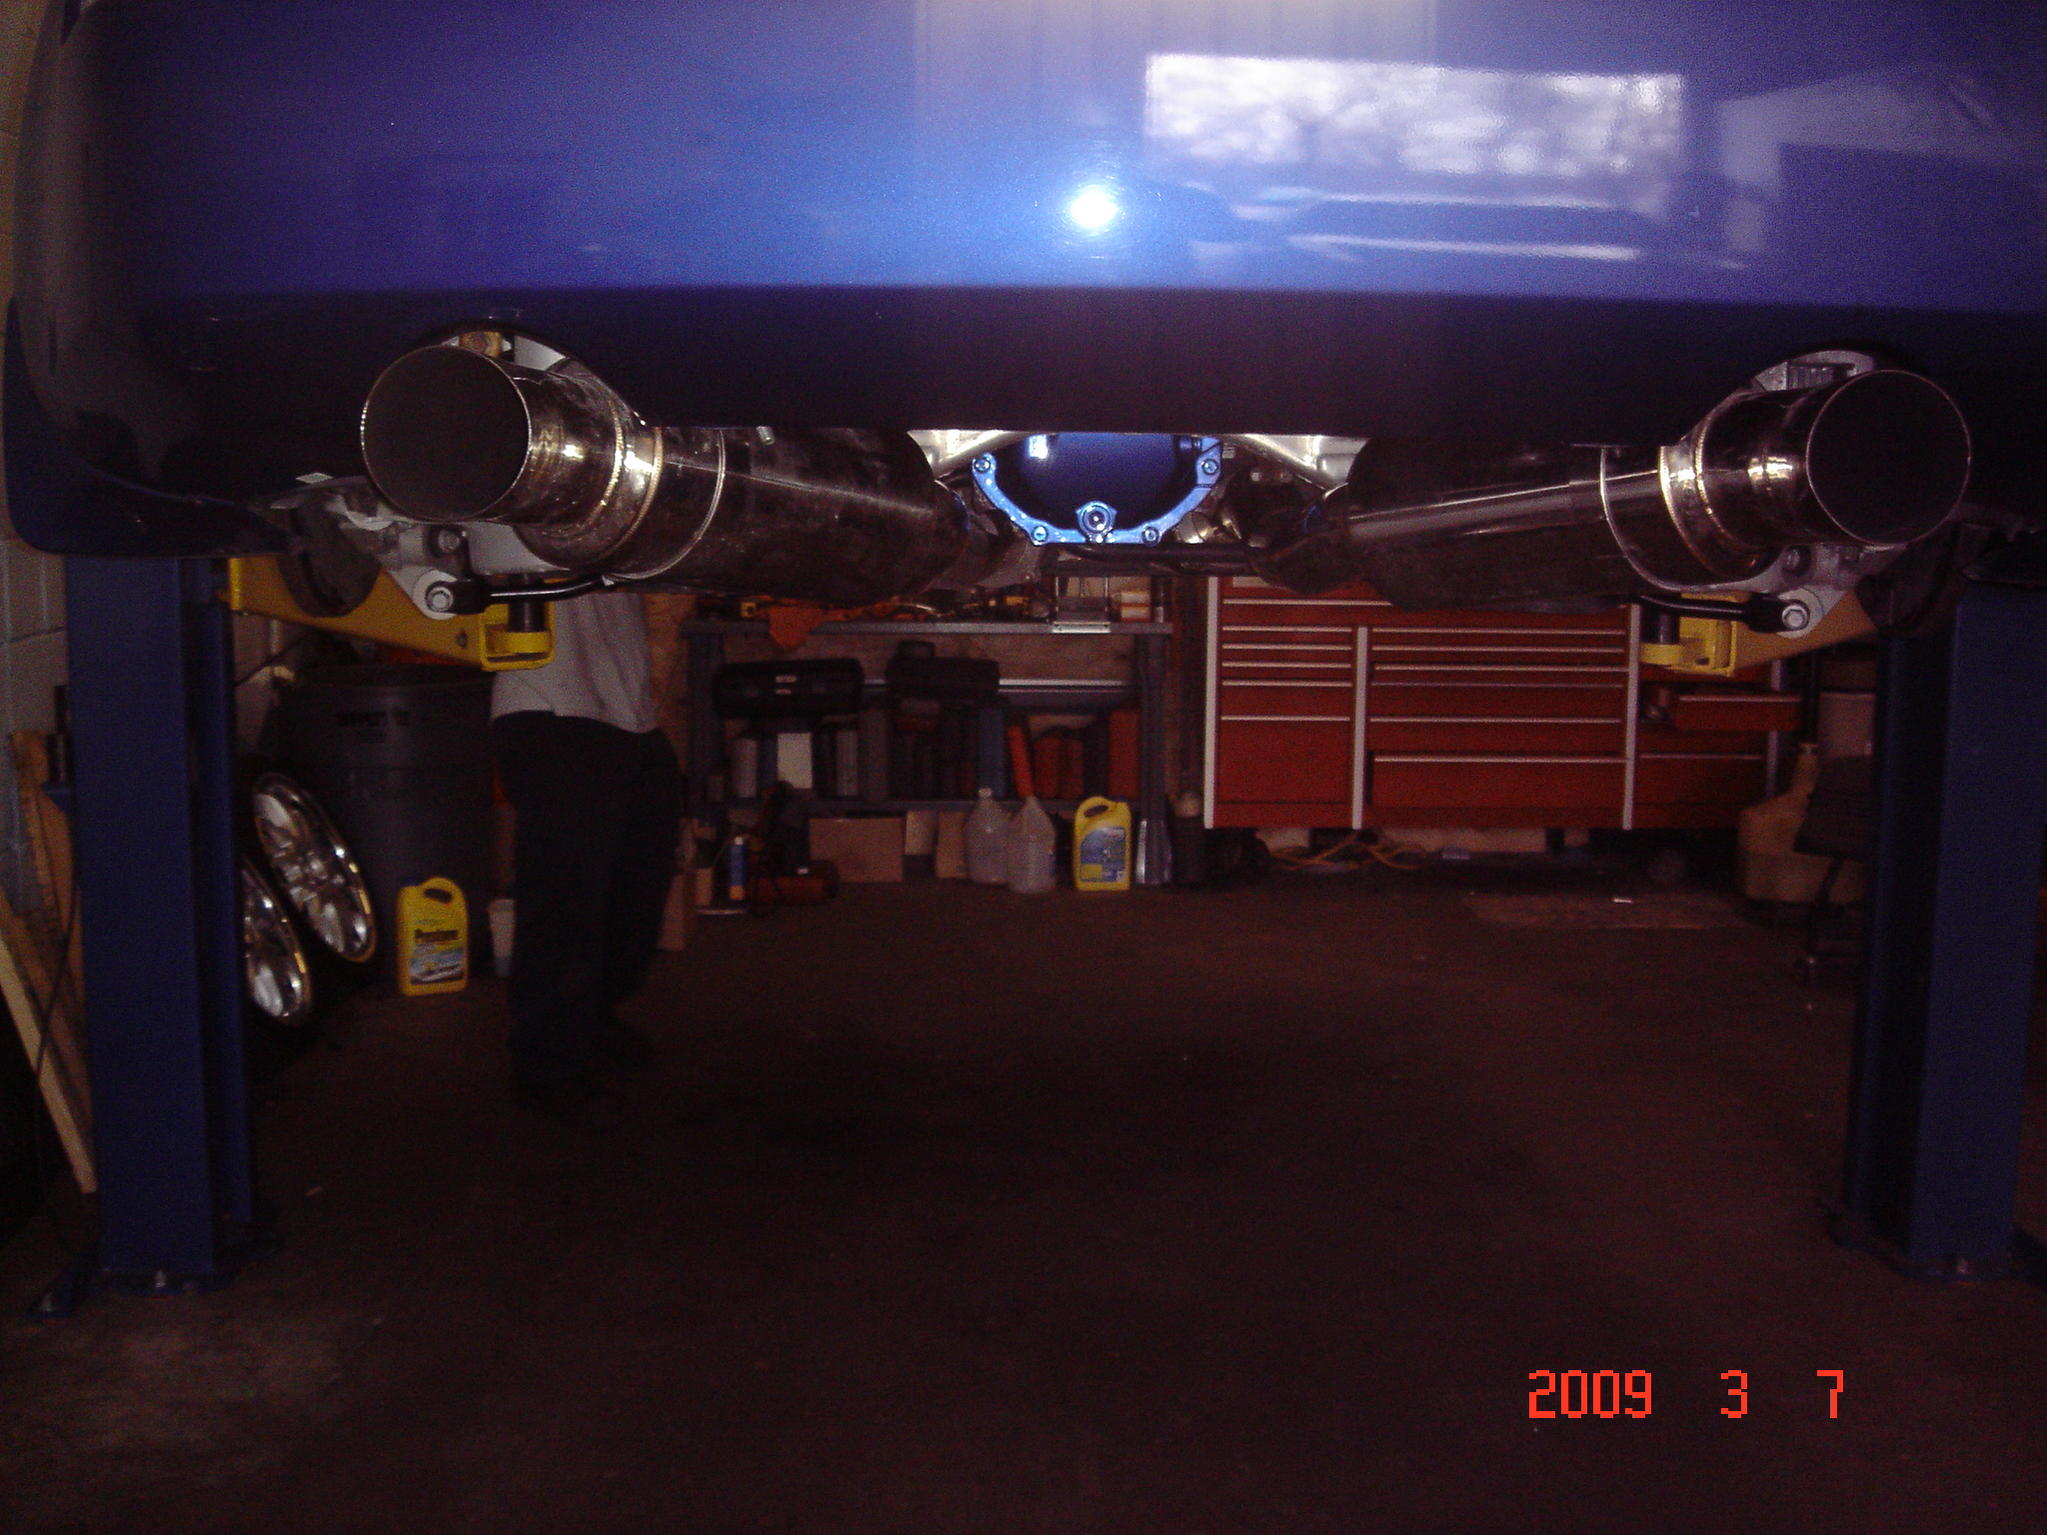
A shot of how it looks from the back underneath the car - damn those downpipes are huge!!
.
You have to get the bolts from the frame to line up with the sub-frame that supports the motor.
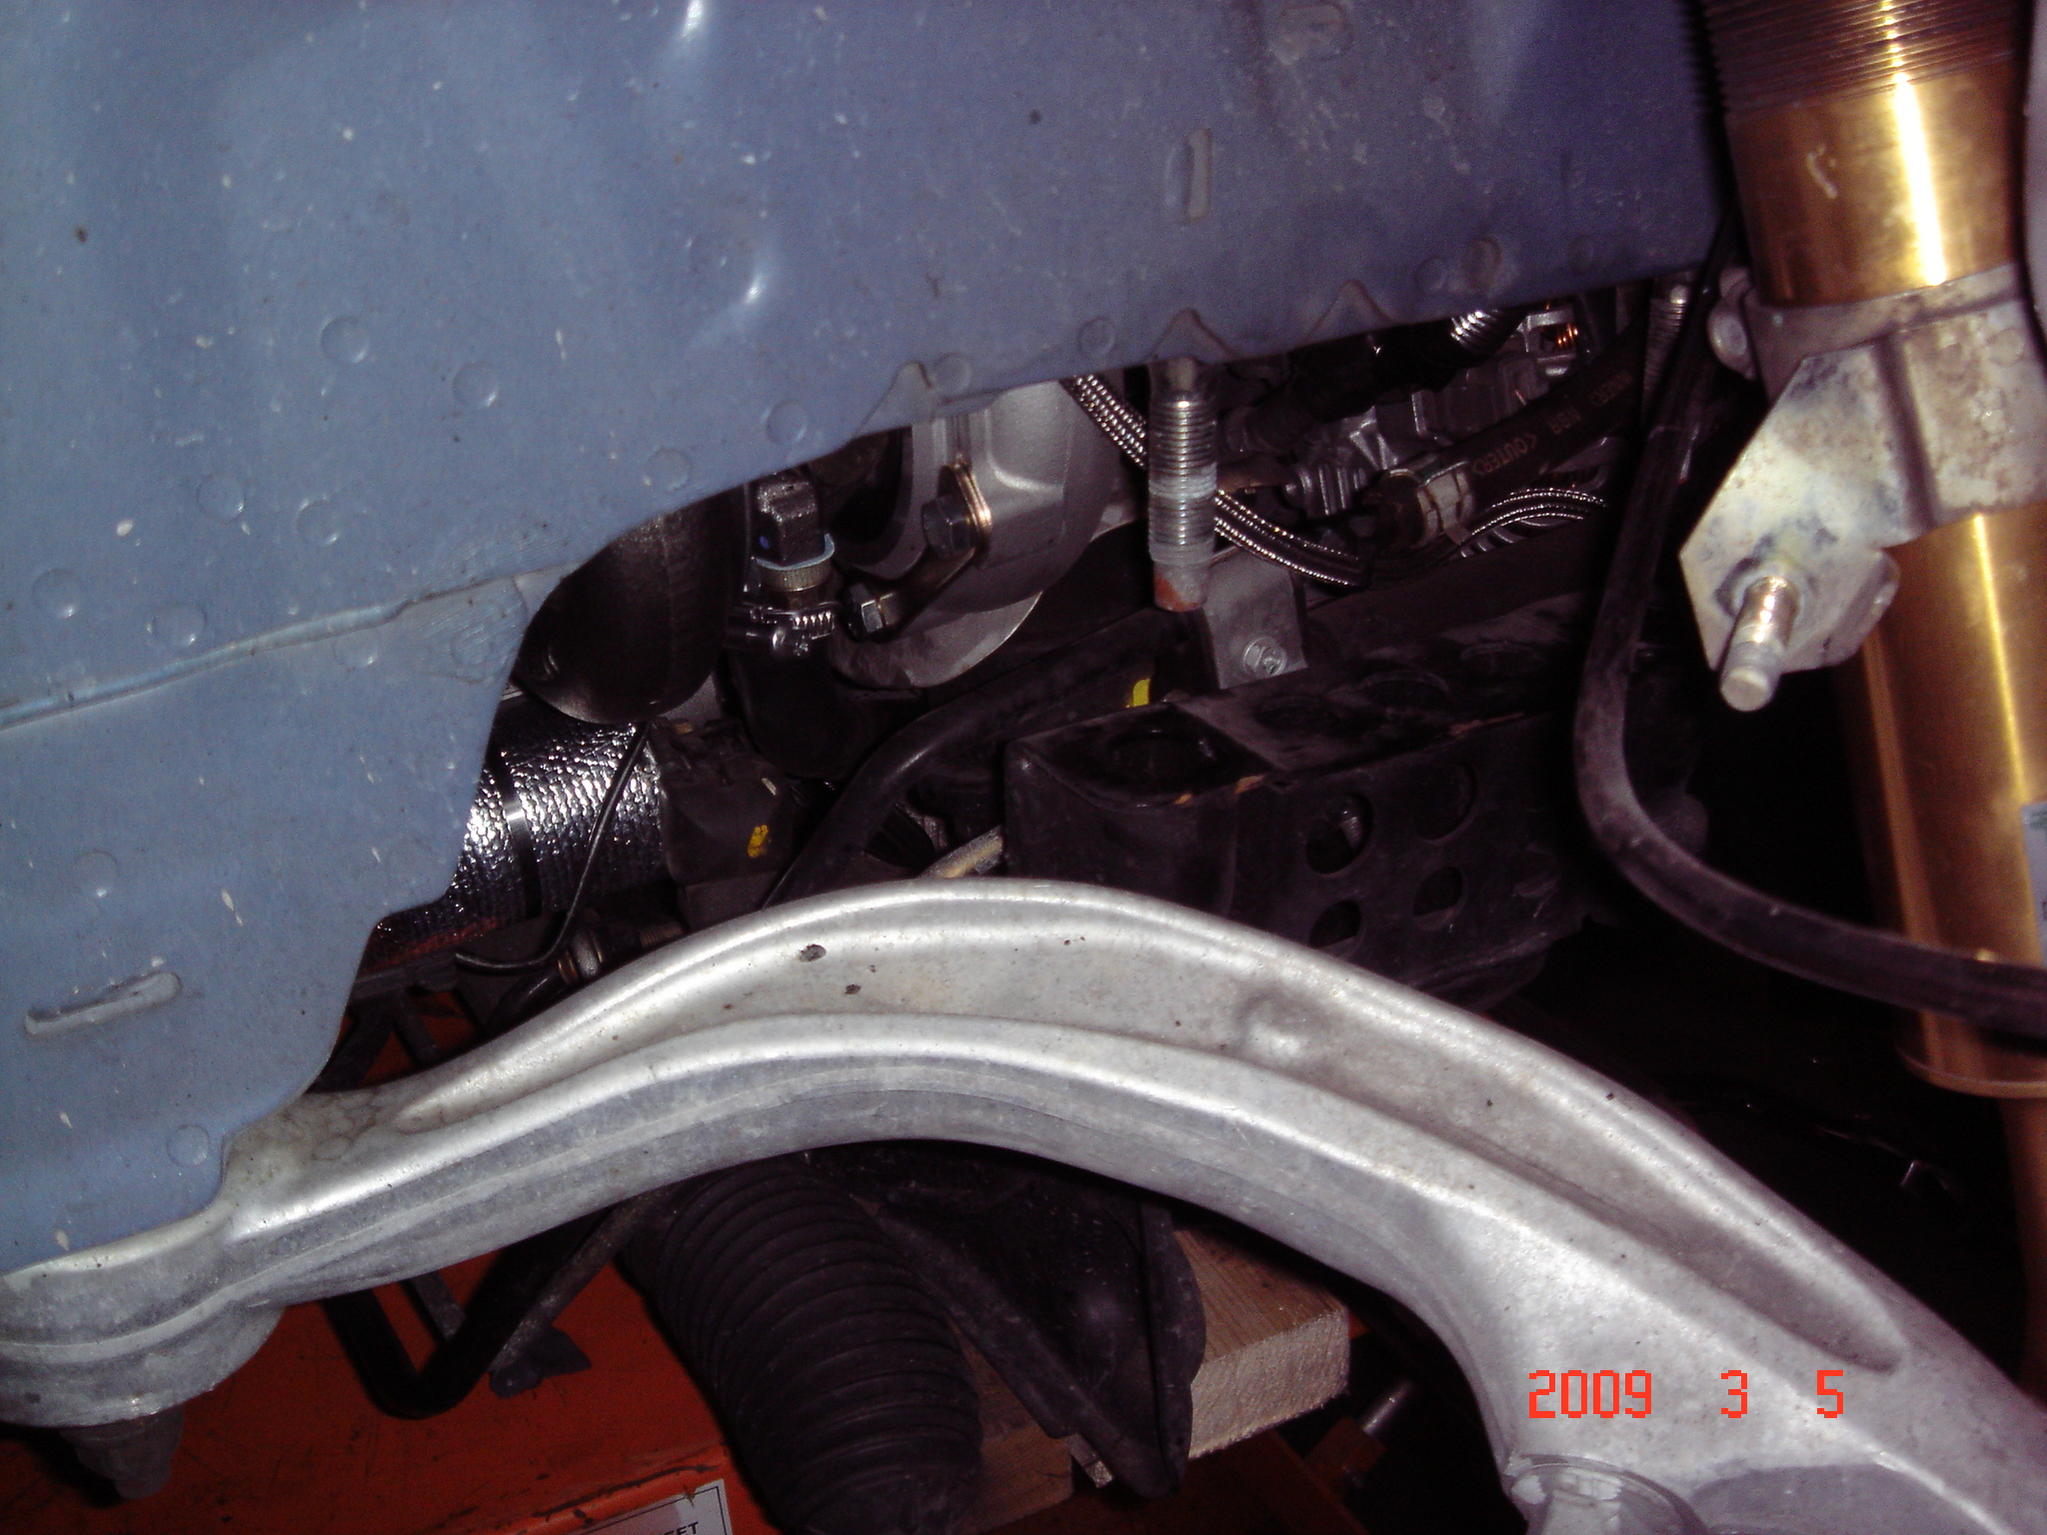
A pic of the Fumoto oil valve installed. Frank had to grind down some of the fins on the APS pan so it would screw in properly.
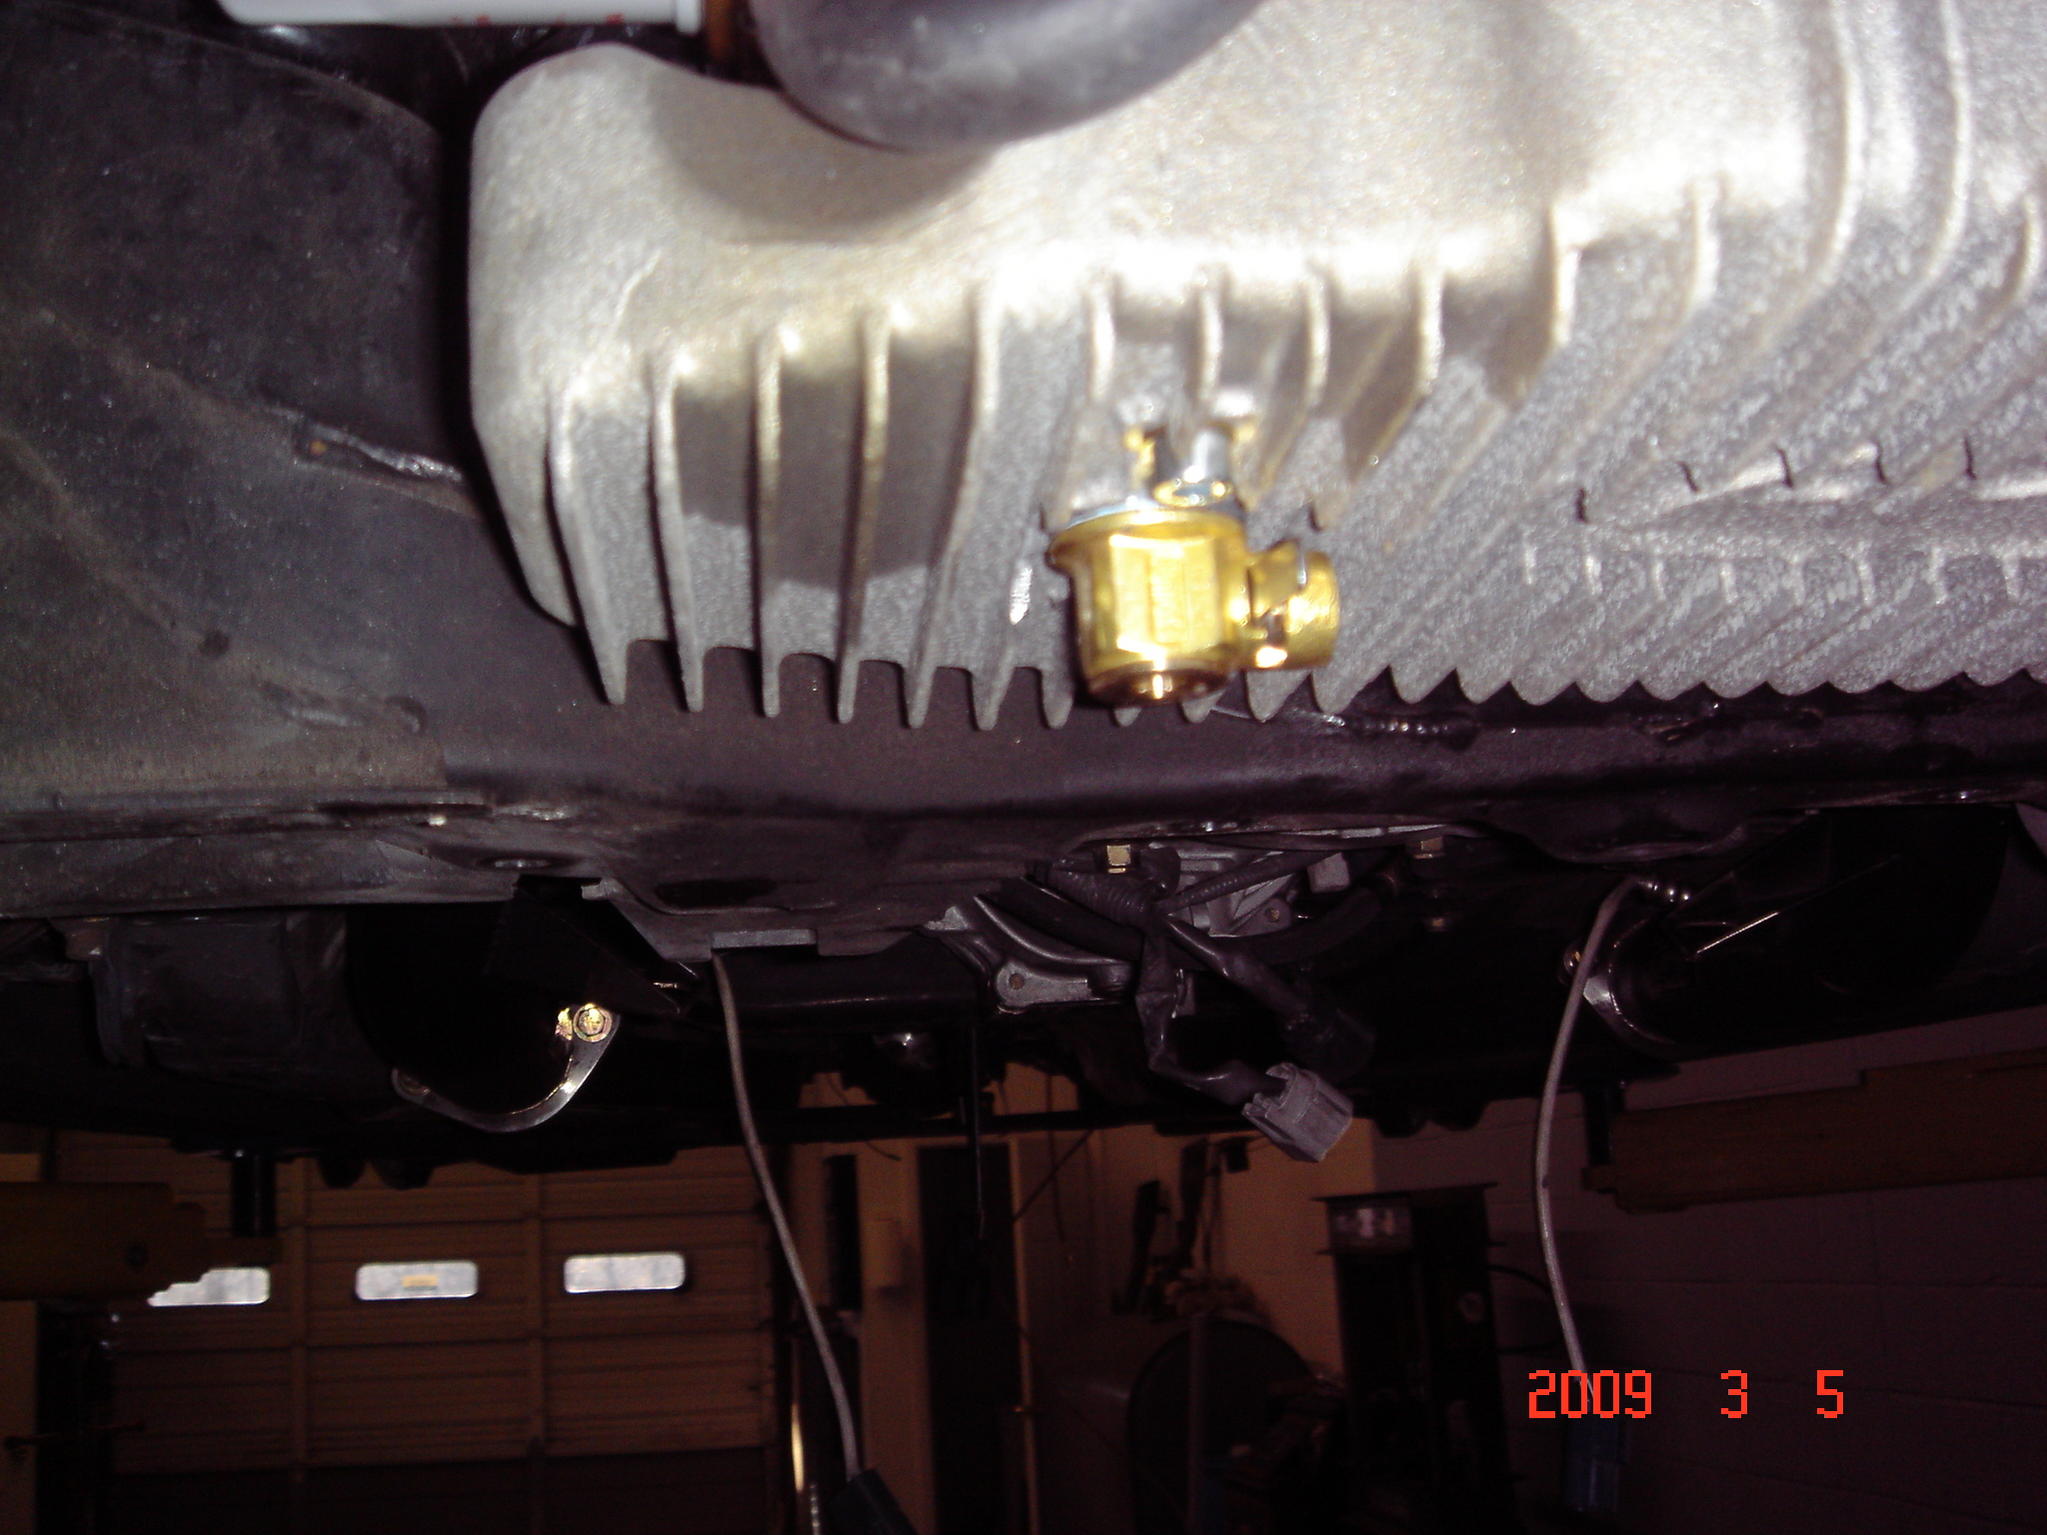
A shot of how it looks from the back underneath the car - damn those downpipes are huge!!
03-08-2009, 11:14 AM
#549
Registered User
iTrader: (11)
Join Date: May 2005
Location: New Jersey
Posts: 1,301
Likes: 0
Received 0 Likes
on
0 Posts
Is that 2 widebands on the passenger side downpipe?
When you see the picture on the engine not mounter you have a wideband up high
near the turbo then when you look at the under side it seems you have another
wideband right by the OEM O2 sensor
When you see the picture on the engine not mounter you have a wideband up high
near the turbo then when you look at the under side it seems you have another
wideband right by the OEM O2 sensor
03-08-2009, 11:21 AM
#550
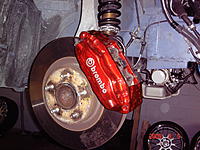
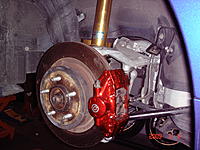
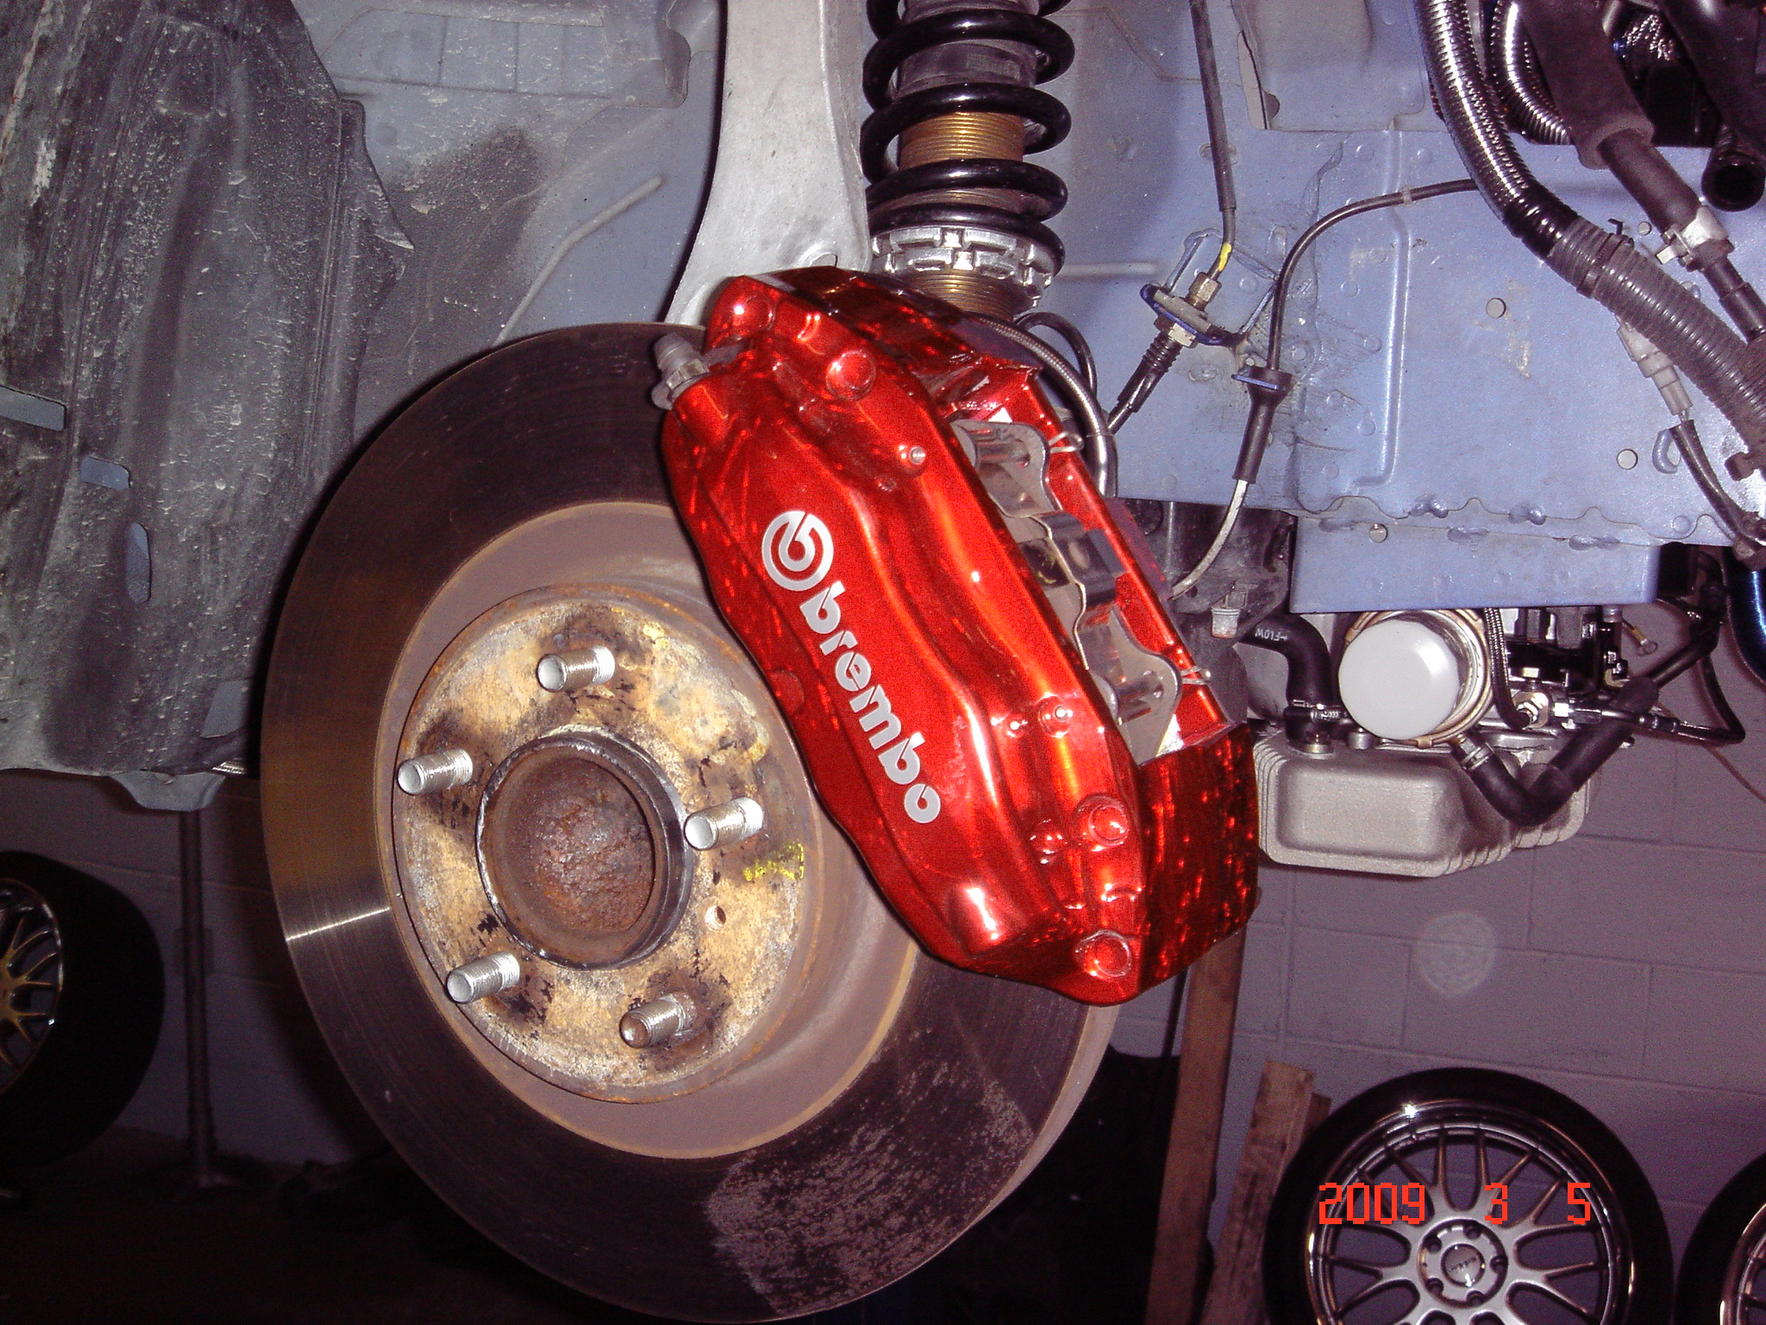
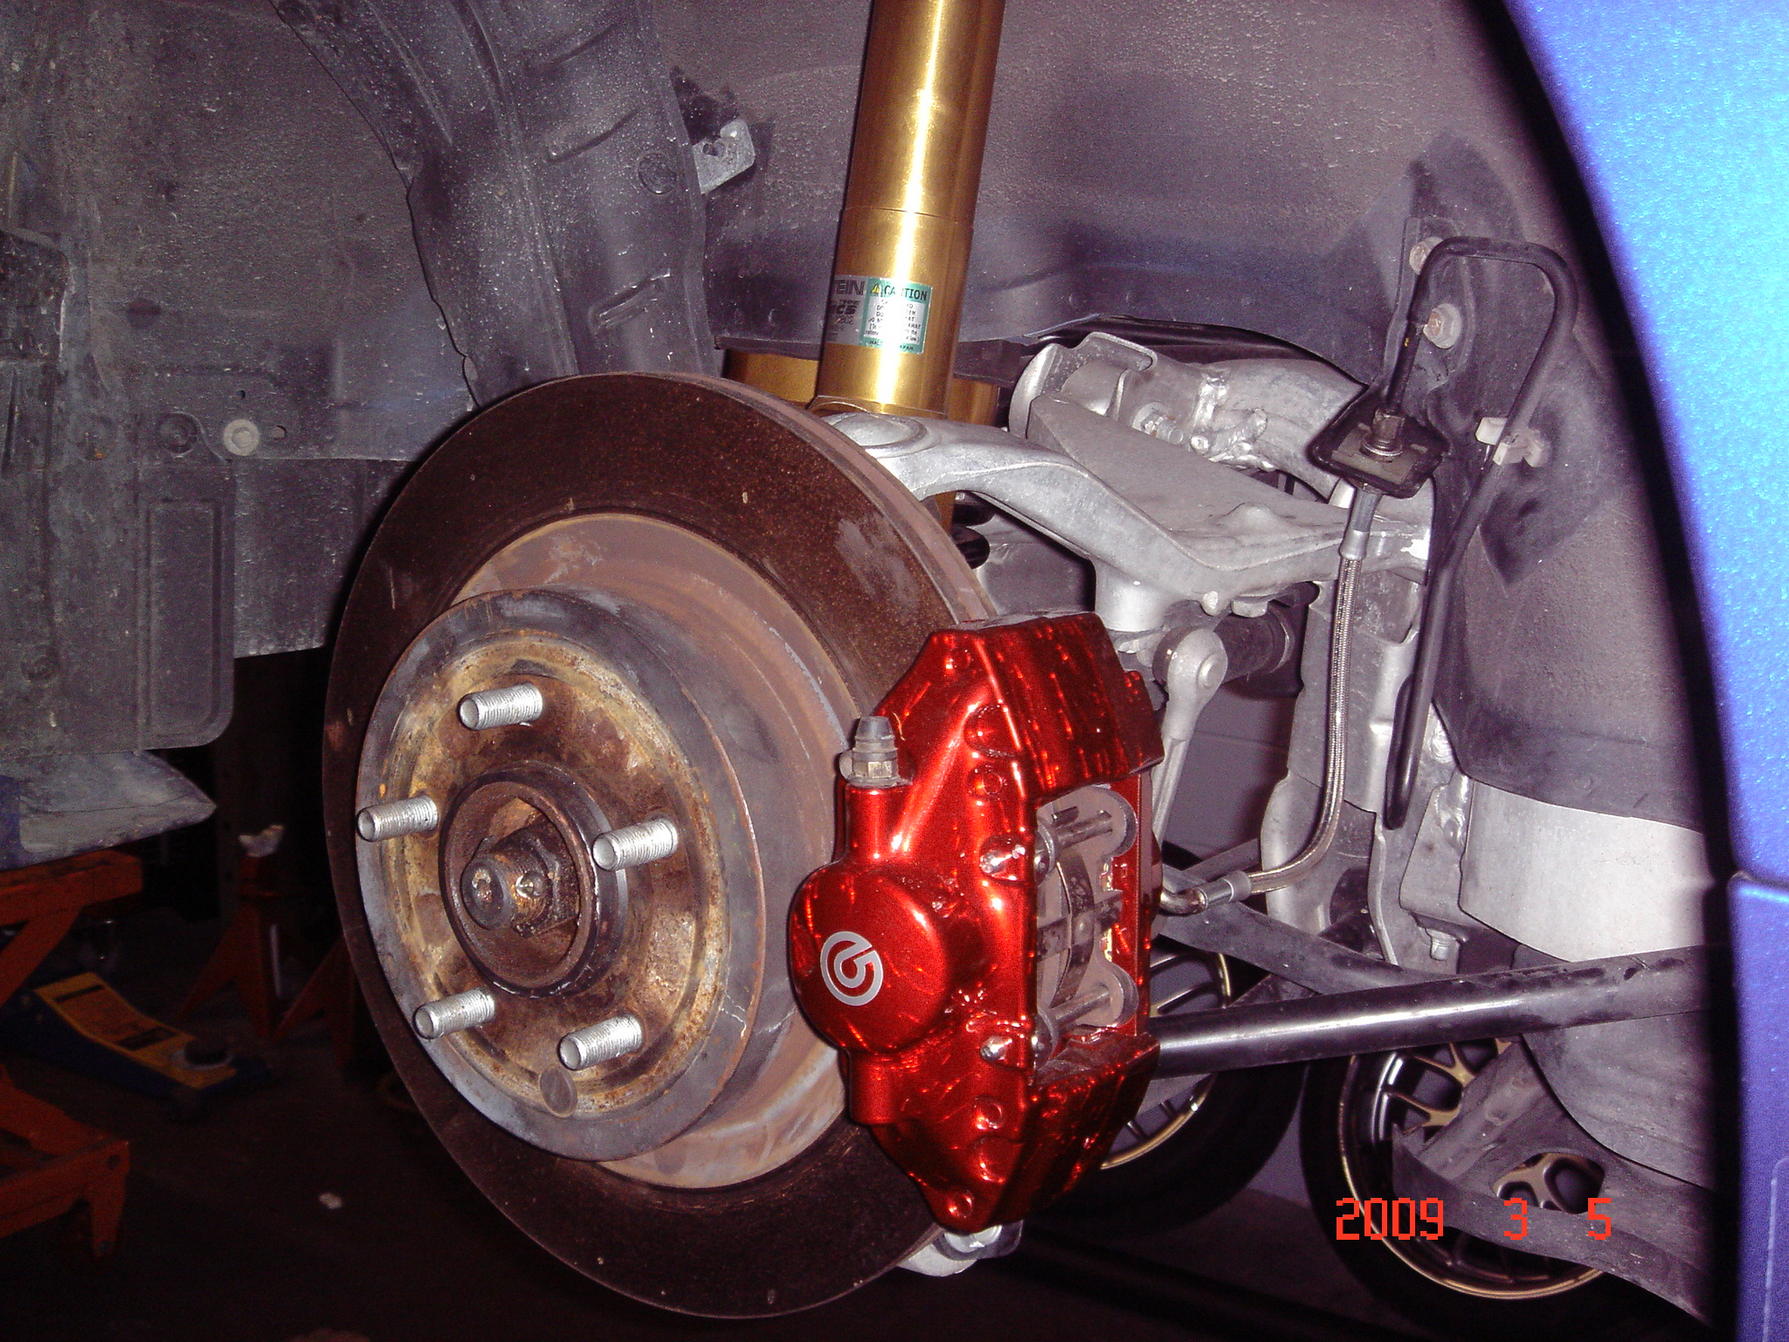
I got the stickers on the brakes today, almost left them off, but I spent money to get the upgrade so I figured I may as well show off the name.
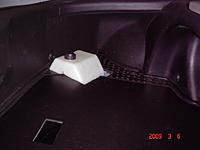
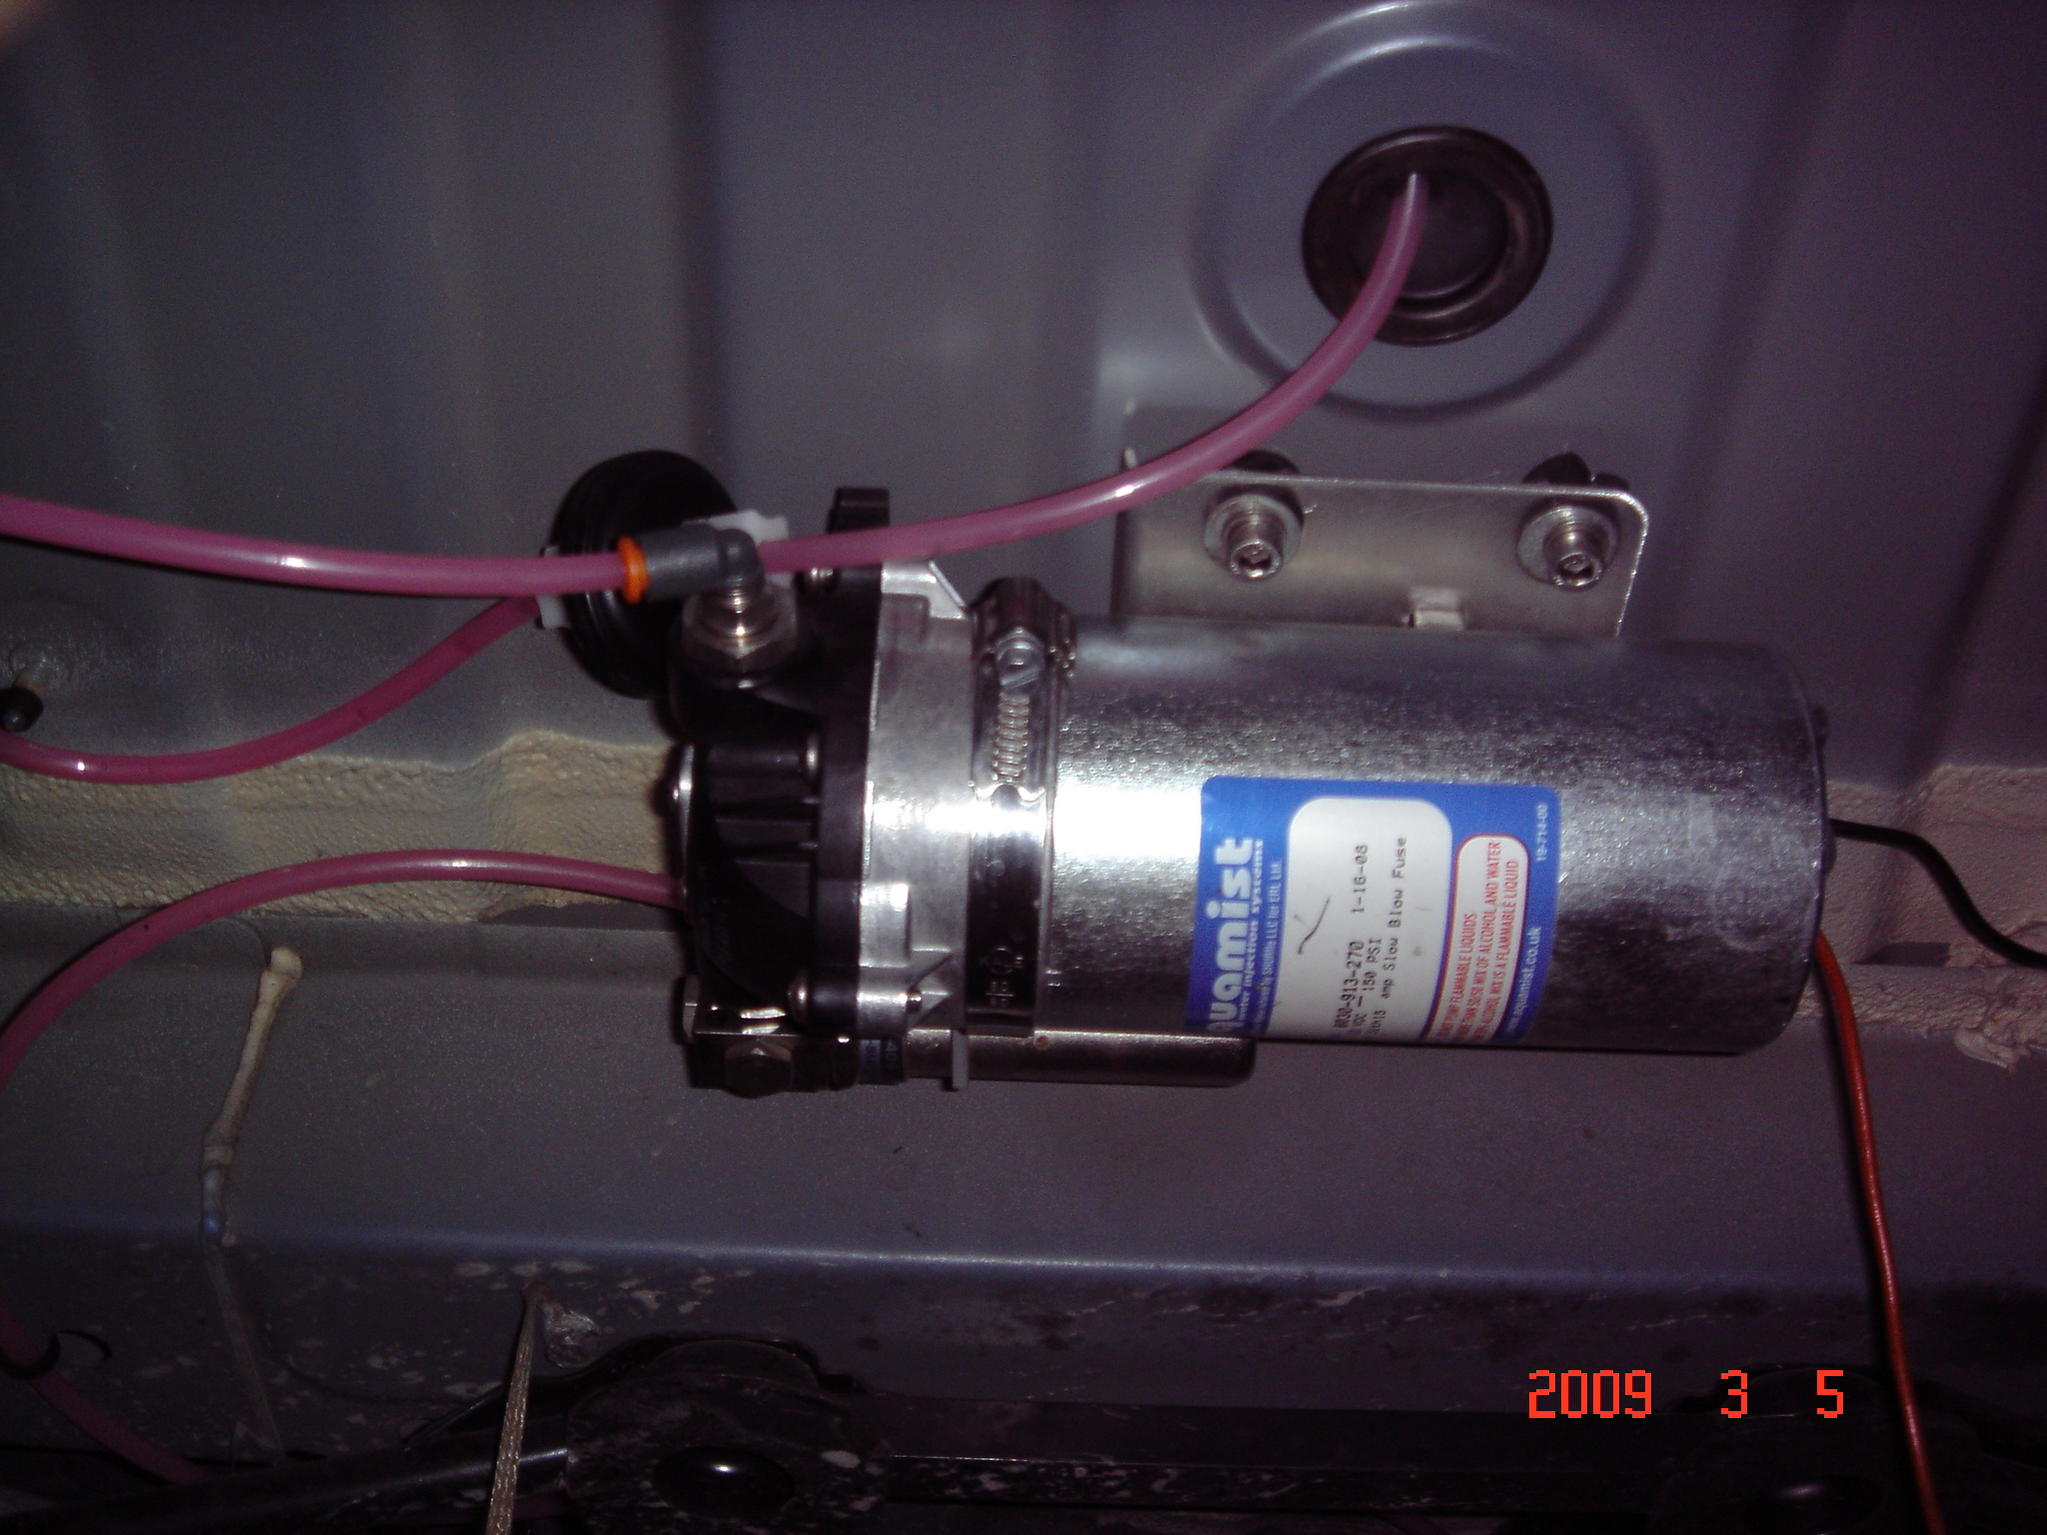
The pump for the meth kit was mounted where the stock exhaust cannister went. Running the hose for the meth kit was not much fun, getting over the gas tank is a PITA (thanks Frank). We zip tied the hose to the fuel lines and then realized we were a few feet short on hose. We found it from a local place near me in PA so the meth kit sits incomplete for yet another day..... this thing takes forever to install") .
.

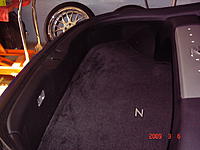
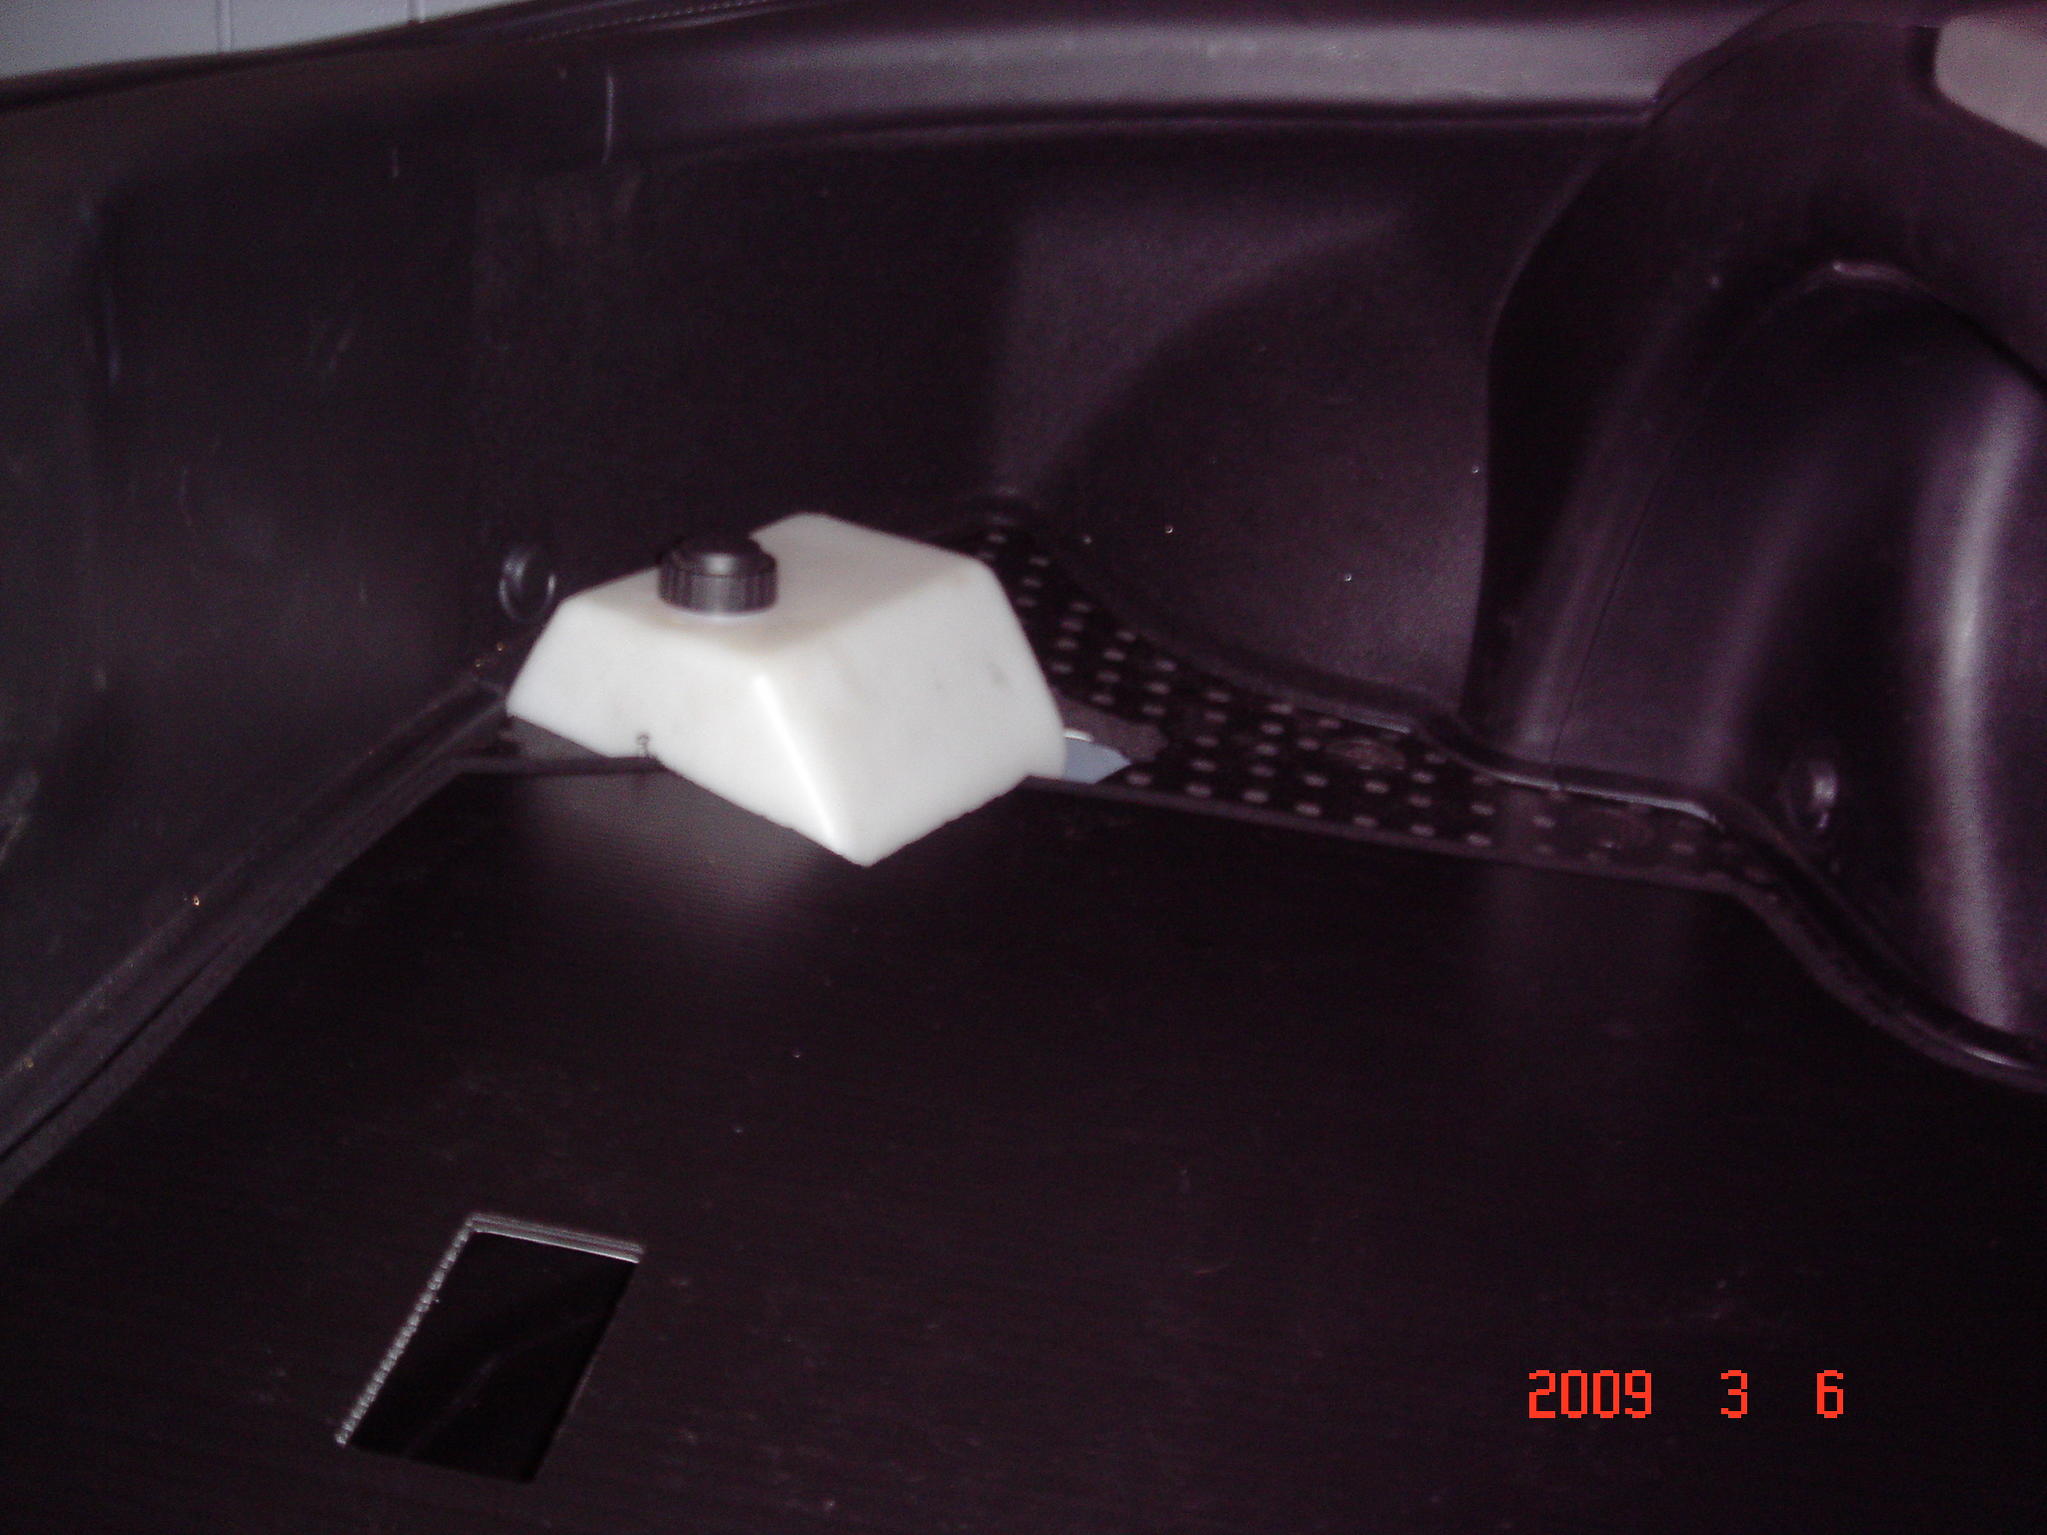
I could finally finish up in the hatch by putting the plastics and carpet back into place. I like the look, but may cut the carpet to sit better if I can't hear the meth sloshing around in the reservoir.
ibkarlito and thefireboy stopped by today, real nice guys. I have a few parts off the Mid-A Mistress on my car now, I hope they work as well for me as they did for Karl. In case you all don't know, thefireboy has one of the nicest G37 coupes I have seen. Super sleek with a custom TT setup - very nice. There is also another G at the shop, its red and owed by someone named Lance from NY/NJ area - very nice rims. I will have to get some pics of these cars to post up.
The pump for the meth kit was mounted where the stock exhaust cannister went. Running the hose for the meth kit was not much fun, getting over the gas tank is a PITA (thanks Frank). We zip tied the hose to the fuel lines and then realized we were a few feet short on hose. We found it from a local place near me in PA so the meth kit sits incomplete for yet another day..... this thing takes forever to install
.
I could finally finish up in the hatch by putting the plastics and carpet back into place. I like the look, but may cut the carpet to sit better if I can't hear the meth sloshing around in the reservoir.

ibkarlito and thefireboy stopped by today, real nice guys. I have a few parts off the Mid-A Mistress on my car now, I hope they work as well for me as they did for Karl. In case you all don't know, thefireboy has one of the nicest G37 coupes I have seen. Super sleek with a custom TT setup - very nice. There is also another G at the shop, its red and owed by someone named Lance from NY/NJ area - very nice rims. I will have to get some pics of these cars to post up.
03-08-2009, 11:31 AM
#552
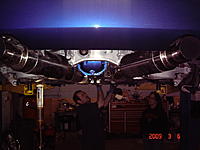
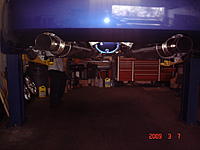
Frank got the Quaife installed and hung the APS 3" true duals (thanks Turismo). The exhaust had been bent slightly at the flex pipe on the drivers side and needed a little convincing to mount up and then have everything match up correctly at the cannisters. Frank did this by himself after I left for home, I swear he has six arms.
He also installed the new SPC camber arms in the rear.


He also installed the new SPC camber arms in the rear.
 03-08-2009, 11:40 AM
#553
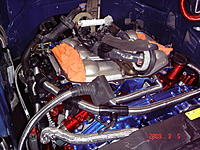
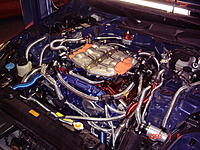
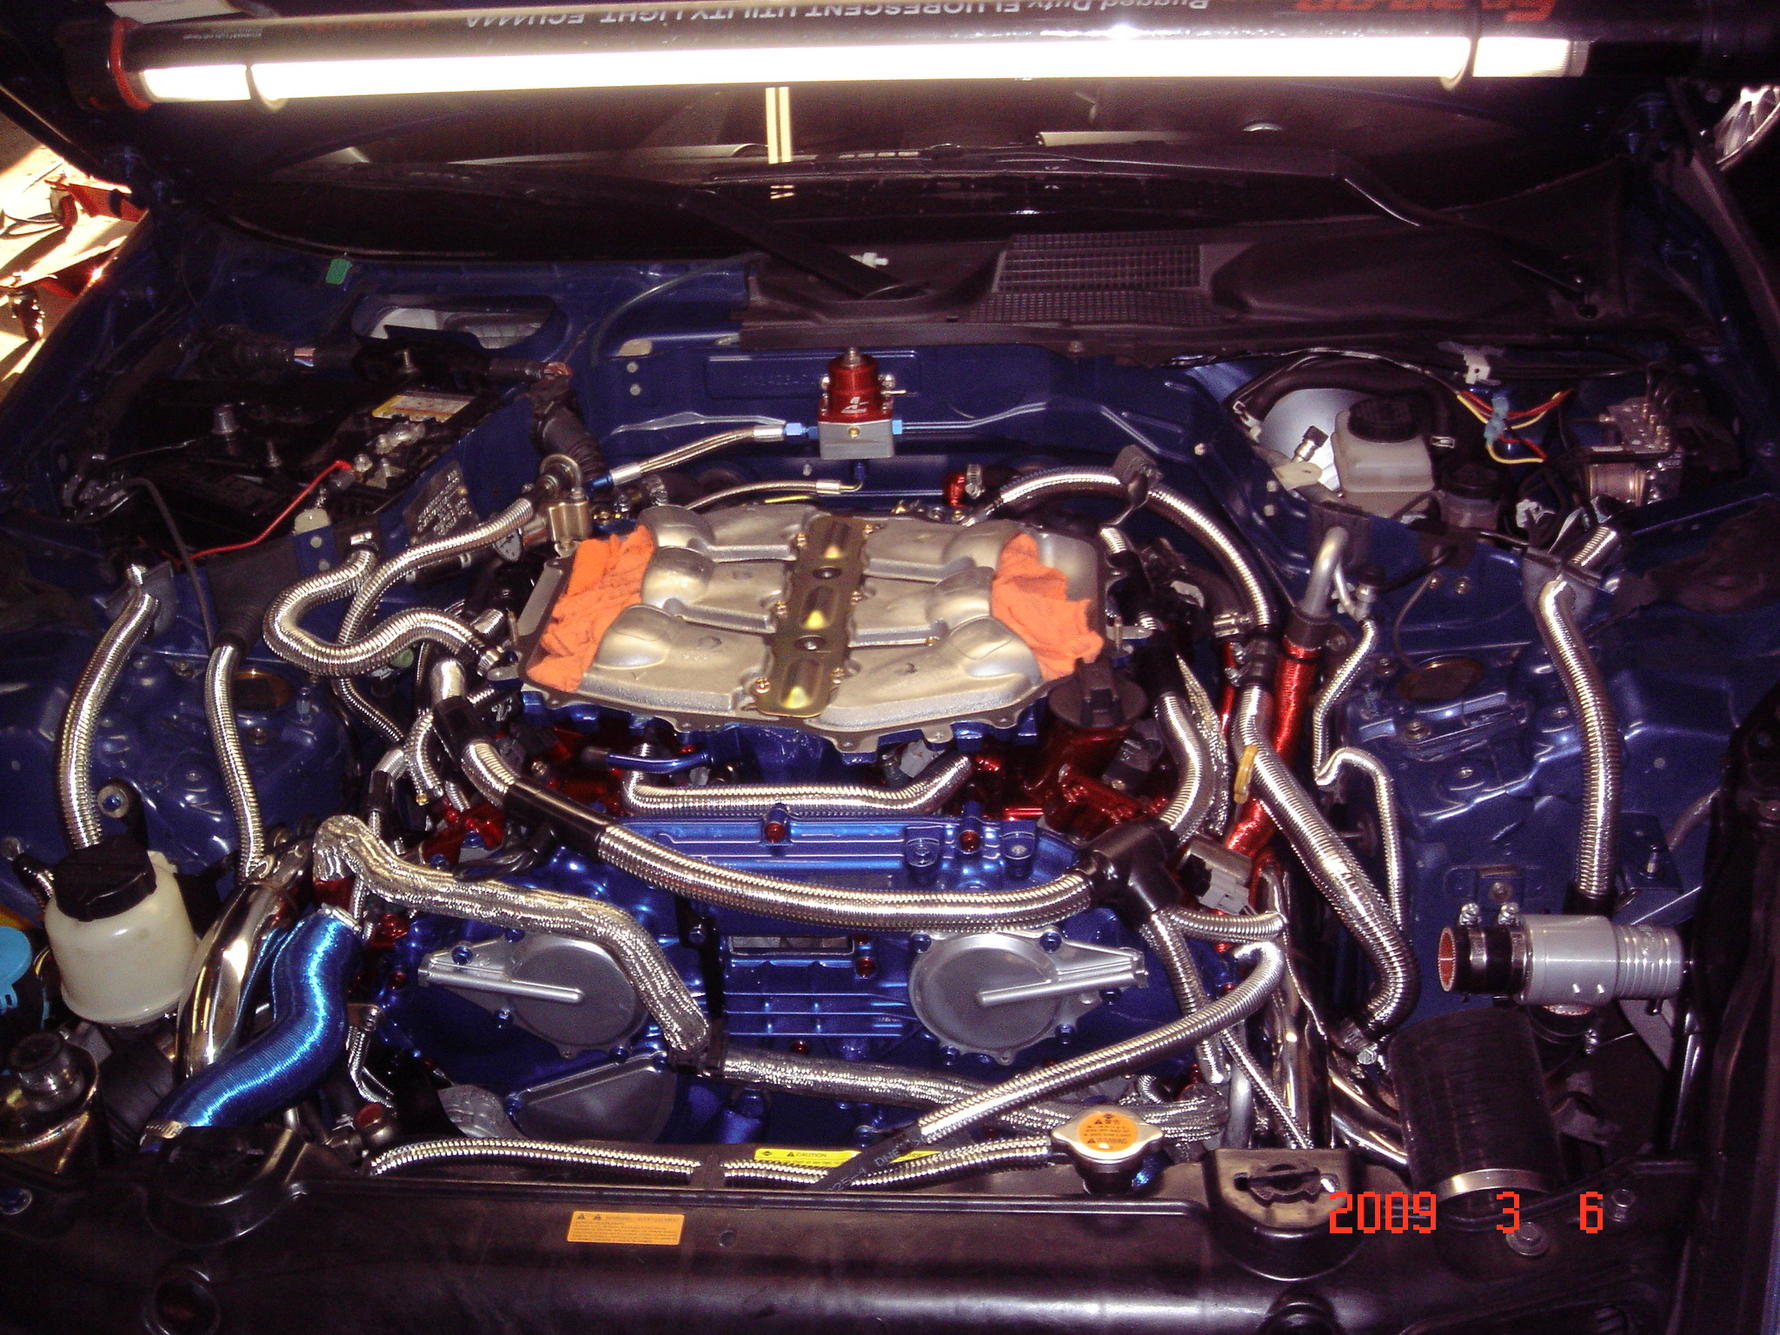
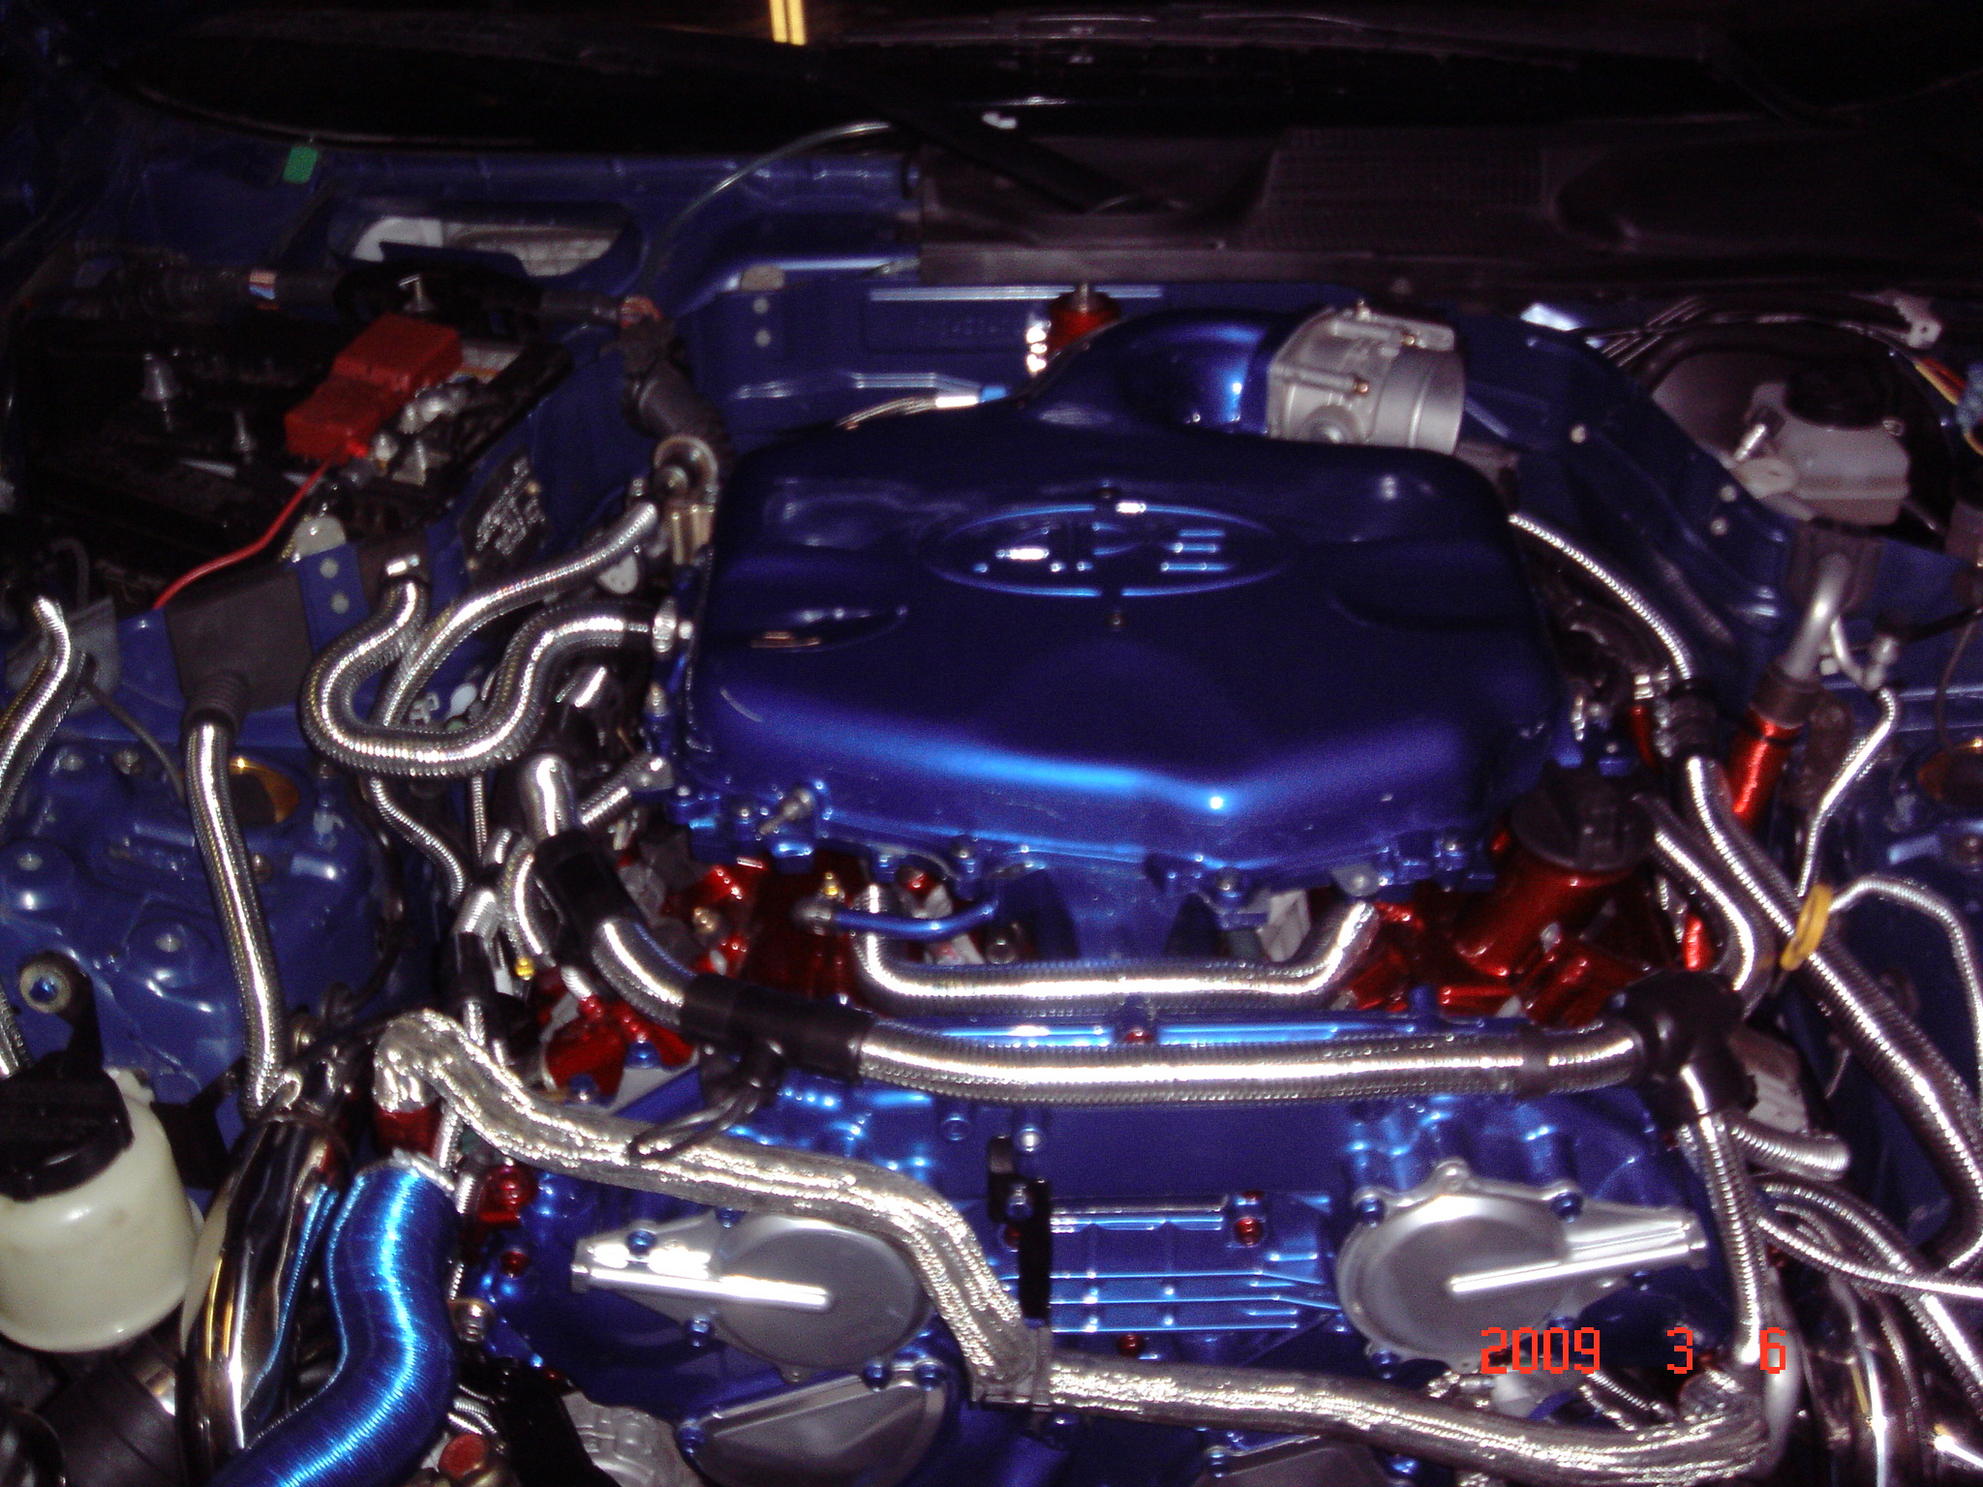
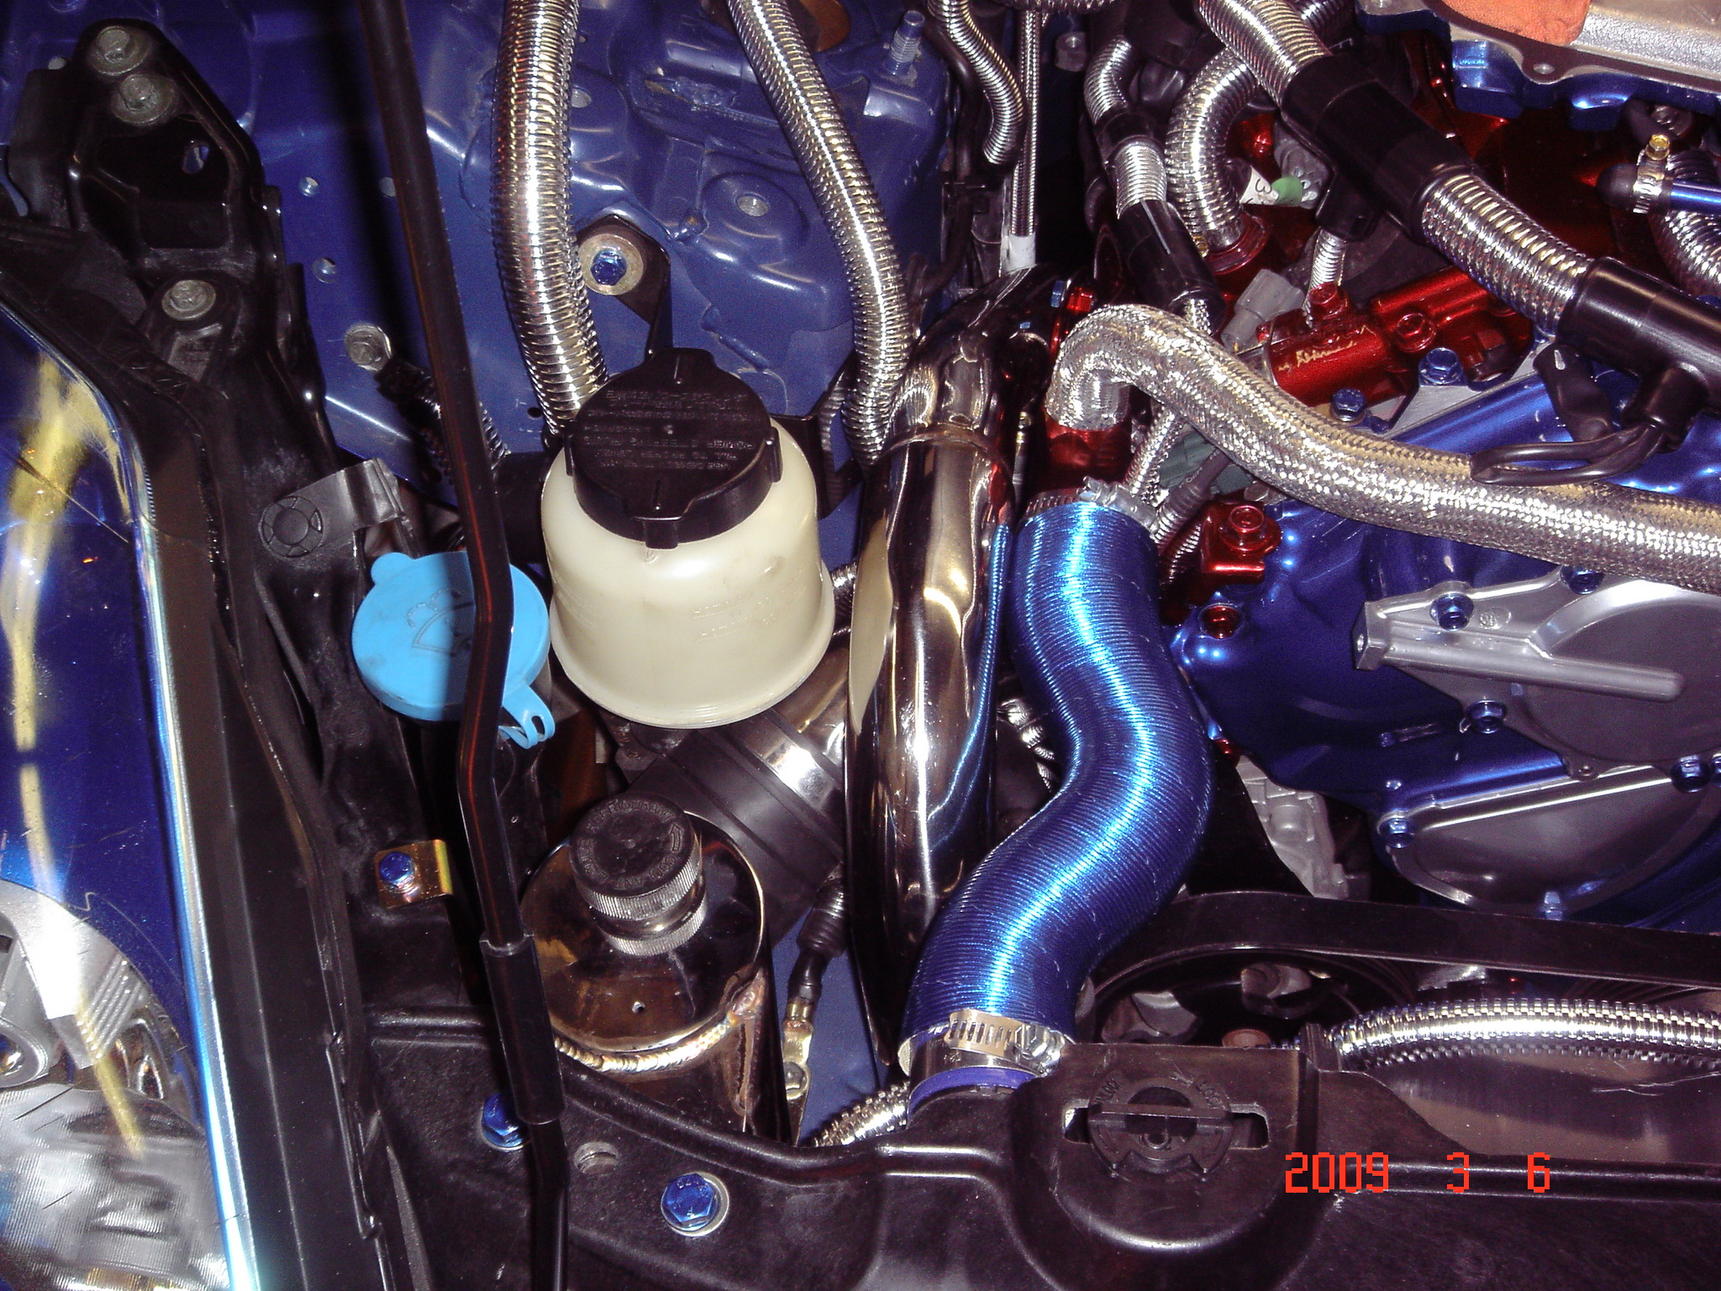
A couple of random shots of the motor fully installed and the plenum finally on and hoses hooked up.

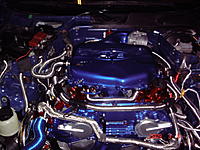
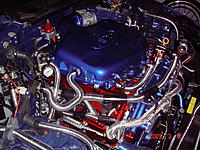
I just realized that I don't have a pic since the intake was installed - coming soon.
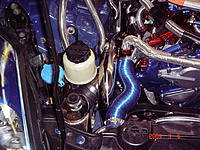
Here is a pic of the new APS coolant overflow reservoir.
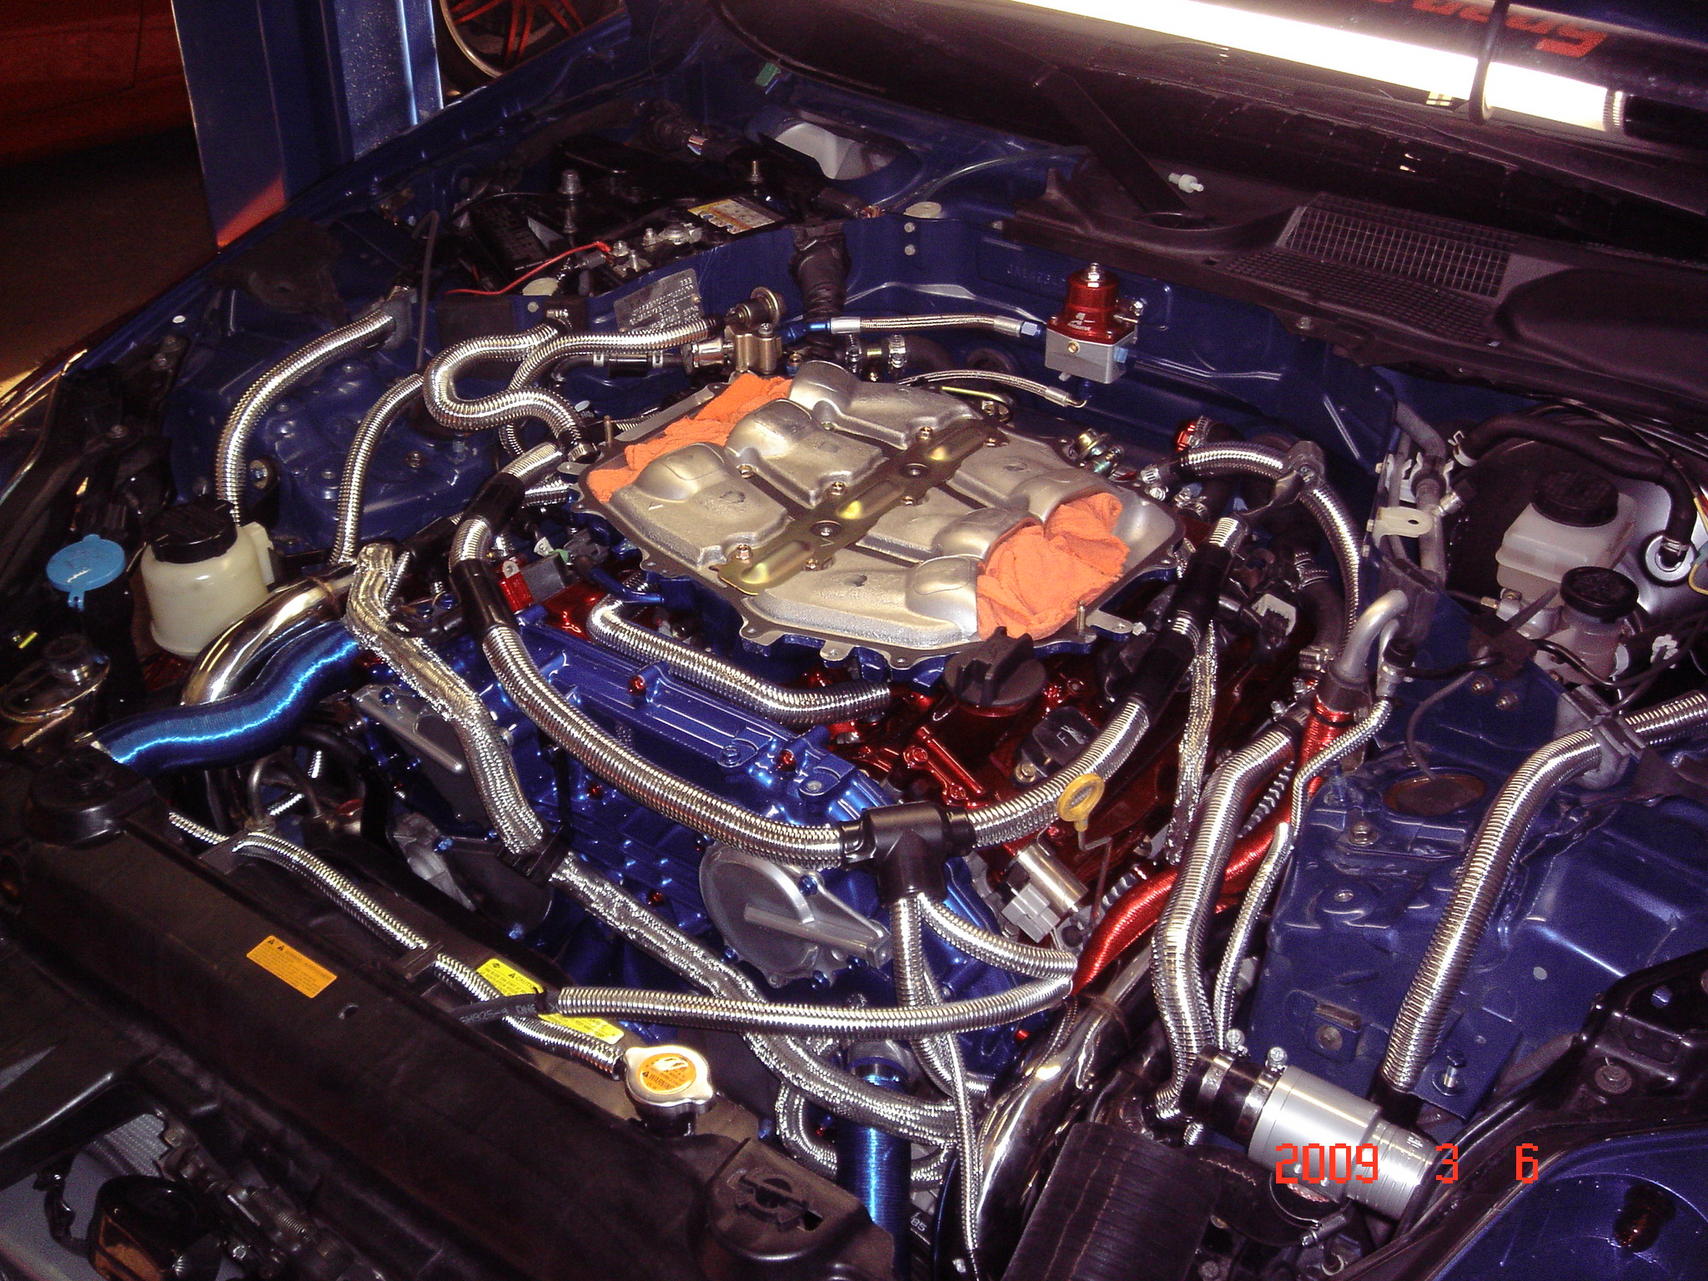

I just realized that I don't have a pic since the intake was installed - coming soon.
Here is a pic of the new APS coolant overflow reservoir.
 03-08-2009, 12:10 PM
#555
Registered User
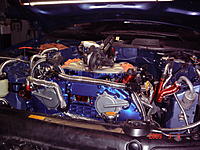
The engine bay looks great with all the powercoating and braided hoses. I will admit I wasn't sure about the color scheme at first, I thought keeping it to blue and chrome would look best. After seeing it put together I must say I like it, the red sets it off nicely.
03-08-2009, 12:13 PM
#556
Saturday was the day we planned to start the motor for the first time. We were waiting on Dave to come up from F:T to reflash the stock ECU and install the Vi-PEC. It turns out there is an issue with the drive-by-wire system that needs to be sorted out on the Vi-PEC and the rep Dave deals with is out of town till Monday. We decided to get the car flashed and started so we can check for leaks and issues prior to the Vi-PEC installation. Here is where the day begins to fail.
Attempt to mount the plenum and the existing vacuum connection hits the fuel return setup - plug hole and redrill new vacuum hole. FAIL.
Attempt to mount the strut bar, get it all bolted down and realize we mounted it with the allen heads on the bolts facing back, not forward like they should. Remove and re-install the strut bar. FAIL.
Confirm that the Ingalls "Stiffy" dampner will not work with the APS strut bar after having it powder coated. For sale now - FAIL.
Swap out the washer fluid reservoir for a smaller unit and after installing it realizing that the pump that is installed is specific to the rear wiper unit (I did this). Remove everything and swap pumps, scraping a bunch of the paint off the new reservoir in the process. FAIL.
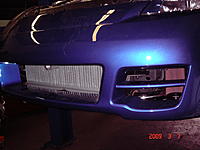
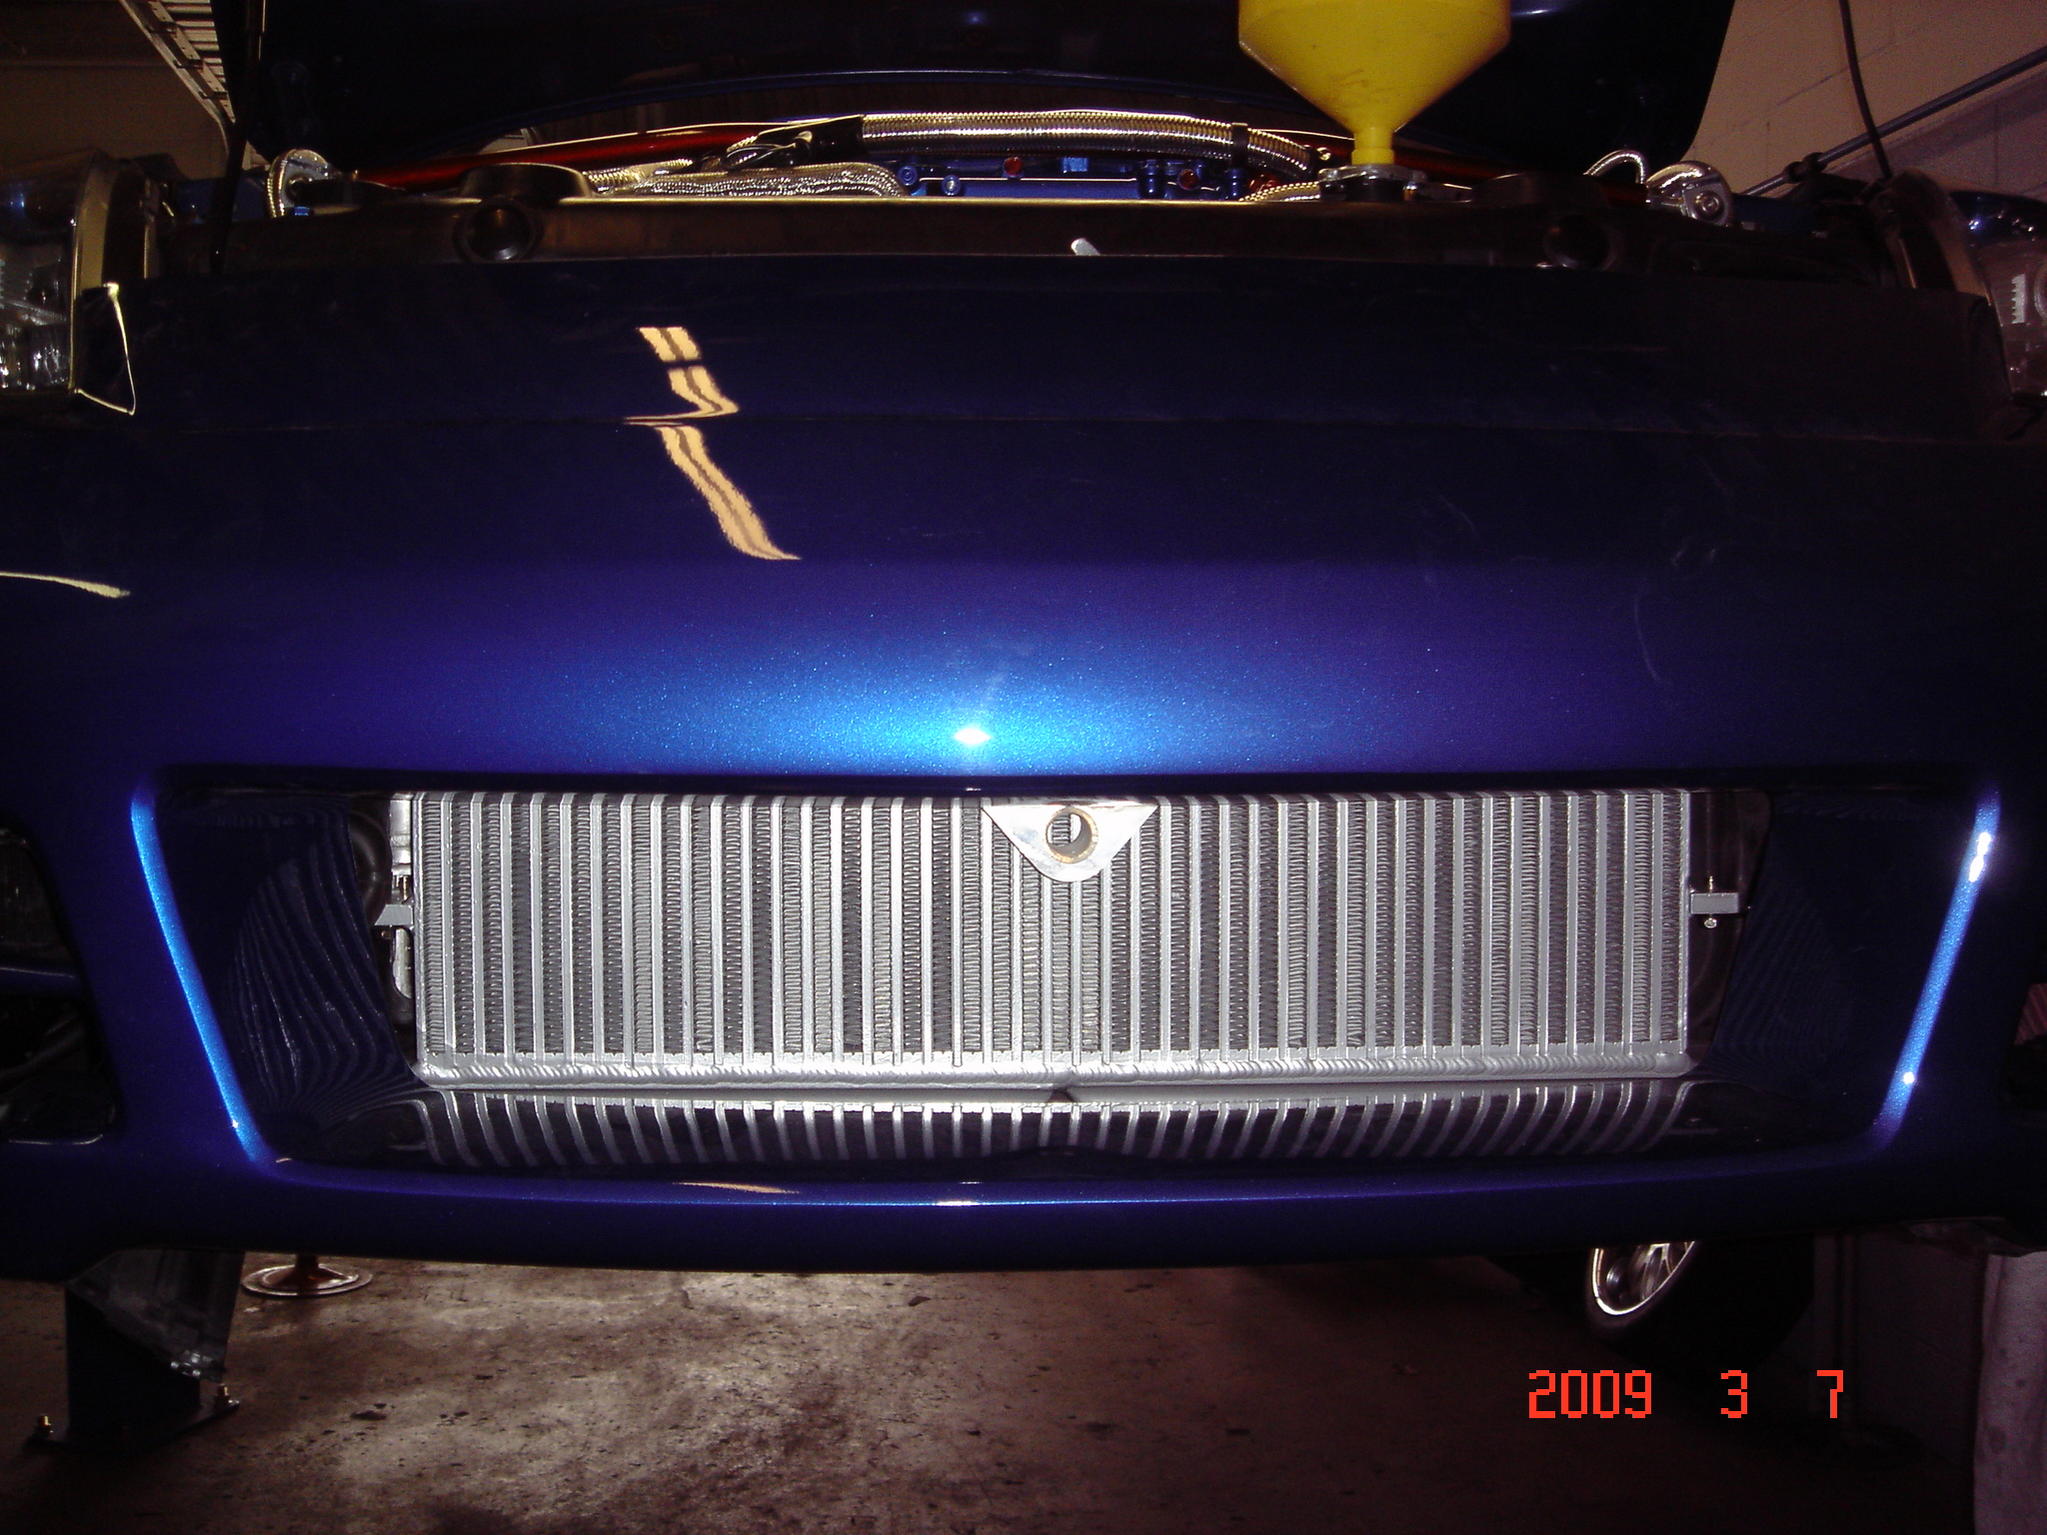
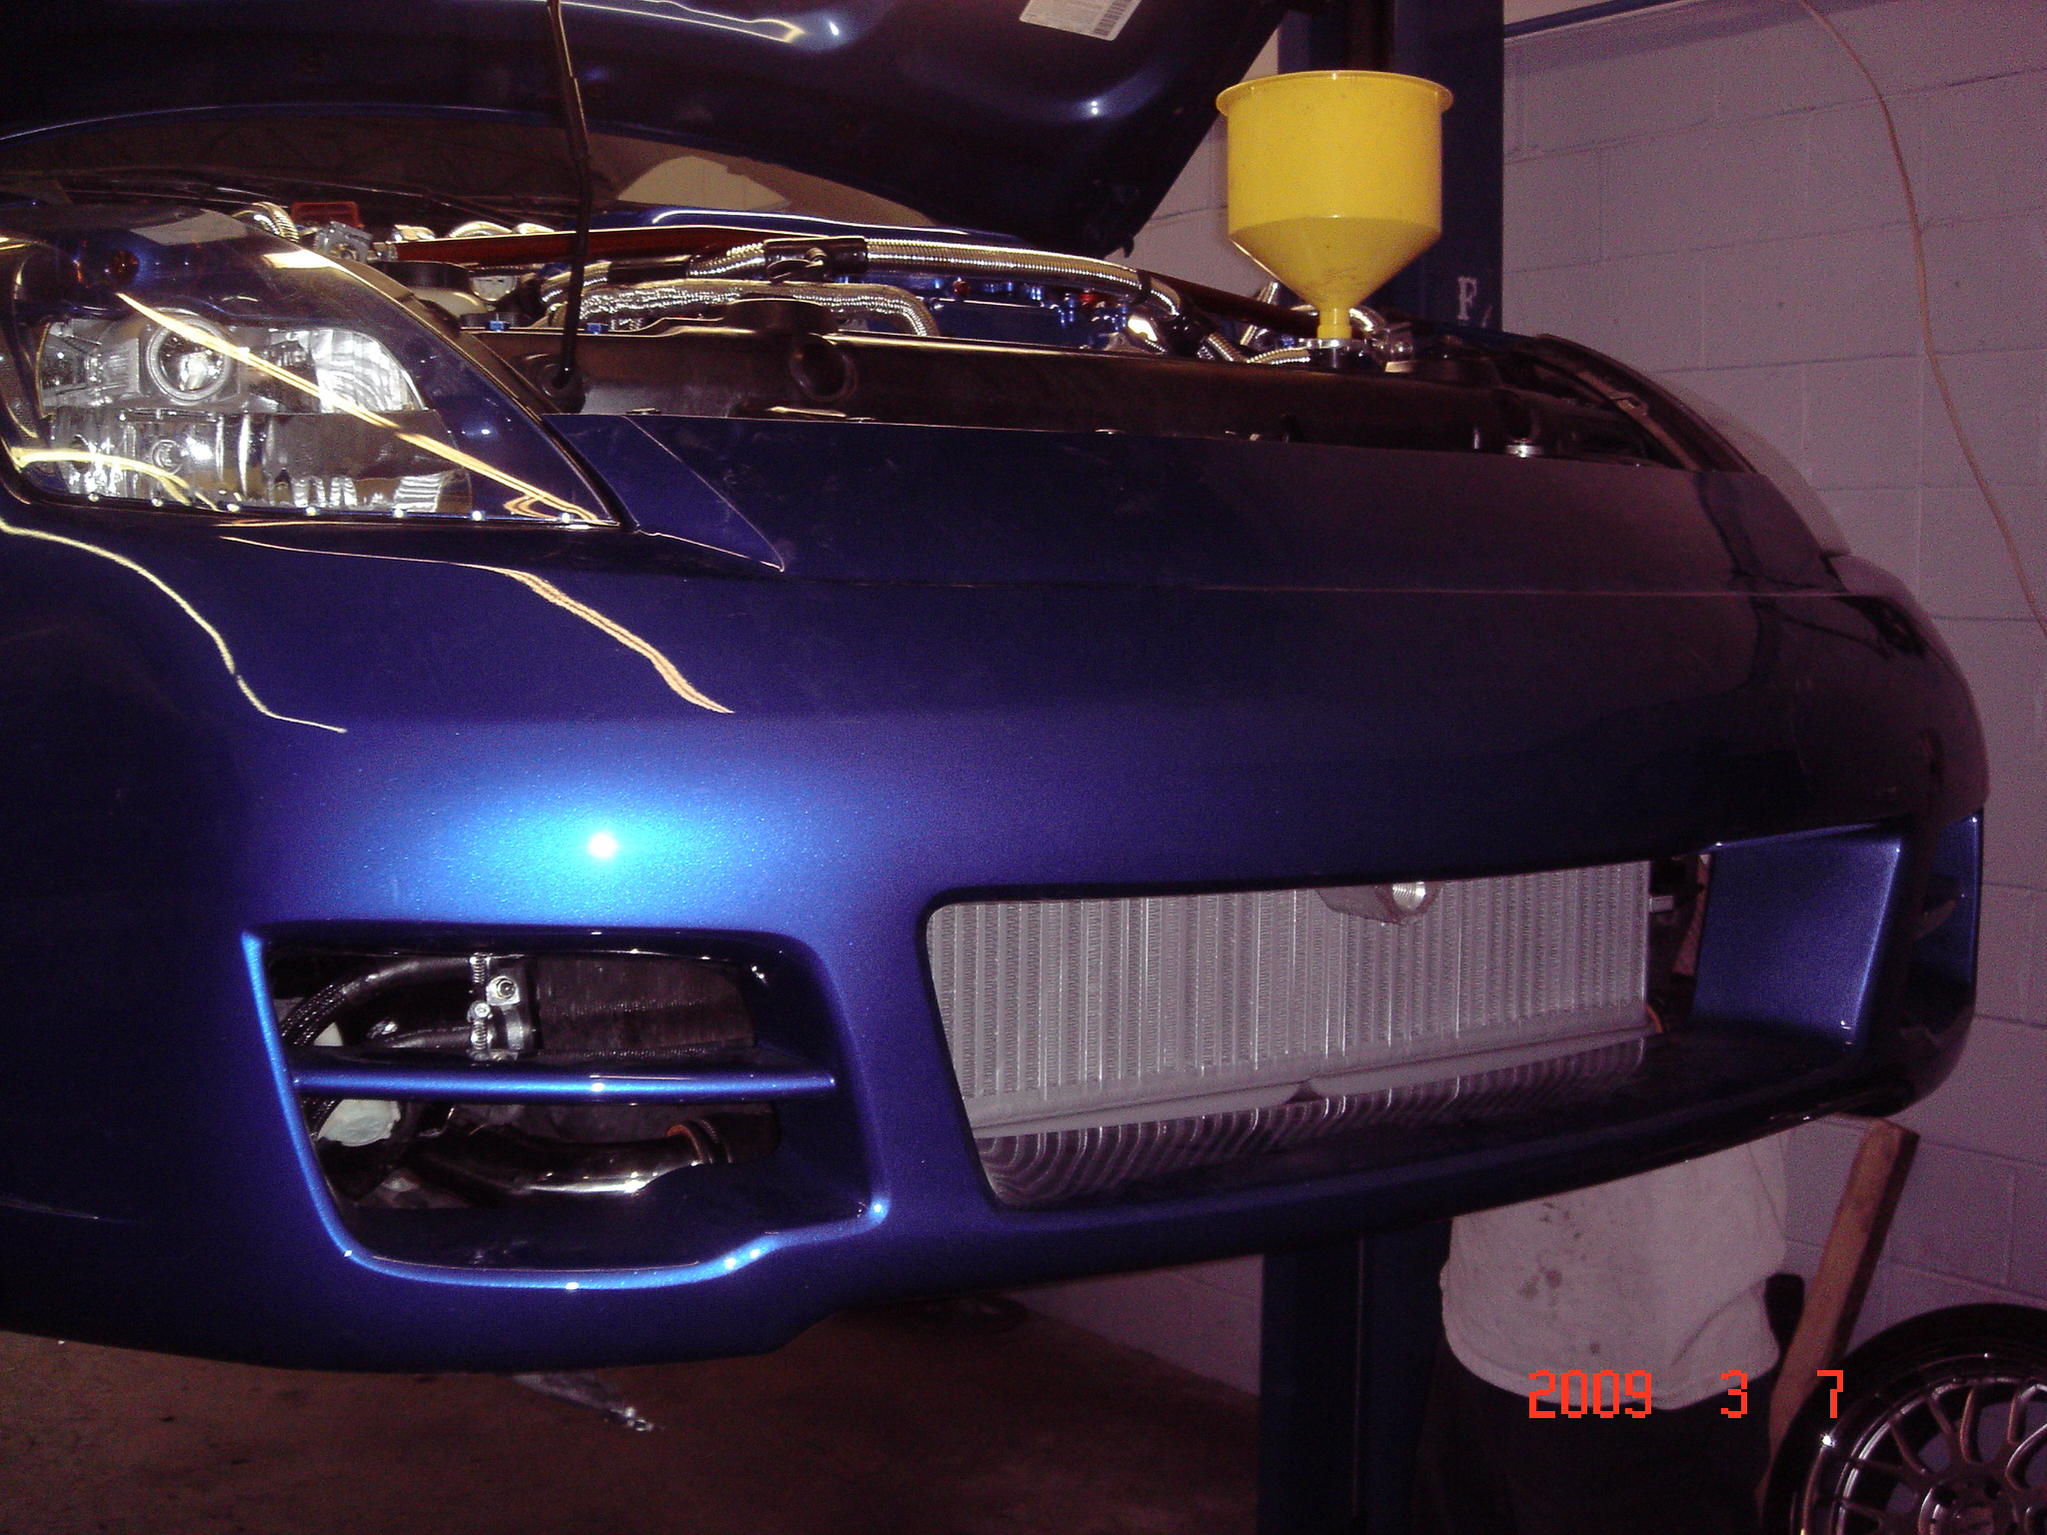
Attempt to mount the new front bumper and find out the holes for the side mounts to attach it to the fender are drilled too small. Remove bumper and re-drill holes (one of my friends told me they were too small when we test fit it and I ignored him). FAIL.
Put the new clear side markers in the new front fascia and find out that there is not enough material to drill holes to press the mounting tabs through so the markers sit flush. Spend an hour trying 3 different solutions to the problem before Frank fabs up a tie down bracket that holds everything in place. FAIL.
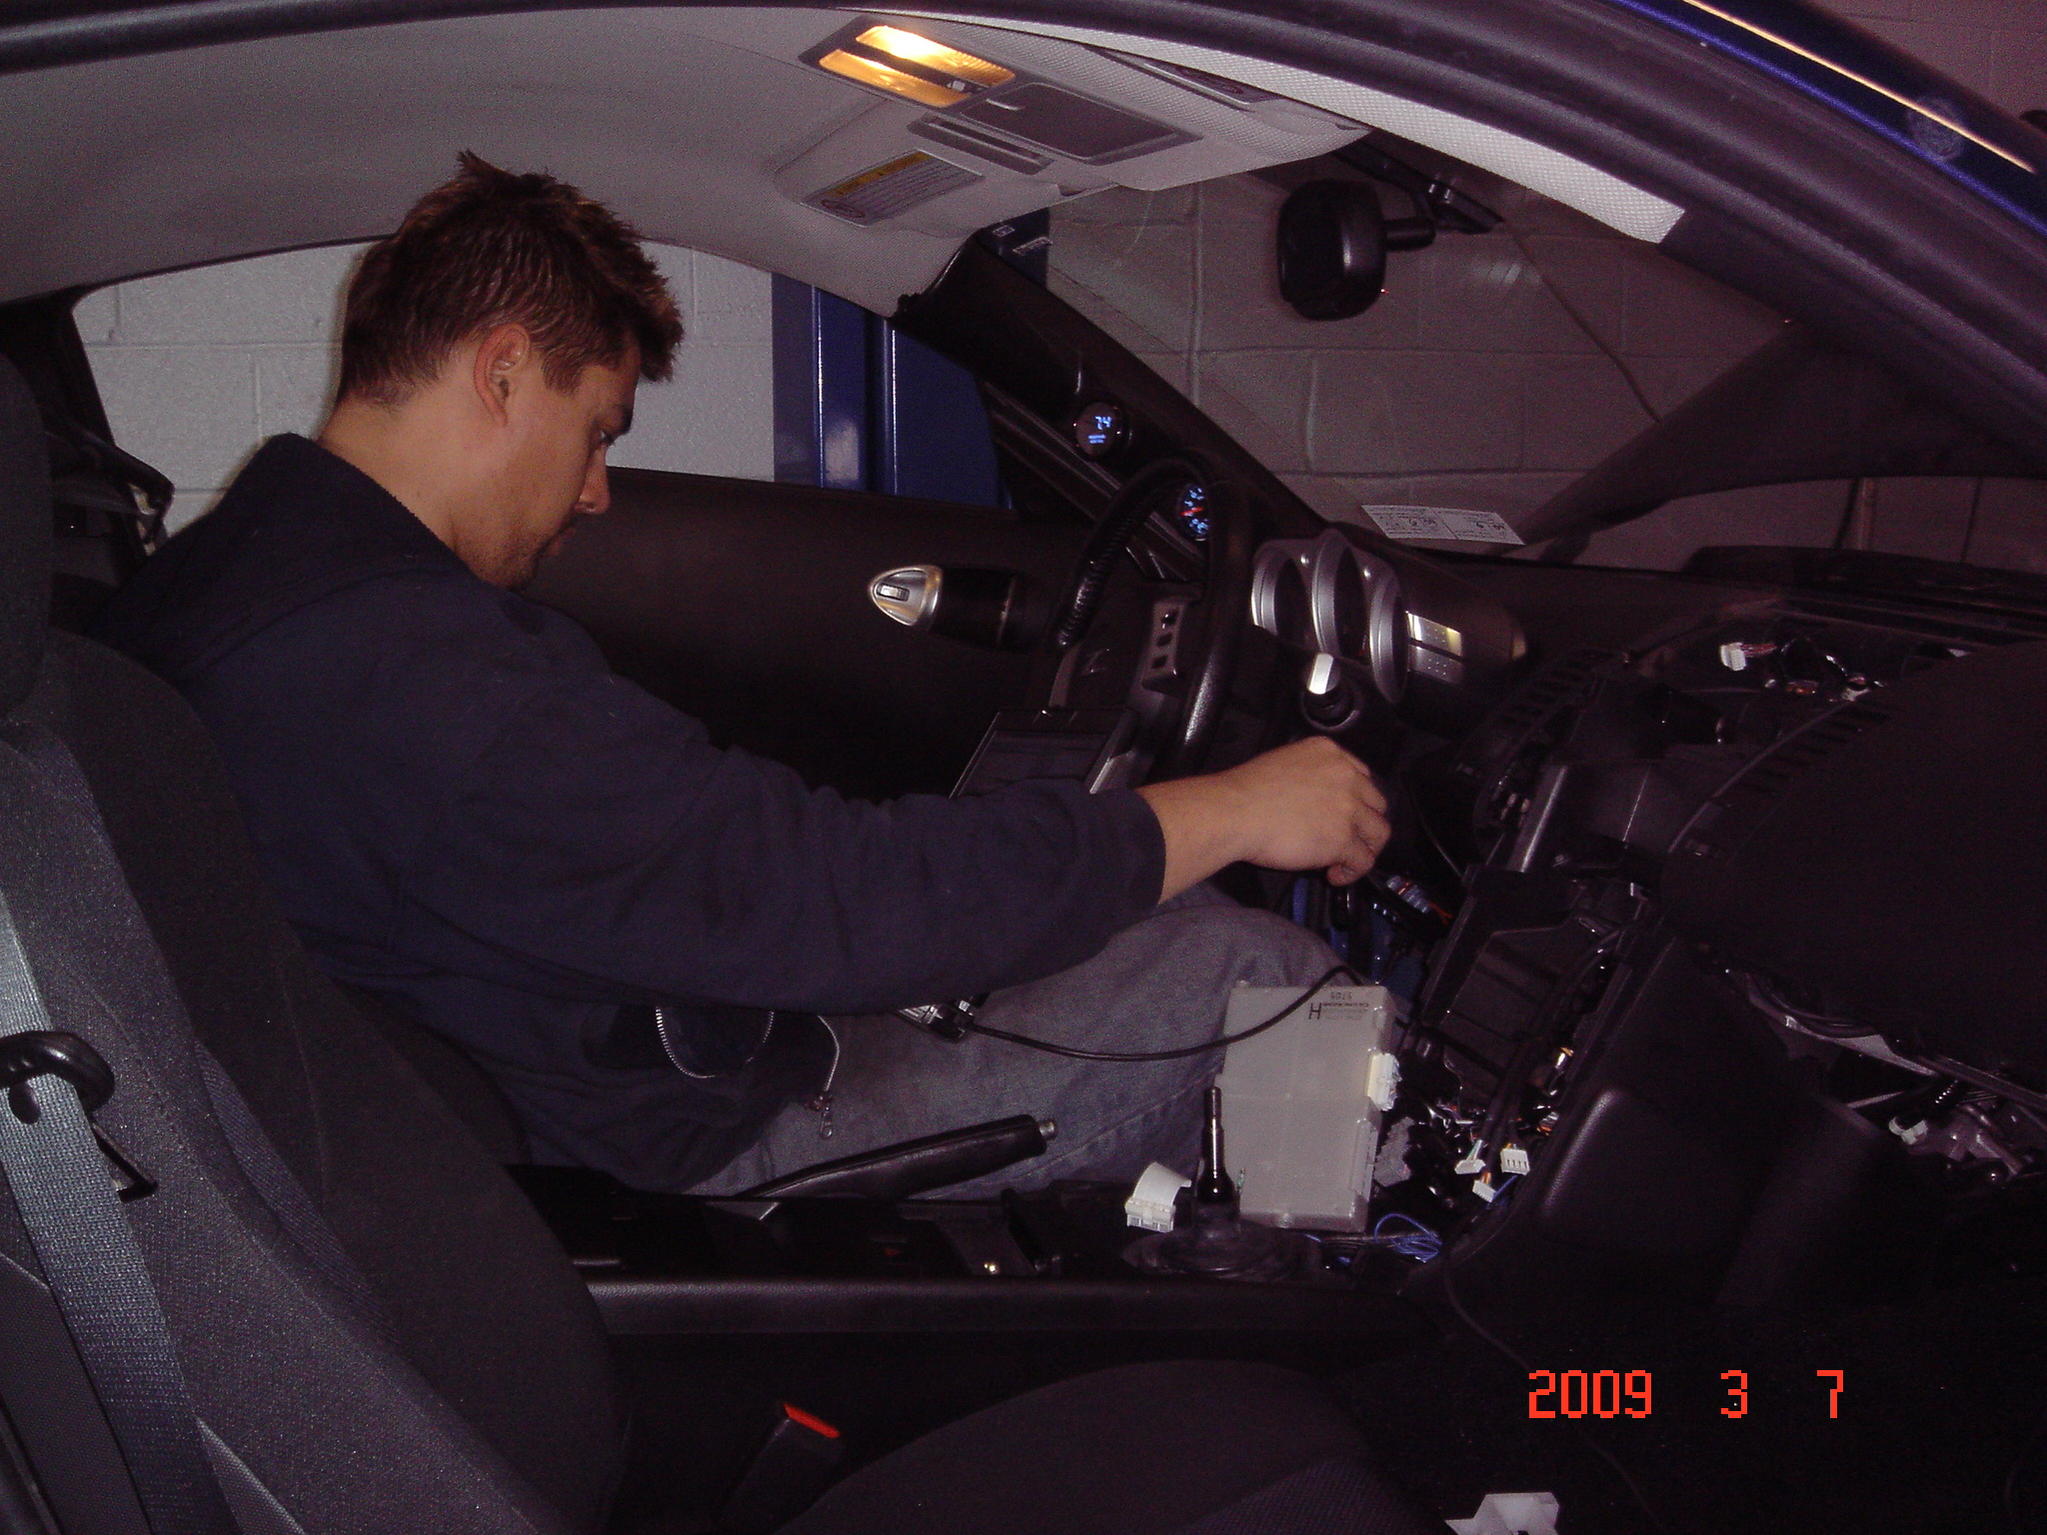
Install the center console only to find out that I forgot to push the tabs in at the top so there is a 1/4" gap that you can see through the windsheild. Remove and re-install the console. FAIL.
Attempt to finish the meth install with the new nylon line I picked up. It's the wrong size..... of course. FAIL.
The new front fascia is such a tight fit between the headlights that it cracks the paint on the inside corners by the lights and will need to be repainted when the big flakes fall off - AWESOME!! FAIL.
A few of pics of the new front:

** edit - Just realized you can see the bright white pump I had to swap out in the second pic.
Attempt to mount the plenum and the existing vacuum connection hits the fuel return setup - plug hole and redrill new vacuum hole. FAIL.
Attempt to mount the strut bar, get it all bolted down and realize we mounted it with the allen heads on the bolts facing back, not forward like they should. Remove and re-install the strut bar. FAIL.
Confirm that the Ingalls "Stiffy" dampner will not work with the APS strut bar after having it powder coated. For sale now - FAIL.
Swap out the washer fluid reservoir for a smaller unit and after installing it realizing that the pump that is installed is specific to the rear wiper unit (I did this). Remove everything and swap pumps, scraping a bunch of the paint off the new reservoir in the process. FAIL.
Attempt to mount the new front bumper and find out the holes for the side mounts to attach it to the fender are drilled too small. Remove bumper and re-drill holes (one of my friends told me they were too small when we test fit it and I ignored him). FAIL.
Put the new clear side markers in the new front fascia and find out that there is not enough material to drill holes to press the mounting tabs through so the markers sit flush. Spend an hour trying 3 different solutions to the problem before Frank fabs up a tie down bracket that holds everything in place. FAIL.
Install the center console only to find out that I forgot to push the tabs in at the top so there is a 1/4" gap that you can see through the windsheild. Remove and re-install the console. FAIL.
Attempt to finish the meth install with the new nylon line I picked up. It's the wrong size..... of course. FAIL.
The new front fascia is such a tight fit between the headlights that it cracks the paint on the inside corners by the lights and will need to be repainted when the big flakes fall off - AWESOME!! FAIL.
A few of pics of the new front:

** edit - Just realized you can see the bright white pump I had to swap out in the second pic.
Last edited by Cass007; 03-08-2009 at 12:15 PM.
03-08-2009, 12:42 PM
#557
Dave shows up and gets the reflash done so we can start the car for the first time. I am so nervous that I just sit there and watch him and Dave checking things prior to startup.
When Dave tries to turn it over it just cranks and then sputters for a minute and then dies. After several more attempts the car finally starts and runs fairly smooth, but has a somewhat loopy idle that is around 1100rpm.
I start freaking out a bit when the exhaust smokes a bit and I can see smoke from the motor as well. Frank tells me this is normal and it should subside as things break in, Dave assures me that everything is normal as well. Frank purges the cooling system and the smoking stops and all seems fine. Dave turns the car on and off a few times and every time on re-start the car is very difficult to start. It takes a lot of cranking and pumping the pedal to get it to start and I was thinking that the up-rev reflash was supposed to eliminate this.
After tweaking things for a while, Dave asks Frank to do a leakdown and compression check. Leakdown is good - 8% or so on cylinder 1 and 3% or so on all the others. The compression shows low numbers across all cylinders - 115 all the way around. Apparently 125 is the low end for Nissan tollerance and 150 is good (I don't even know the unit of measure). I am not sure if this is an issue or not at this point as the piston rings may not have seated fully in the 15 min or so that the car was running - I also have no idea what this means as it is above my mechanical knowledge. I am wondering if the cams may be more aggressive than previously thought because we never got a solid answer on what they were and the loopy idle, we assumed they were Tomei 268s, but can't be sure.
Jay'Z, if you read this can you tell me how much vacuum your car pulls at idle, since we have similar mods?
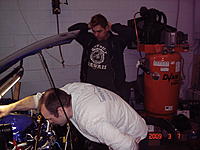
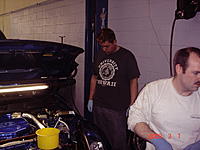
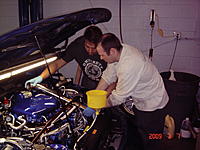
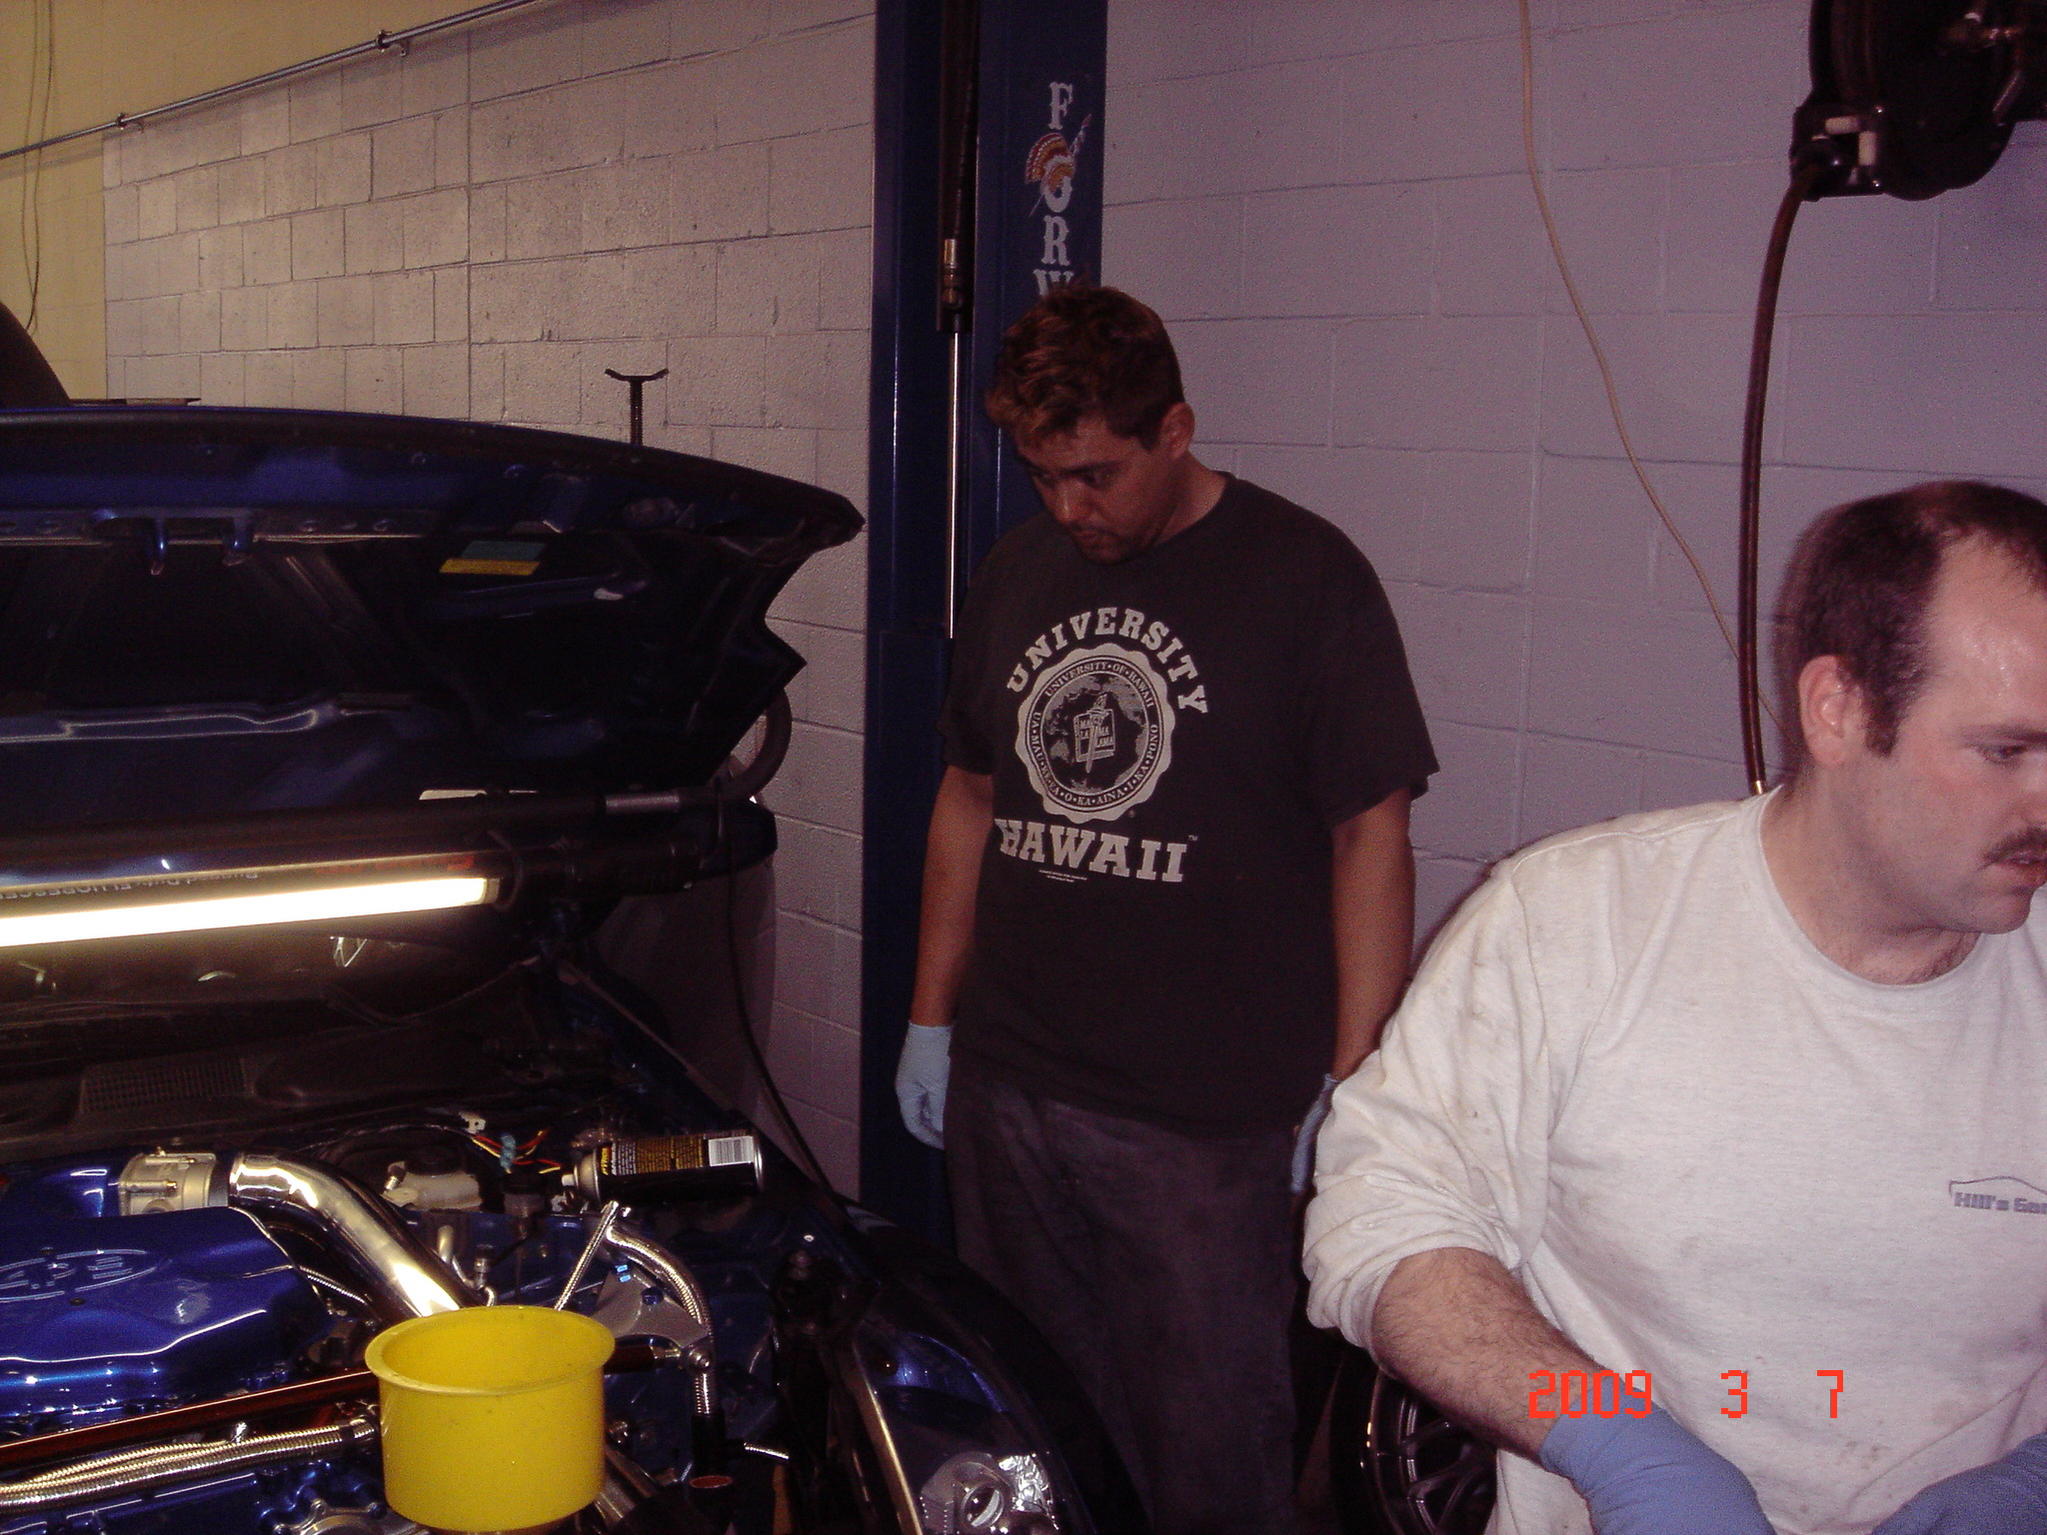
The car runs smooth other than the start-up issue and makes some cool new noises, like the dual stage BOV and the open exhaust where you can hear the wastegates dump when coming off throttle. I have a vid I will post if I can figure out how to do it, not sure on the audio quality though. Here are a couple pics of my dream team in action - OJ had Shapiro and Cochran, I have Hill and Shiroma .
.
When Dave tries to turn it over it just cranks and then sputters for a minute and then dies. After several more attempts the car finally starts and runs fairly smooth, but has a somewhat loopy idle that is around 1100rpm.
I start freaking out a bit when the exhaust smokes a bit and I can see smoke from the motor as well. Frank tells me this is normal and it should subside as things break in, Dave assures me that everything is normal as well. Frank purges the cooling system and the smoking stops and all seems fine. Dave turns the car on and off a few times and every time on re-start the car is very difficult to start. It takes a lot of cranking and pumping the pedal to get it to start and I was thinking that the up-rev reflash was supposed to eliminate this.
After tweaking things for a while, Dave asks Frank to do a leakdown and compression check. Leakdown is good - 8% or so on cylinder 1 and 3% or so on all the others. The compression shows low numbers across all cylinders - 115 all the way around. Apparently 125 is the low end for Nissan tollerance and 150 is good (I don't even know the unit of measure). I am not sure if this is an issue or not at this point as the piston rings may not have seated fully in the 15 min or so that the car was running - I also have no idea what this means as it is above my mechanical knowledge. I am wondering if the cams may be more aggressive than previously thought because we never got a solid answer on what they were and the loopy idle, we assumed they were Tomei 268s, but can't be sure.
Jay'Z, if you read this can you tell me how much vacuum your car pulls at idle, since we have similar mods?
The car runs smooth other than the start-up issue and makes some cool new noises, like the dual stage BOV and the open exhaust where you can hear the wastegates dump when coming off throttle. I have a vid I will post if I can figure out how to do it, not sure on the audio quality though. Here are a couple pics of my dream team in action - OJ had Shapiro and Cochran, I have Hill and Shiroma
.


 .
03-08-2009, 01:12 PM
.
03-08-2009, 01:12 PM
#560
Registered User
iTrader: (11)
Join Date: May 2005
Location: New Jersey
Posts: 1,301
Likes: 0
Received 0 Likes
on
0 Posts
I wouldn't mention this cause the shop should know this.
Since its a fresh motor he did pull the fuel fuse out
so oil can circulate through the motor before cranking it over?
Also again since this is a reassembly there probably was no fuel in the lines.
I would have turned on the ignition 2-3 times to get the fuel circulating through
the fuel lines before cranking it over.
The smoke and burned oil smell is normal might stick around for a few days.
As far as the compression findings don't know what to say there but it might
just as you stated and they just need time to seat correctly.
The fuel system your using I see a Aeromotive Fuel Regulator and return system but no rails. Is that the new CJM basic fuel return system?
Apart from that everything looks great