
My version of a 350Z single turbo kit


Thread Starter
Registered User
Joined: Jun 2011
Posts: 56
Likes: 0
From: Portland, OR
Hey there guys, I'm working on a single turbo kit for my 350Z and wanted to show some progress. I wanted to build a kit that was simple yet effective making it user friendly and can be installed with just regular tools. You will see that the kit was built and installed on jack stands, no pulling motor needed. I did tons of research before even attempting to design and have came up with a kit that fits my needs perfectly. Here are a few key points I wanted to incorporate when building the kit.
- Must use T4 flange
- Capable of making 450whp with base turbo kit
- Upgradable to twin turbo
- Keep heat to a minimal (deathly afraid of engine fires)
- Simplify kit without sacraficing quality and function
Talking to techs at Horsepower Freaks and Precision Turbo, they suggested using a PT6766 CEA. It is a 935hp capable turbo that uses similar size housings as GT35R. I wanted to make sure the kit can make 450hp and still have room to play so the 6766 should be plenty for now. It's a small turbo that packs a big punch.
After seeing some of the front mounted turbo setups, I chose to go towards rear due to my fear of engine fire. I have seen turbos and piping get red hot on dyno pulls. It scares the hell out of me to think of something that creates that much heat stuffed into such a tight area.
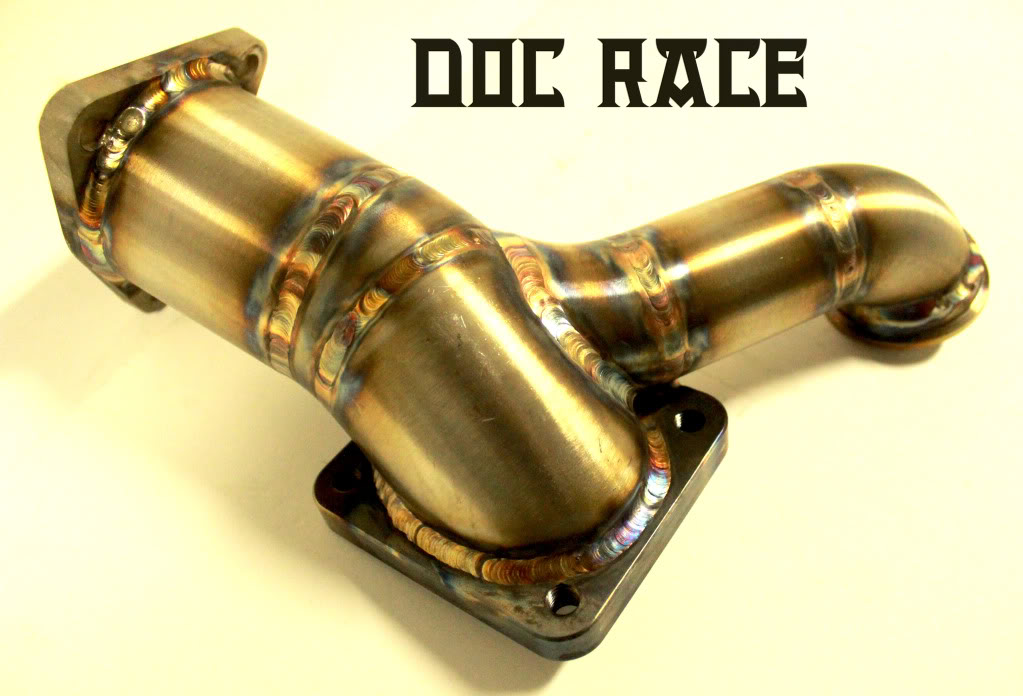
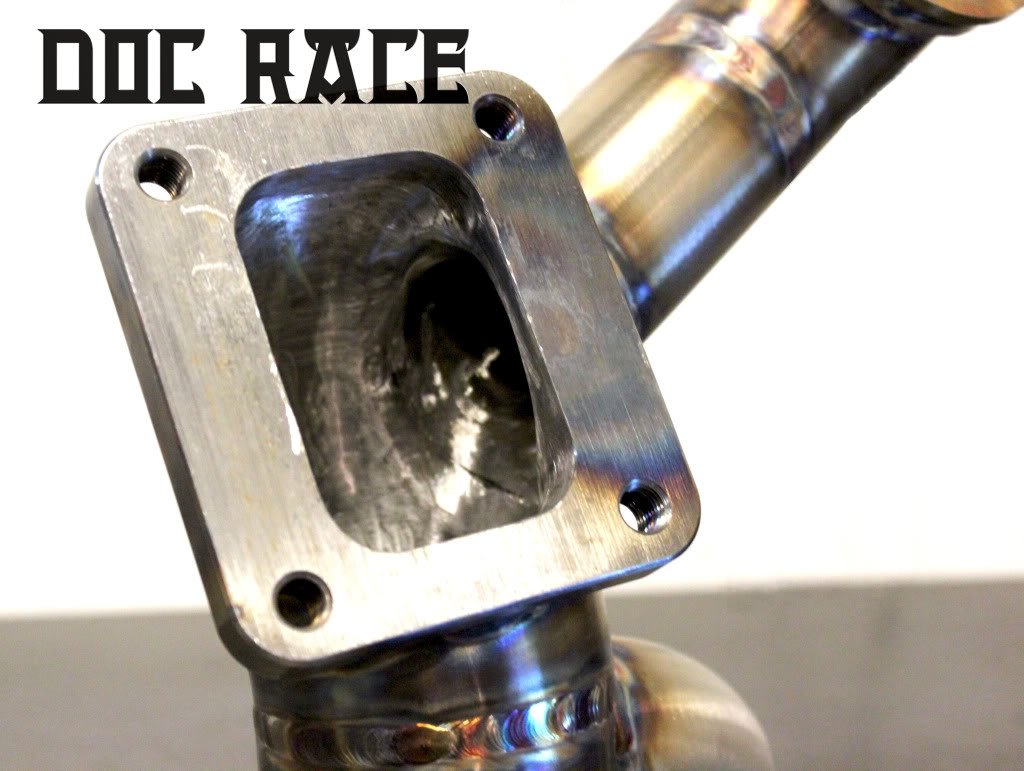
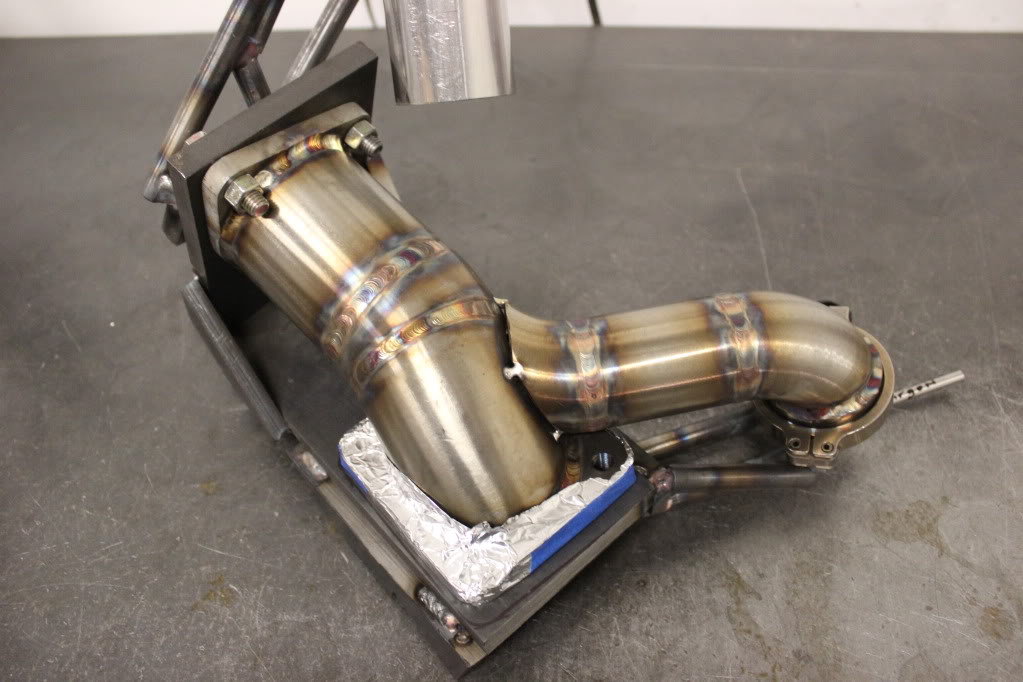
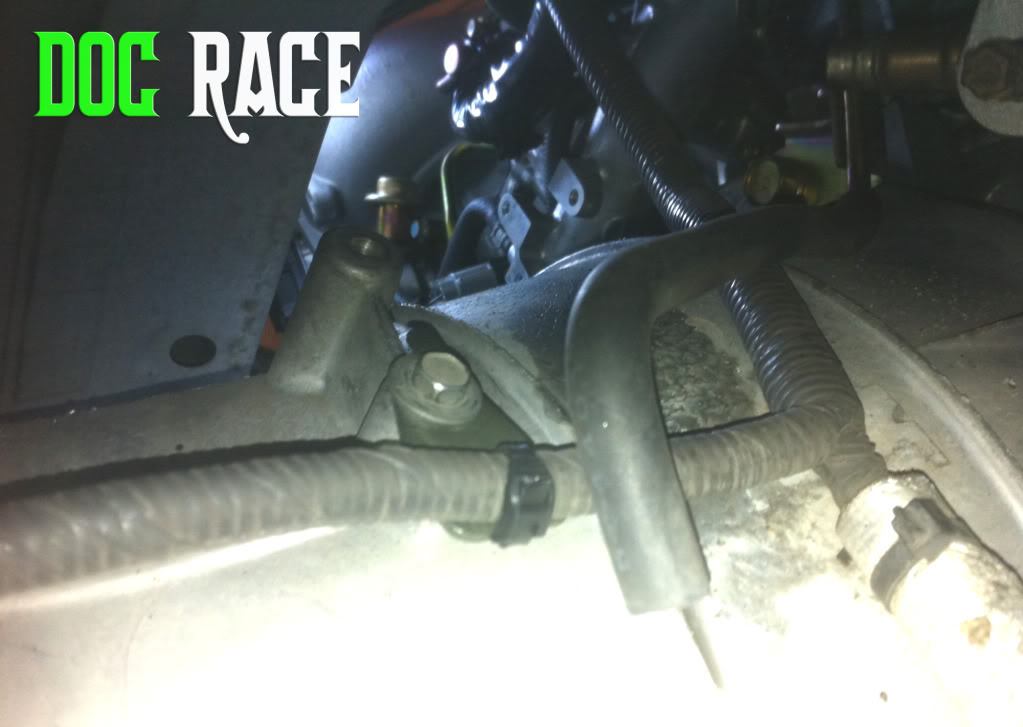
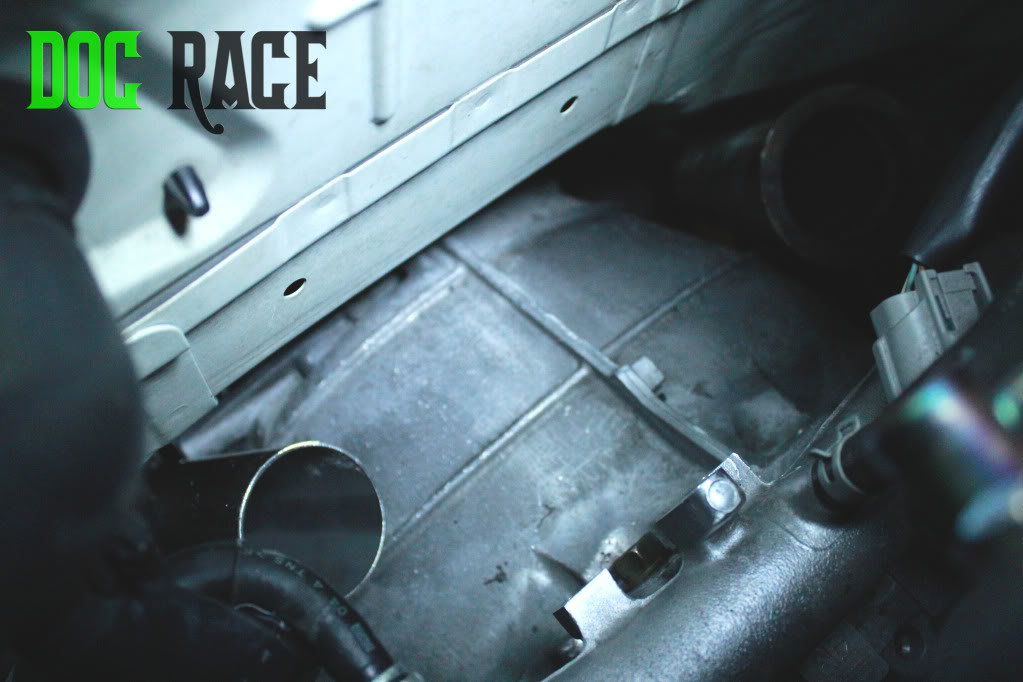
Off to some pics. The main piece connects the left bank header to the turbo, we'll call this the turbo elbow. It also has a v band to connect the right bank exhaust. I wanted to make sure exhaust flow was not comprimized so I did my best to make a T4 exhaust housing work. Turbo placement is not final but it gives me a good starting point. So far I've been daily driving with this exhaust housing on for 3 weeks with absolutely no scratches. I am lowered 1.75" btw.
- Must use T4 flange
- Capable of making 450whp with base turbo kit
- Upgradable to twin turbo
- Keep heat to a minimal (deathly afraid of engine fires)
- Simplify kit without sacraficing quality and function
Talking to techs at Horsepower Freaks and Precision Turbo, they suggested using a PT6766 CEA. It is a 935hp capable turbo that uses similar size housings as GT35R. I wanted to make sure the kit can make 450hp and still have room to play so the 6766 should be plenty for now. It's a small turbo that packs a big punch.
After seeing some of the front mounted turbo setups, I chose to go towards rear due to my fear of engine fire. I have seen turbos and piping get red hot on dyno pulls. It scares the hell out of me to think of something that creates that much heat stuffed into such a tight area.
Off to some pics. The main piece connects the left bank header to the turbo, we'll call this the turbo elbow. It also has a v band to connect the right bank exhaust. I wanted to make sure exhaust flow was not comprimized so I did my best to make a T4 exhaust housing work. Turbo placement is not final but it gives me a good starting point. So far I've been daily driving with this exhaust housing on for 3 weeks with absolutely no scratches. I am lowered 1.75" btw.

Thread Starter
Registered User
Joined: Jun 2011
Posts: 56
Likes: 0
From: Portland, OR
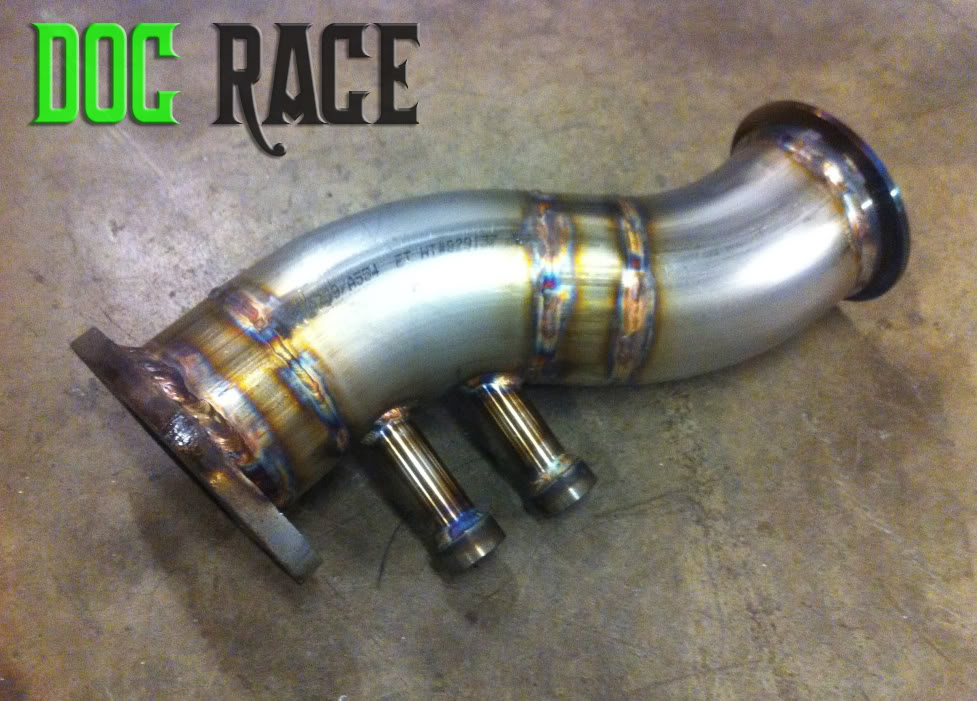
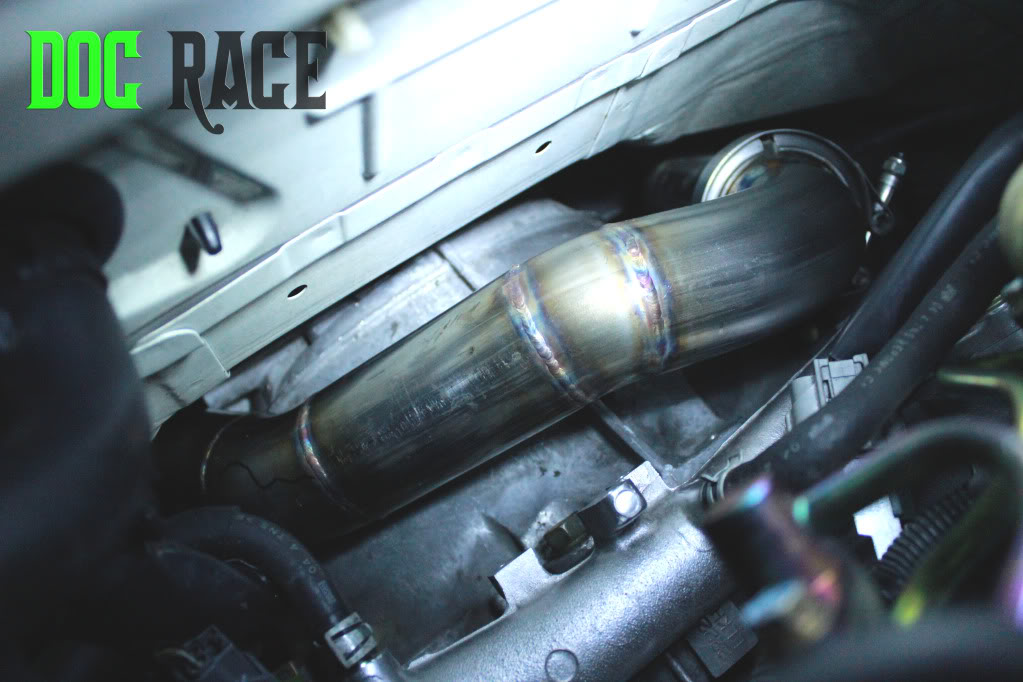
Here are some shots of the downpipe. I figured I would build it with check engine light eliminators in case I wanted to mess with them down the road.
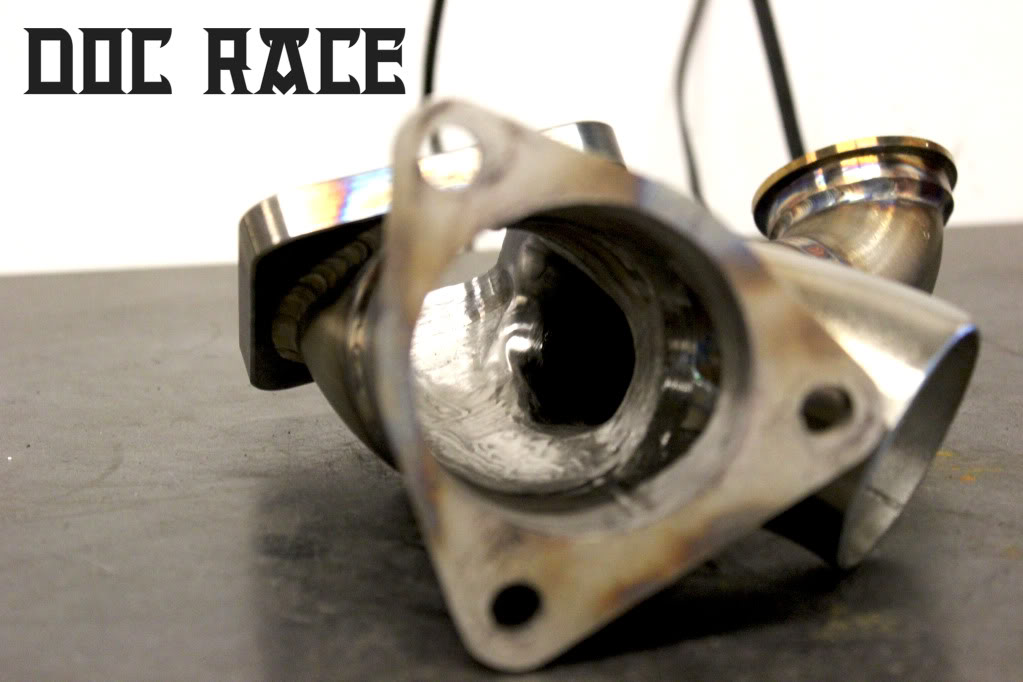
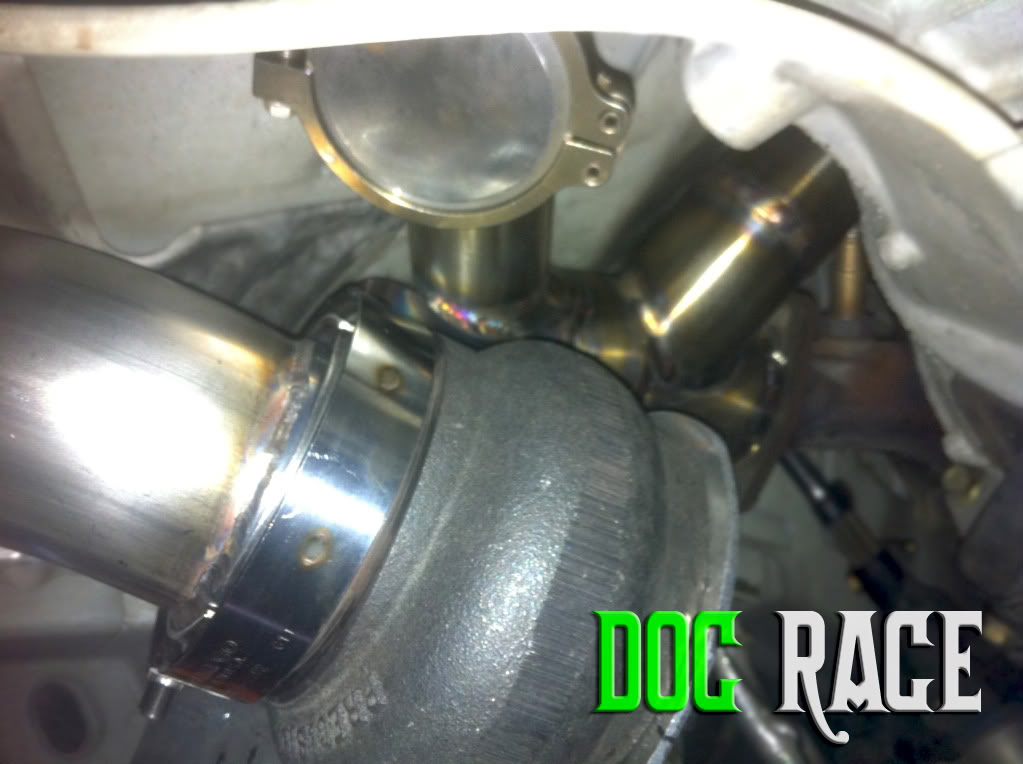
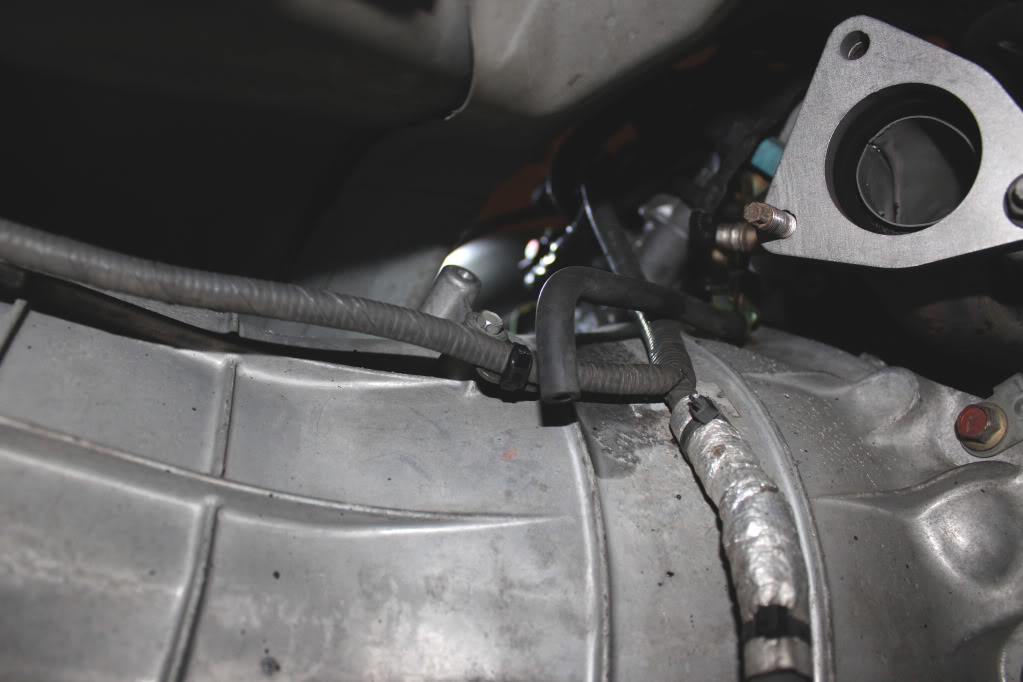
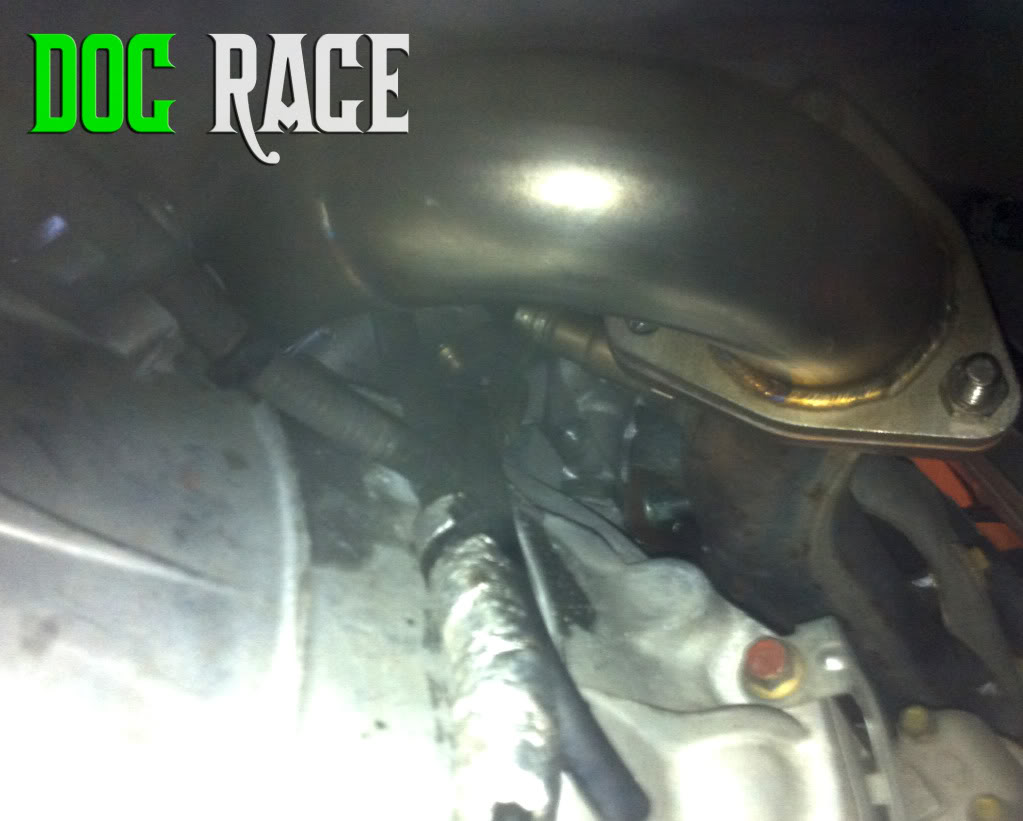
Some shots of the turbo elbow installed with the downpipe. As you can see I capped off the wg and turbo cartridge because this is my daily driver and I have to keep it on the road as I build the kit. With the wastegate so close to the downpipe, it makes doing a dumptube or recirc simple and out of the way.
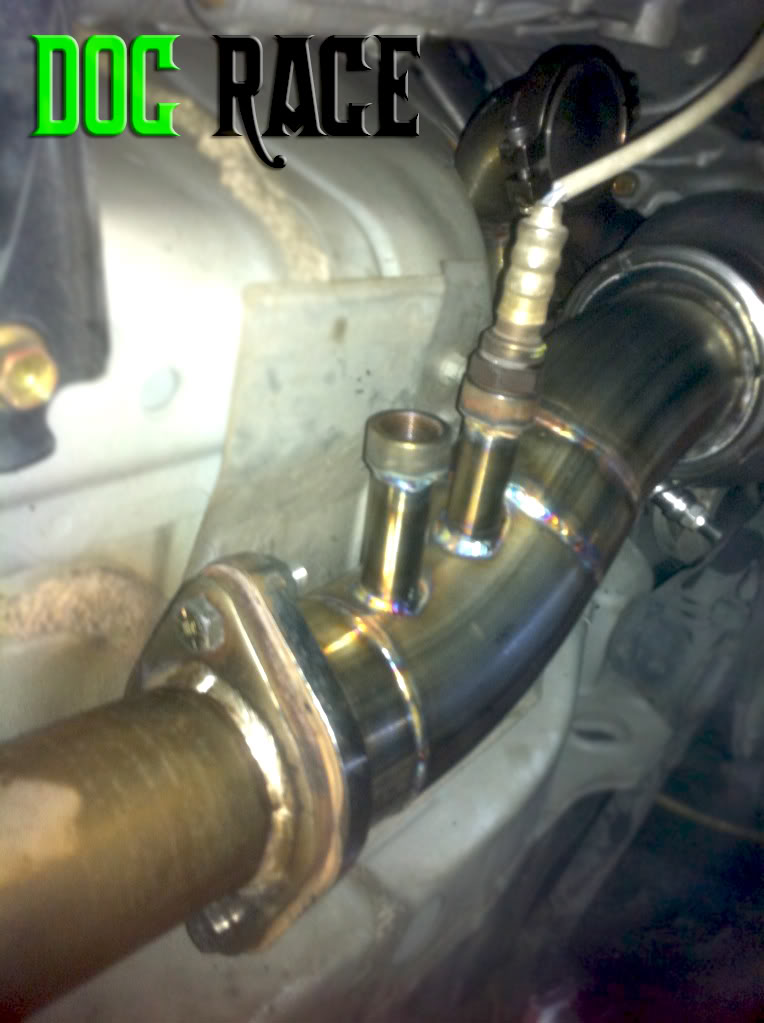
After the elbow and downpipe were done I started on the crossover pipe. I wanted to make sure it flowed enough to make some power so I used 2.25" stainless tubing. Paying close attention to available room and performance, we reworked the wiring harness to give extra room.
This made it possible for a crossover pipe with no extra bends or kinks and it won't melt your wire harness.

Some shots of the turbo elbow installed with the downpipe. As you can see I capped off the wg and turbo cartridge because this is my daily driver and I have to keep it on the road as I build the kit. With the wastegate so close to the downpipe, it makes doing a dumptube or recirc simple and out of the way.
After the elbow and downpipe were done I started on the crossover pipe. I wanted to make sure it flowed enough to make some power so I used 2.25" stainless tubing. Paying close attention to available room and performance, we reworked the wiring harness to give extra room.
This made it possible for a crossover pipe with no extra bends or kinks and it won't melt your wire harness.


Trending Topics


Joined: Feb 2008
Posts: 13,406
Likes: 130
From: MexiCali dodging potholes
From what I've gathered a mid mount turbo like this should be the same for an HR or a DE. The only difference in piping is the intake to intercooler! Everything else is the same!
Op if you can, if I where you I would look into this seeing this setup is less piping and allows for customers to build their own kits!
Only needing the pipes makes Boosting an HR Z sub 5k range! Now for all the users reading this it ain't big power but it's getting pass 300 less of a headache!
If I were stateside I'd be pressing a single turbo setup down someones throat! Only downfall is you can't show it off at a carshow.
2 to 1 GTM intercooler
400-500 turbo size of your liking
Wastegate
2 BOVs
Safe tune
A$$kicking!
Noob FI rant
