
WAY Overly Complicated Intake


Thread Starter
Registered User
iTrader: (2)
Joined: Sep 2011
Posts: 309
Likes: 2
From: Murfreesboro, TN
**After researching here and other 350z sites almost all the intake questions and ideas and didn't seem to find anyone tackle this before. If anyone knows someone who has done something like this below, please shoot me a link so I can see what they did.**
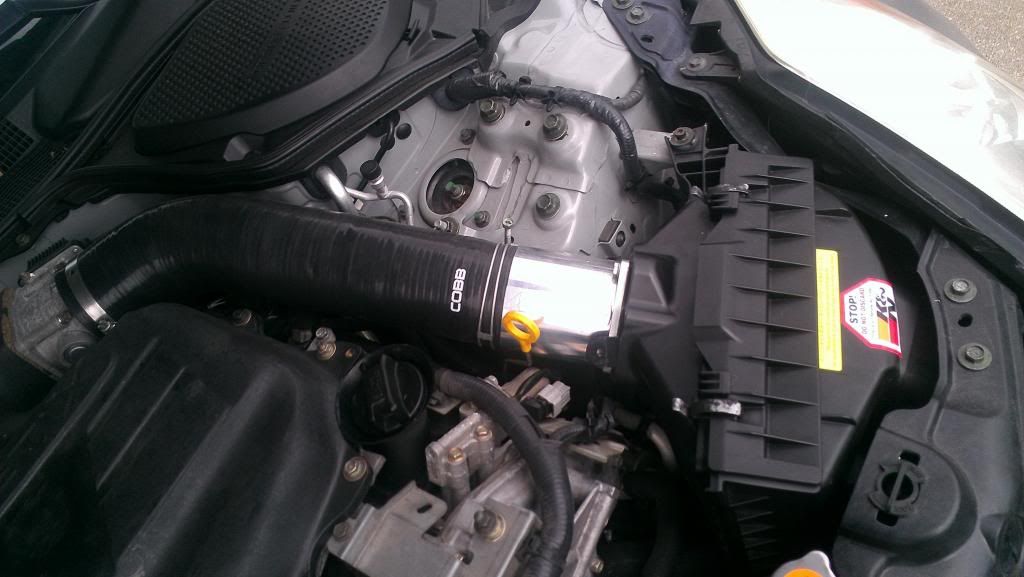
Ok for the DE, "the best" intake mod is '06 air-box with choice of drop-in filter. Why is the '06 the best, because of the velocity stack/venturi ring on the inside. I am currently running the GTM 3" MAF housing and COBB post MAF silicone hose. I believe SAMCO might have a hose now the exact same, because I can't seem to find the COBB hose anymore.
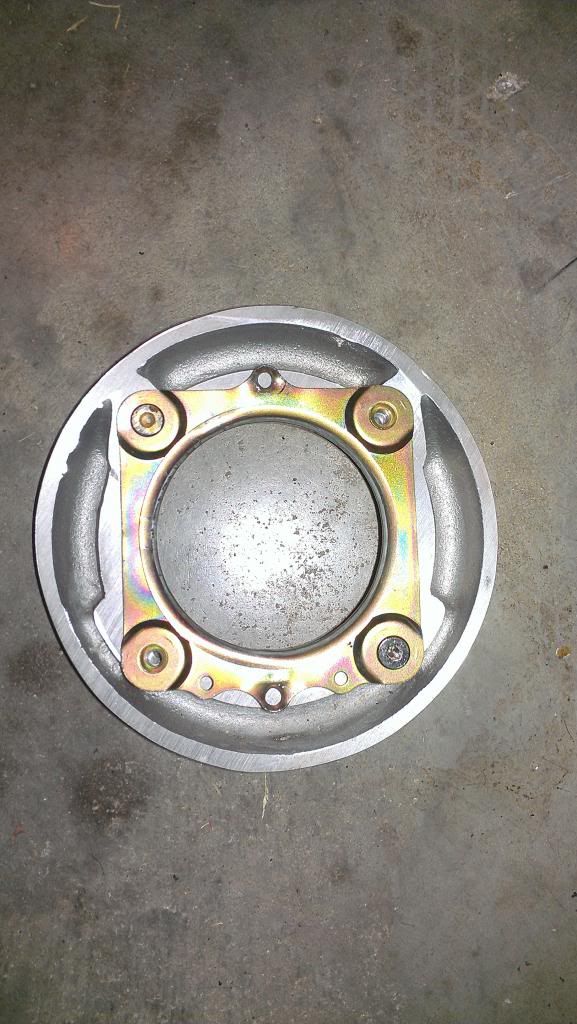
'06 air box velocity stack/venturi ring

The diameter of the air box unfortunately does not exactly line up very well with the 3" housing. So I filed down the plastic around the outlet and smoothed it over to make the transition better. You can see the small lip in the first pic.


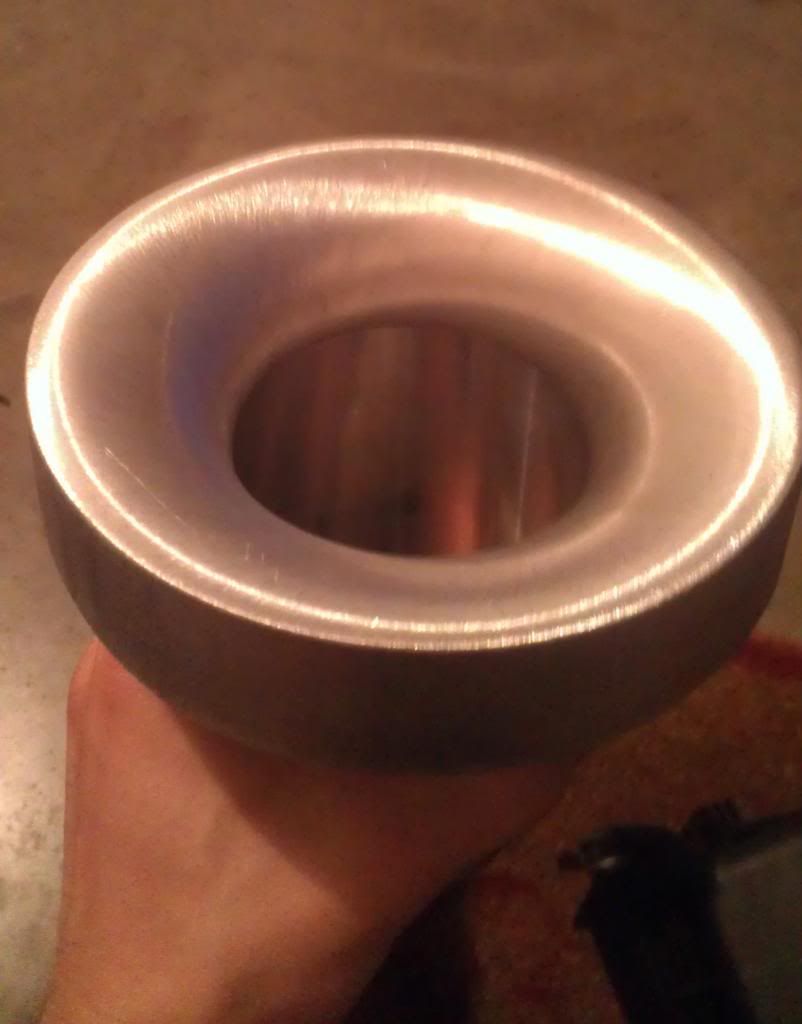
This is where my search began. How do I get the air box and housing match diameters? I can't grind away at the ring because it's barely 1mm thick. So I thought to myself, "self, what is that metal on your old pop-charger?" SUCCESS!!....dam, won't fit. The inner diameter of the ring is basically 75.5mm, because it matches nearly perfect to the 76mm (3") housing.
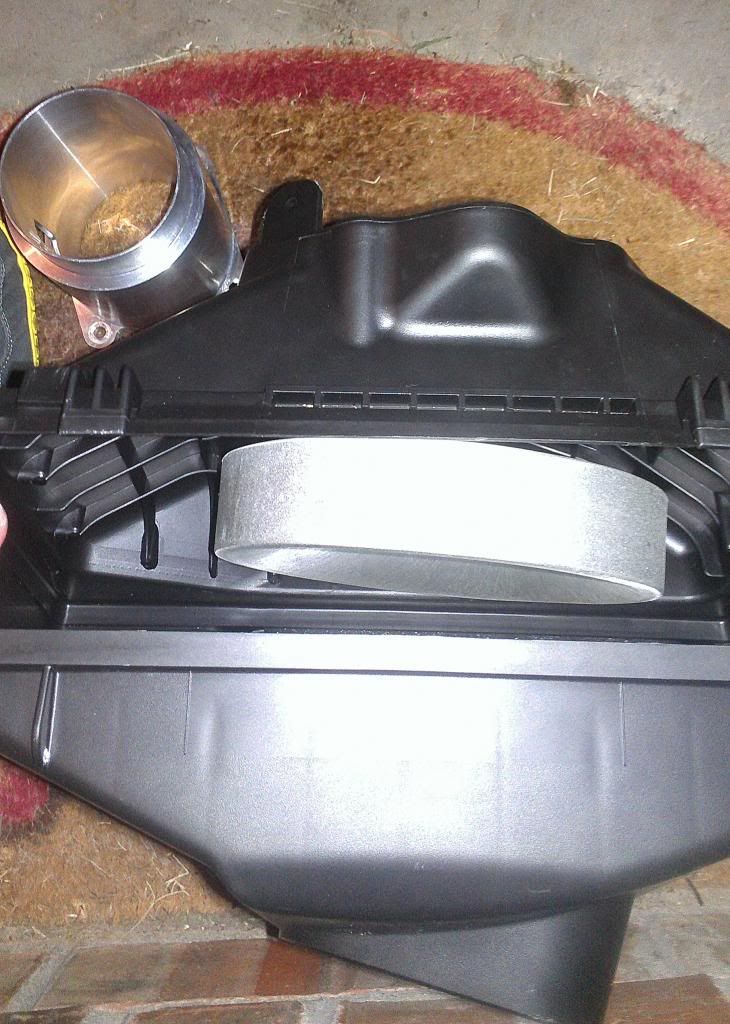

Just for comparison, I ripped out the bracket in my '03 box to see how bad the inner diameter off. Well, seems like enough to disrupt air flow for sure. And how much am I looking at I need to mill off for this thing to fit....dam.
Ok, lets find some local machine shops and get some quotes. Well only found 2 shops that were even willing and able to tackle this project. First shop looked at it, took it to the back where I then heard "WTH is that?!?" Guy comes back and says, "Well, we don't do too much walk-in stuff any more, but we can do it for like $220." Thanks, I'll see if someone is out there. Called a couple shops and found a guy that works almost primarily off word-of-mouth because he's not listed in the phone book as a business or even registered on google! Got to his personal shop behind his house, explained what I'm doing, showed him the air box, and he said "meh, like 2 hours of work and I charge $70/hour on the CNC." He instructed me to measure and check...remeasure, and recheck....measure again and check measurements are correct before I bring it back to him. Less time in the CNC, less money I pay. So I've spent about 5 hours measuring and checking clearances today, and figure I have a few more days measuring and checking clearances of different measurements before even thinking of taking it back. That and he said his CNC machine will be tied almost all of next. We did a rough outline of where I wanted to cut, but I went back over top of those lines to shade my original idea of where I want to cut. Blue shaded areas are original and milling points.
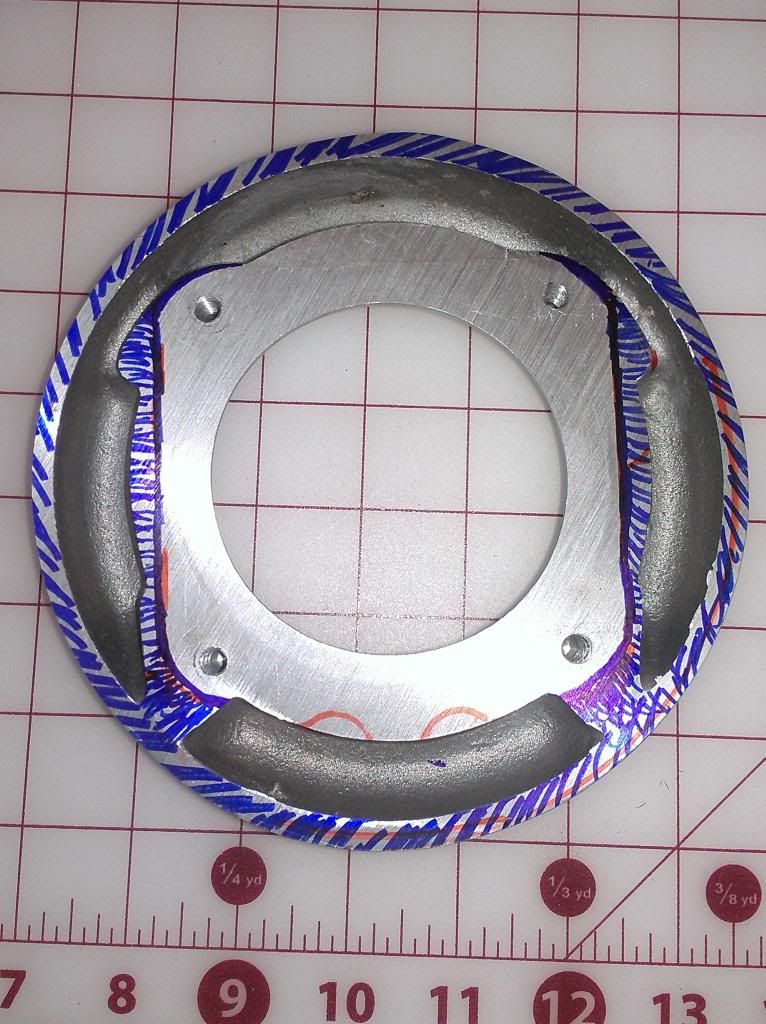
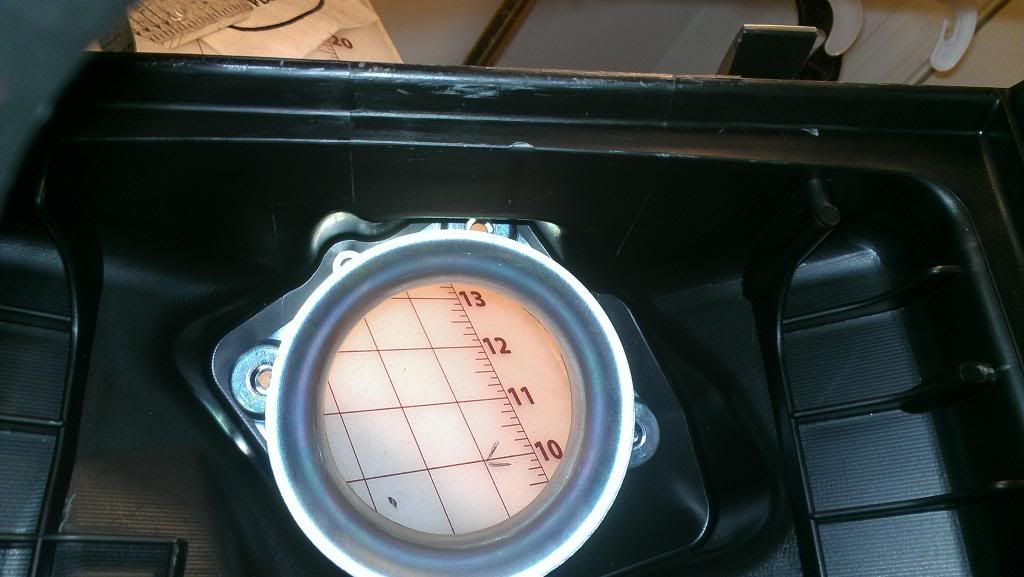
Shaded blue is original thought, 135mm outer diameter. Orange/brownish line is new proposed measurement, 120mm diameter. Blue lines mark current '06 diameter, 100mm.
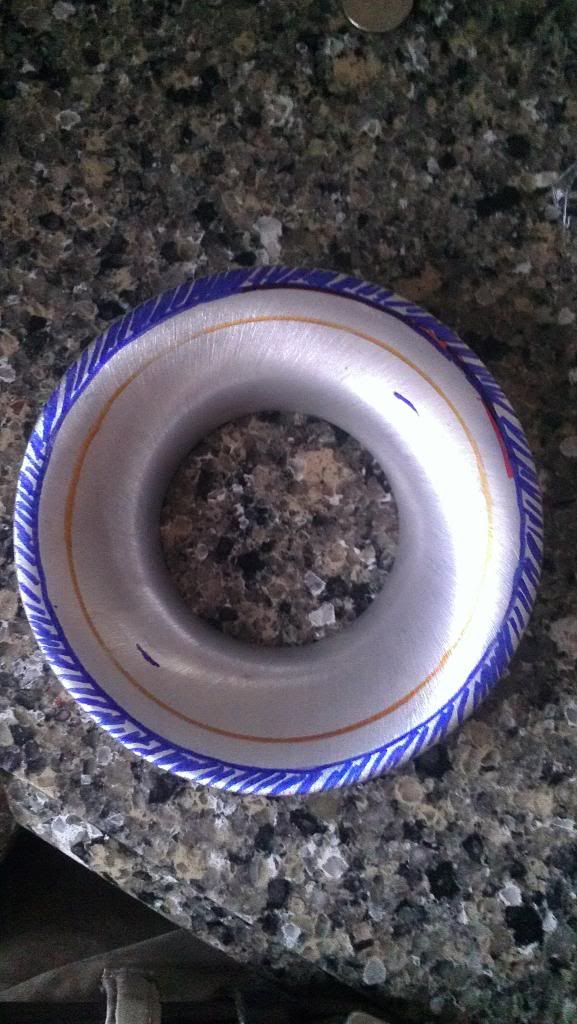
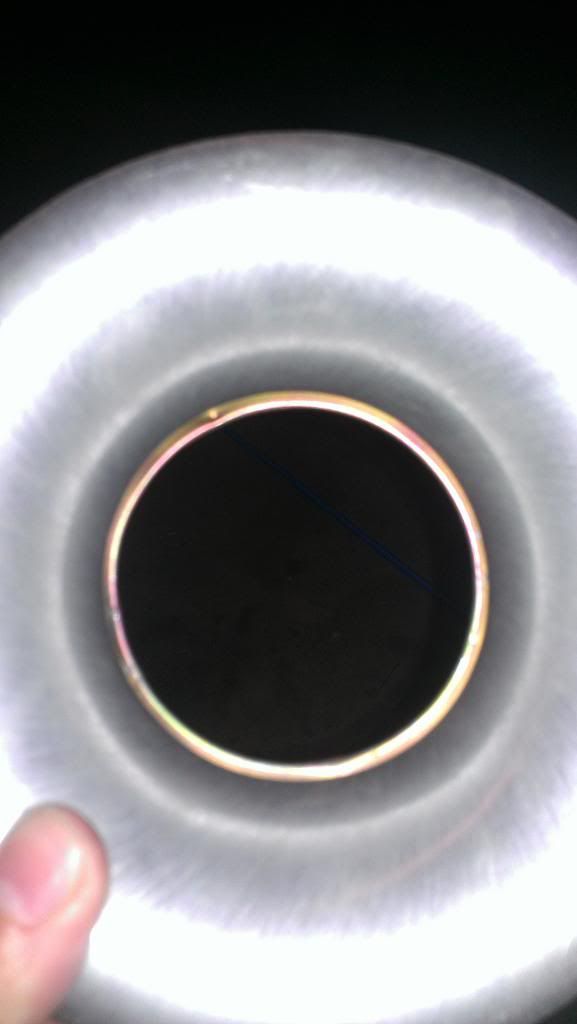
How did I come up with 120mm you ask...it was this simple(blue marks are currently '06 diameter).
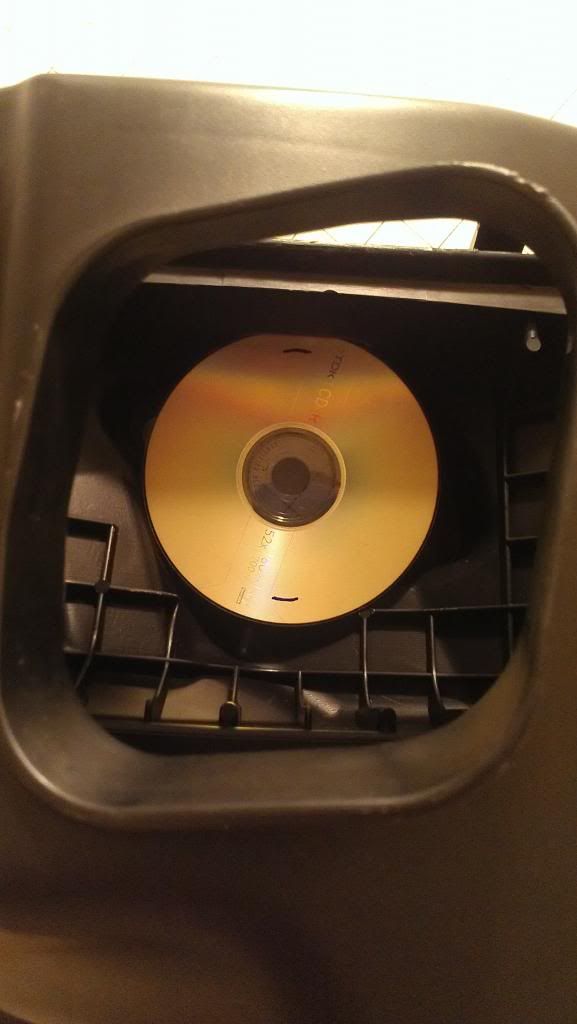
Not only did this fit perfectly, but it seems like I only have 1 clearance issue with this. Notice the plastic in the bottom right corner just touching the CD. If the ring is milled down the 120mm, I might need to have the curve milled down to be thinner or just dremel the plastic flat. Which brings me to my next point. I could possibly go larger to 125 or 130mm by flattening the plastic grids, and I would have to file down this lip at the top of the box. However, filing down the top of the box poses a risk to putting a hole in the box by accident. I know what you're saying, "but that lip keeps the filter from falling back, dumbass!" Exactly why I would only file in curve to slid the ring right it with no risk of the filter falling back.
If anyone has any questions for me to explain something, please ask. If anyone has any input as to how I could do more, or do something different to maximize outer diameter, please say something. Do I expect HP/TQ gains, no not really. I do expect a little better throttle response. Again, the main goal is just to match the air box diameter to MAF housing. Although I just retuned a few weeks ago with my 1/2" spacer, I will not retune again after doing this. I will however go to a local shop to check my A/F ratio to make sure it's where should be.
Ok for the DE, "the best" intake mod is '06 air-box with choice of drop-in filter. Why is the '06 the best, because of the velocity stack/venturi ring on the inside. I am currently running the GTM 3" MAF housing and COBB post MAF silicone hose. I believe SAMCO might have a hose now the exact same, because I can't seem to find the COBB hose anymore.

'06 air box velocity stack/venturi ring

The diameter of the air box unfortunately does not exactly line up very well with the 3" housing. So I filed down the plastic around the outlet and smoothed it over to make the transition better. You can see the small lip in the first pic.
This is where my search began. How do I get the air box and housing match diameters? I can't grind away at the ring because it's barely 1mm thick. So I thought to myself, "self, what is that metal on your old pop-charger?" SUCCESS!!....dam, won't fit. The inner diameter of the ring is basically 75.5mm, because it matches nearly perfect to the 76mm (3") housing.


Just for comparison, I ripped out the bracket in my '03 box to see how bad the inner diameter off. Well, seems like enough to disrupt air flow for sure. And how much am I looking at I need to mill off for this thing to fit....dam.


Ok, lets find some local machine shops and get some quotes. Well only found 2 shops that were even willing and able to tackle this project. First shop looked at it, took it to the back where I then heard "WTH is that?!?" Guy comes back and says, "Well, we don't do too much walk-in stuff any more, but we can do it for like $220." Thanks, I'll see if someone is out there. Called a couple shops and found a guy that works almost primarily off word-of-mouth because he's not listed in the phone book as a business or even registered on google! Got to his personal shop behind his house, explained what I'm doing, showed him the air box, and he said "meh, like 2 hours of work and I charge $70/hour on the CNC." He instructed me to measure and check...remeasure, and recheck....measure again and check measurements are correct before I bring it back to him. Less time in the CNC, less money I pay. So I've spent about 5 hours measuring and checking clearances today, and figure I have a few more days measuring and checking clearances of different measurements before even thinking of taking it back. That and he said his CNC machine will be tied almost all of next. We did a rough outline of where I wanted to cut, but I went back over top of those lines to shade my original idea of where I want to cut. Blue shaded areas are original and milling points.

Shaded blue is original thought, 135mm outer diameter. Orange/brownish line is new proposed measurement, 120mm diameter. Blue lines mark current '06 diameter, 100mm.

How did I come up with 120mm you ask...it was this simple(blue marks are currently '06 diameter).

Not only did this fit perfectly, but it seems like I only have 1 clearance issue with this. Notice the plastic in the bottom right corner just touching the CD. If the ring is milled down the 120mm, I might need to have the curve milled down to be thinner or just dremel the plastic flat. Which brings me to my next point. I could possibly go larger to 125 or 130mm by flattening the plastic grids, and I would have to file down this lip at the top of the box. However, filing down the top of the box poses a risk to putting a hole in the box by accident. I know what you're saying, "but that lip keeps the filter from falling back, dumbass!" Exactly why I would only file in curve to slid the ring right it with no risk of the filter falling back.


If anyone has any questions for me to explain something, please ask. If anyone has any input as to how I could do more, or do something different to maximize outer diameter, please say something. Do I expect HP/TQ gains, no not really. I do expect a little better throttle response. Again, the main goal is just to match the air box diameter to MAF housing. Although I just retuned a few weeks ago with my 1/2" spacer, I will not retune again after doing this. I will however go to a local shop to check my A/F ratio to make sure it's where should be.
Last edited by waldo36; Aug 1, 2013 at 01:36 PM.


Thread Starter
Registered User
iTrader: (2)
Joined: Sep 2011
Posts: 309
Likes: 2
From: Murfreesboro, TN
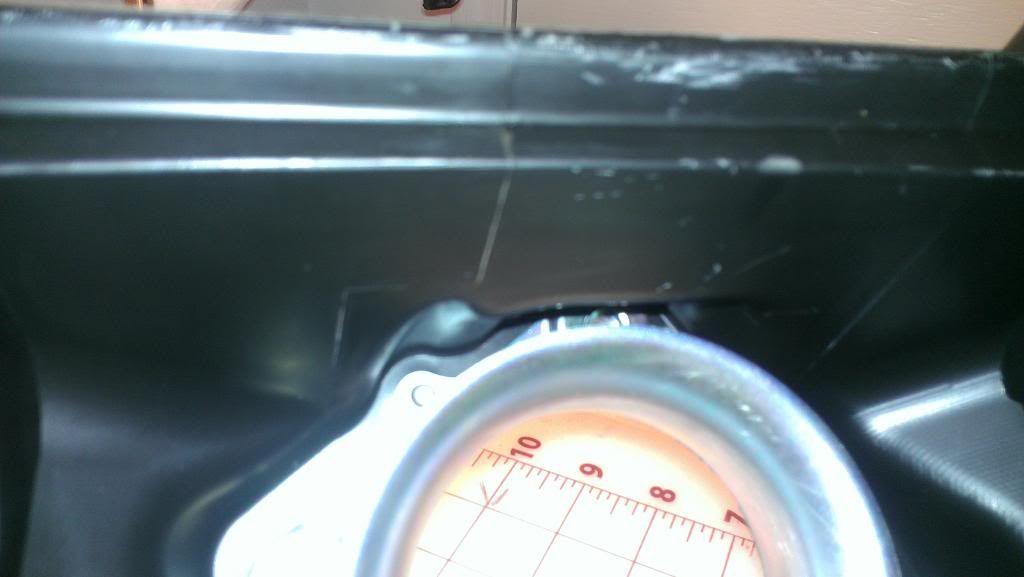
Thanks for the support guys. I'm going to go buy a cheap compass today so I cut out some varying diameters to check clearances. I might go ahead and dremel down some of the plastic grid lines and measure widths again. Just my biggest concern is right there at the top of the box, the last two pics I posted. The CD slides just perfect under the little niche in the box. So I think I can dremel it a little bit to allow maybe 2-3 more mm clearance.

Trending Topics

Thread Starter
Registered User
iTrader: (2)
Joined: Sep 2011
Posts: 309
Likes: 2
From: Murfreesboro, TN
I've read a few articles/threads from where larger bellmouths, which I think is kind of the same thing a Venturi ring, have helped turbo guys gain boost pressure. So if my calculations are correct I should getting as much if not more boost pressure than the electric supercharger provides


I think you are too concerned with keeping the V stack round. The portion were the plastic is make that portion of the v stack flat to match.
I tried this on my G35. The g box does not have the space of a z box and the g box is more angled.
I tried this on my G35. The g box does not have the space of a z box and the g box is more angled.
Last edited by denchan350gt; Aug 1, 2013 at 01:15 PM.

ive been running a 3.5" intake in a HEAVILY modified 350z airbox in my g35 for well over a year. i went through a few different versions too. afaik i was the first, and still and the only one to do it this way. denchan350gt and some others have used a stillen box and built similar setups. ive got some other little "tricks" built into mine and over 100 hours of construction/fabrication time on the current version and thats why i dont show anyone the inside of it. but i will say, what you are trying to do is definitely possible and from what i can see here you are on the right track  . also like denchan350gt said, dont worry so much about keeping the velocity stack round. mine is, but it doesnt have to be. you can trim the top of it to get a more agreeable inlet angle. keep up the good work!
. also like denchan350gt said, dont worry so much about keeping the velocity stack round. mine is, but it doesnt have to be. you can trim the top of it to get a more agreeable inlet angle. keep up the good work!
Last edited by juicinjake; Aug 1, 2013 at 01:46 PM.
Thread Starter
Registered User
iTrader: (2)
Joined: Sep 2011
Posts: 309
Likes: 2
From: Murfreesboro, TN
Meh, I would like to see more data before I dive into that one. Granted, I have exactly ZERO data on what I'm doing now, haha.
Thread Starter
Registered User
iTrader: (2)
Joined: Sep 2011
Posts: 309
Likes: 2
From: Murfreesboro, TN
ive been running a 3.5" intake in a HEAVILY modified 350z airbox in my g35 for well over a year. i went through a few different versions too. afaik i was the first, and still and the only one to do it this way. denchan350gt and some others have used a stillen box and built similar setups. ive got some other little "tricks" built into mine and over 100 hours of construction/fabrication time on the current version and thats why i dont show anyone the inside of it. but i will say, what you are trying to do is definitely possible and from what i can see here you are on the right track . also like denchan350gt said, dont worry so much about keeping the velocity stack round. mine is, but it doesnt have to be. you can trim the top of it to get a more agreeable inlet angle. keep up the good work!
. also like denchan350gt said, dont worry so much about keeping the velocity stack round. mine is, but it doesnt have to be. you can trim the top of it to get a more agreeable inlet angle. keep up the good work!
Thread Starter
Registered User
iTrader: (2)
Joined: Sep 2011
Posts: 309
Likes: 2
From: Murfreesboro, TN
the diameter of the CD works perfect. Just anything larger would require box modification. But your route, I can go larger without box modification. still gotta go by the dam dollar store and get a stupid compass.
I really don't think it's going to give much, but it is a needed puzzle piece for a fast NA build. With cams and higher RPM's is where I think it will really shine. Till you hit the limit of the manifold or a different weak link.

love the idea because of keeping the sealed box, there are 2 things that I can question:
1. how much cfm can that k&n drop in flow?
2. in my opinion, 3" is not that big of a jump... I'd rather stick with 3.5" like the one the other guy has.
I will likely go with 3.5" myself and hack up my stillen box to use with it.
1. how much cfm can that k&n drop in flow?
2. in my opinion, 3" is not that big of a jump... I'd rather stick with 3.5" like the one the other guy has.
I will likely go with 3.5" myself and hack up my stillen box to use with it.
Thread Starter
Registered User
iTrader: (2)
Joined: Sep 2011
Posts: 309
Likes: 2
From: Murfreesboro, TN
love the idea because of keeping the sealed box, there are 2 things that I can question:
1. how much cfm can that k&n drop in flow?
2. in my opinion, 3" is not that big of a jump... I'd rather stick with 3.5" like the one the other guy has.
I will likely go with 3.5" myself and hack up my stillen box to use with it.
1. how much cfm can that k&n drop in flow?
2. in my opinion, 3" is not that big of a jump... I'd rather stick with 3.5" like the one the other guy has.
I will likely go with 3.5" myself and hack up my stillen box to use with it.
2. My current setup is already 3", so I don't want to pay more money overhauling my entire intake system. I can keep cost down by just milling this ring and fitting it in the box.