
**** Official Photoshop 101 Thread ****


Thread Starter
Registered User
Joined: Mar 2005
Posts: 1,176
Likes: 0
From:
Keyboard Shortcuts
****Click HERE****
How-to: Carbon Fiber
****Click HERE****
How-to: Lower
****Click HERE****
How-to: Wheel Swap
****Click HERE****
How-to: Change Color
First, find a picture that you like, save it to your computer.
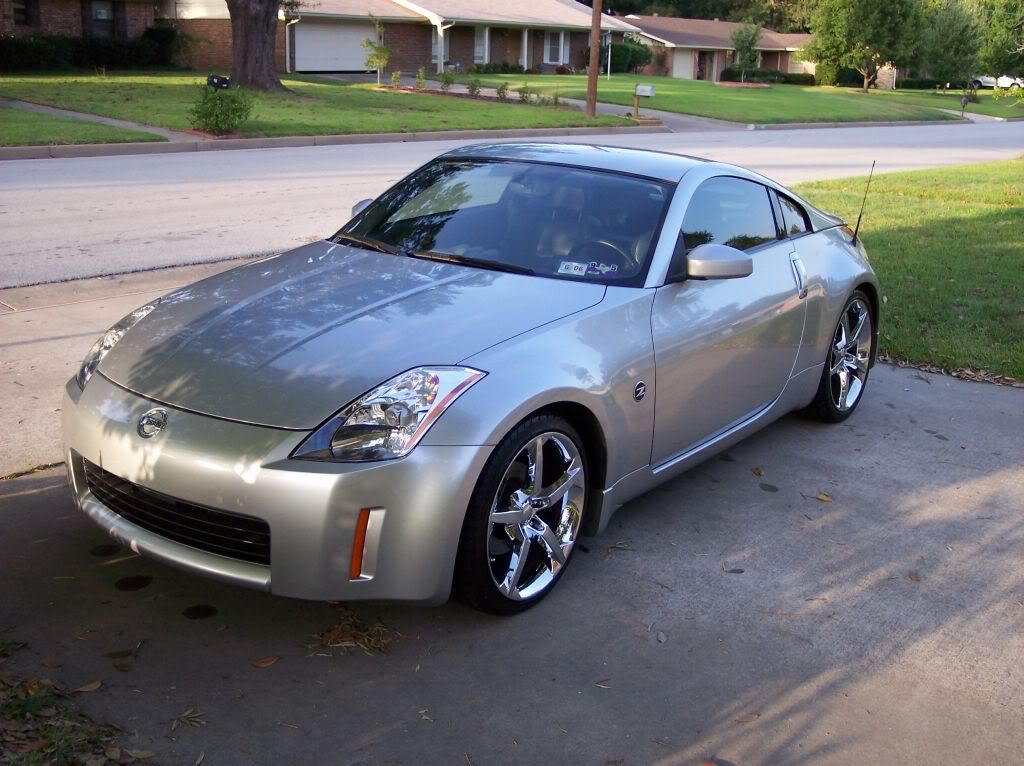
Then, open it in Photoshop.
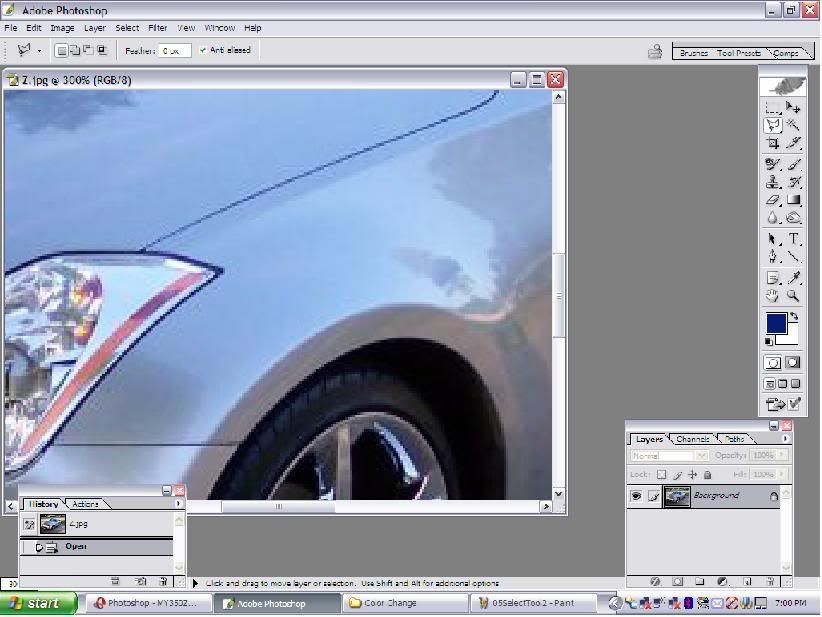
When you first open the picture in photoshop, it should look something like this.
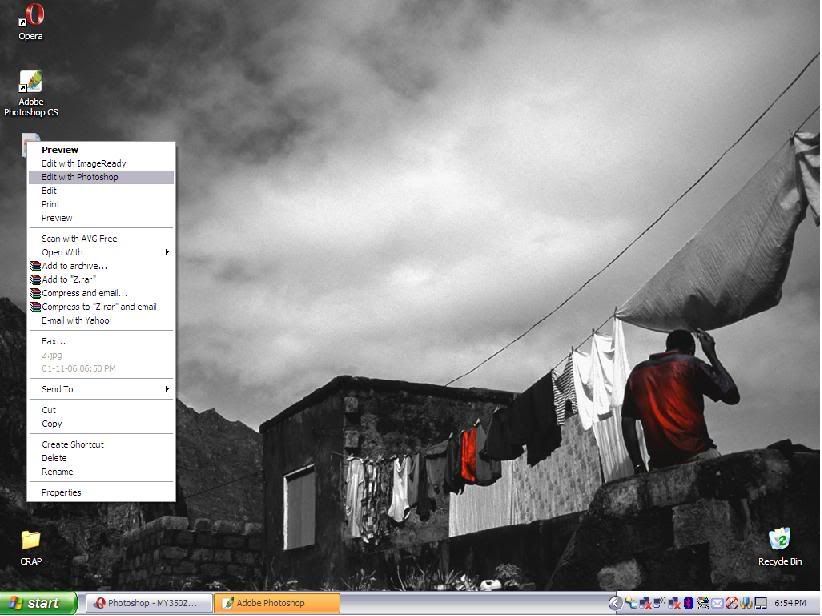
There are MANY MANY different ways to accomplish something in photoshop, but in order to do anything, you must first have tools to work with.
Go to Window and click on tools, layers, and history.

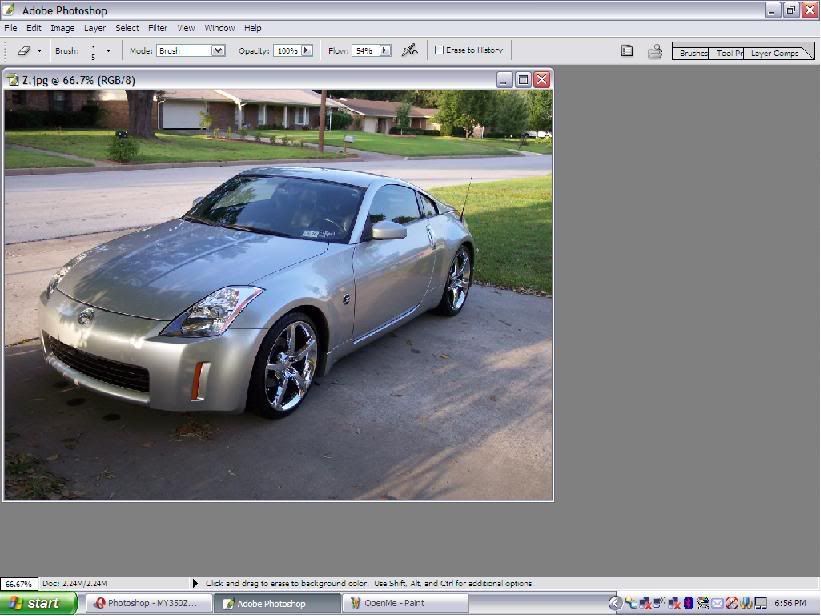
Find the tool you want to use. I prefer the Lasso tool when doing a color change. Click on the tool you want to use.
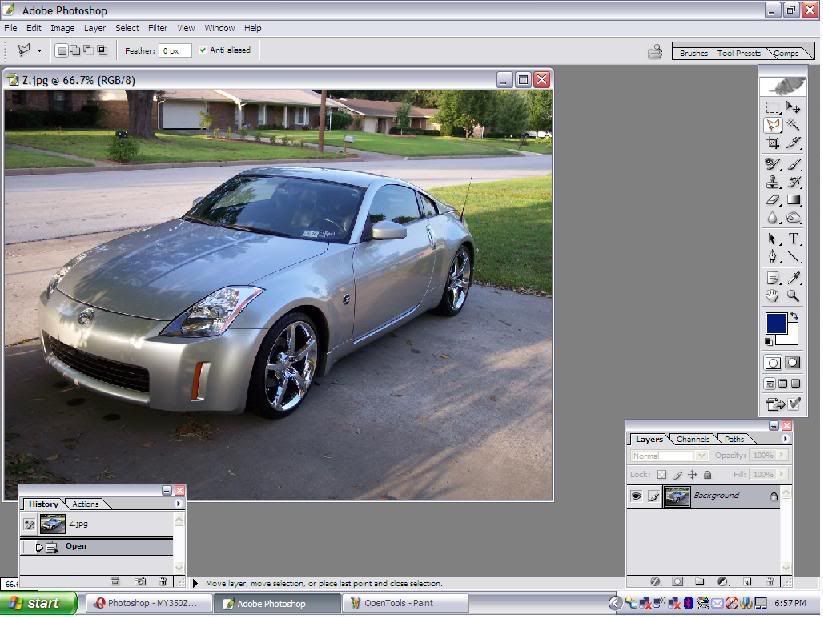
There are a few different kind of Lasso tools. My personal preference is the polygonal lasso because I feel I have more control over it. Remember, there are many different ways to accomplish the same result in photoshop. In this case, I "right clicked" to show the different lasso tools I could use and clicked on the one I wanted to use.

****Click HERE****
How-to: Carbon Fiber
****Click HERE****
How-to: Lower
****Click HERE****
How-to: Wheel Swap
****Click HERE****
How-to: Change Color
First, find a picture that you like, save it to your computer.
Then, open it in Photoshop.
When you first open the picture in photoshop, it should look something like this.
There are MANY MANY different ways to accomplish something in photoshop, but in order to do anything, you must first have tools to work with.
Go to Window and click on tools, layers, and history.
Find the tool you want to use. I prefer the Lasso tool when doing a color change. Click on the tool you want to use.
There are a few different kind of Lasso tools. My personal preference is the polygonal lasso because I feel I have more control over it. Remember, there are many different ways to accomplish the same result in photoshop. In this case, I "right clicked" to show the different lasso tools I could use and clicked on the one I wanted to use.
Last edited by need Z; Aug 4, 2007 at 02:05 PM.
Thread Starter
Registered User
Joined: Mar 2005
Posts: 1,176
Likes: 0
From:
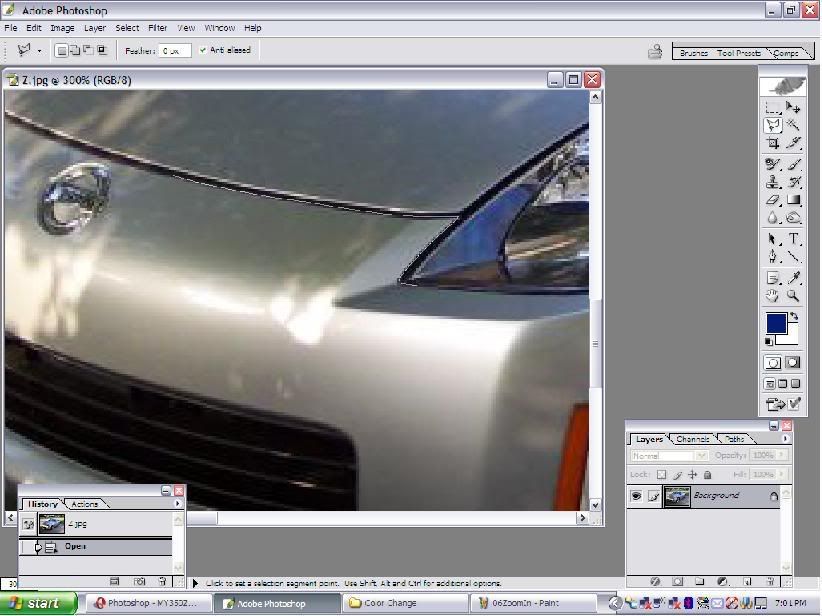
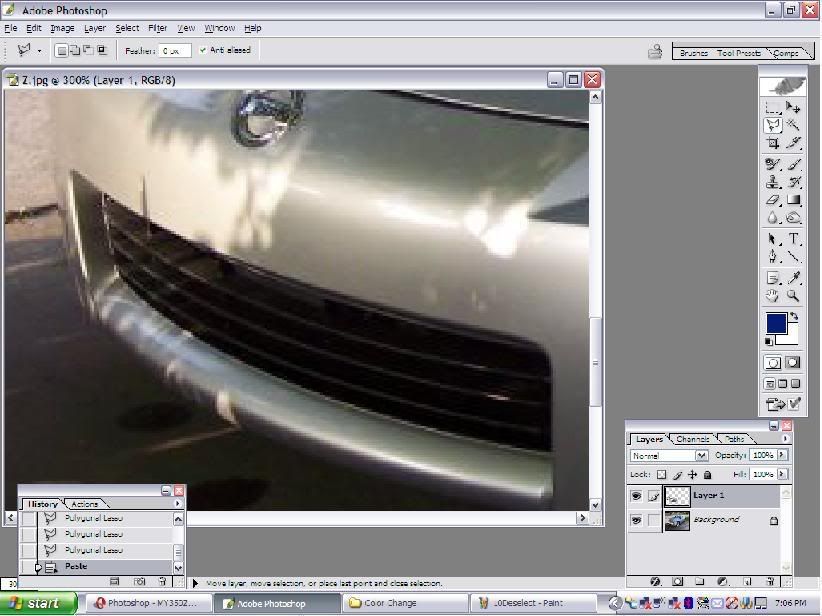
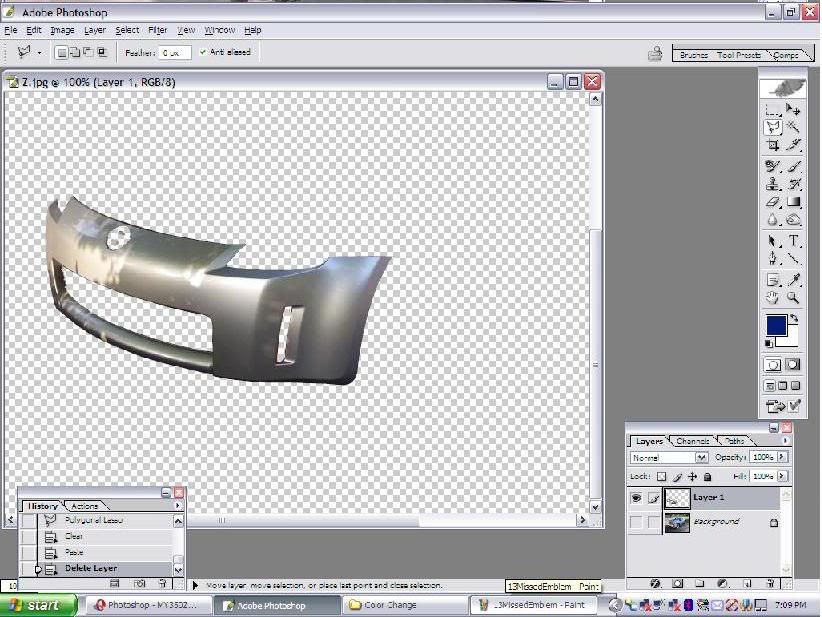
Now comes the "hard" part. In order to manipulate any photo you must select the area you want to manipulate. In this how-to, we'll just focus on the front bumper. To just try to highlight the front bumper at this point would require a lot of patience and a magnifying glass.
Instead, by pressing ctrl and "+" you can zoom in on the picture.
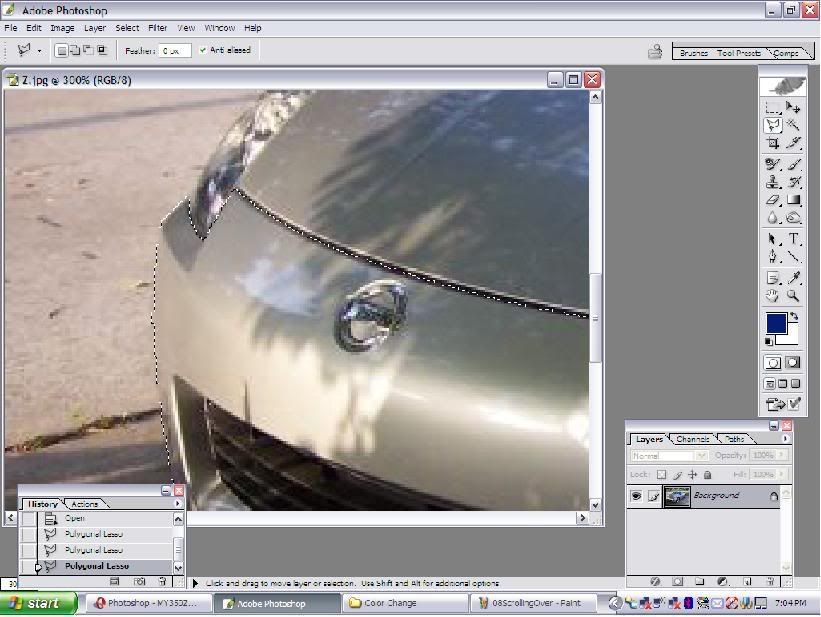
Begin clicking and highlighting the area you want to select (i.e. change the color of).
You'll get to a point where you can't see what you want to select. The easiest and most efficient way to move the picture without losing your work is to press the spacebar and dragging the picture over. After you press the spacebar, a little hand should appear that will "grab" the picture and move it.
After you've moved the picture, continue by selecting the area you want to change the color of.

When you've completely selected the area you want to manipulate, you should see a dashed line that looks like it's moving that moves around the area that you've selected.
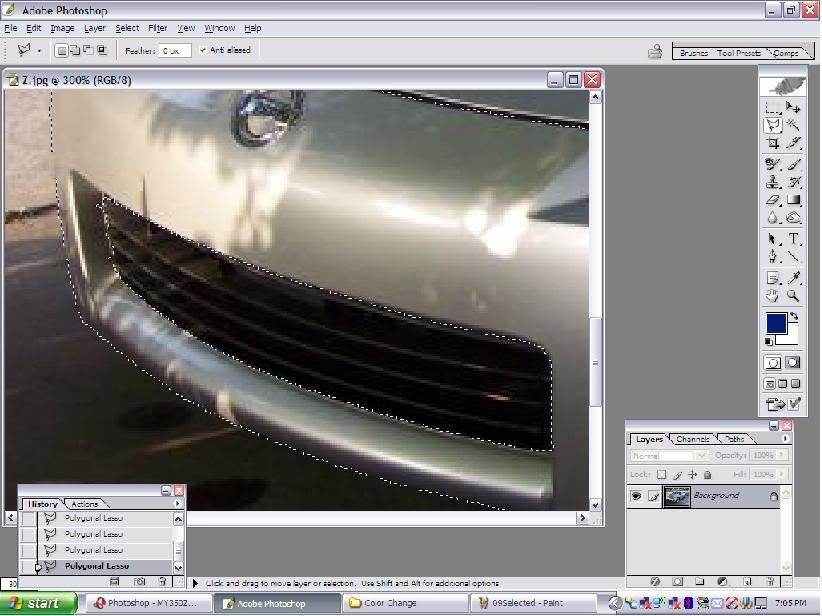
Now you need to deselect (or unhighlight) the areas that you don't want changed. This can often include windows, reflectors, lights, etc. In this case, it's the front grill. To deselect an area, press the alt key and begin selecting/highlighting the areas that you don't want to be changed.
At this point copy the highlighted area by pressing ctrl C and then paste the area to a new layer (think of it like a transparency). To paste, click Ctrl V.
Instead, by pressing ctrl and "+" you can zoom in on the picture.
Begin clicking and highlighting the area you want to select (i.e. change the color of).
You'll get to a point where you can't see what you want to select. The easiest and most efficient way to move the picture without losing your work is to press the spacebar and dragging the picture over. After you press the spacebar, a little hand should appear that will "grab" the picture and move it.
After you've moved the picture, continue by selecting the area you want to change the color of.
When you've completely selected the area you want to manipulate, you should see a dashed line that looks like it's moving that moves around the area that you've selected.
Now you need to deselect (or unhighlight) the areas that you don't want changed. This can often include windows, reflectors, lights, etc. In this case, it's the front grill. To deselect an area, press the alt key and begin selecting/highlighting the areas that you don't want to be changed.
At this point copy the highlighted area by pressing ctrl C and then paste the area to a new layer (think of it like a transparency). To paste, click Ctrl V.
Thread Starter
Registered User
Joined: Mar 2005
Posts: 1,176
Likes: 0
From:
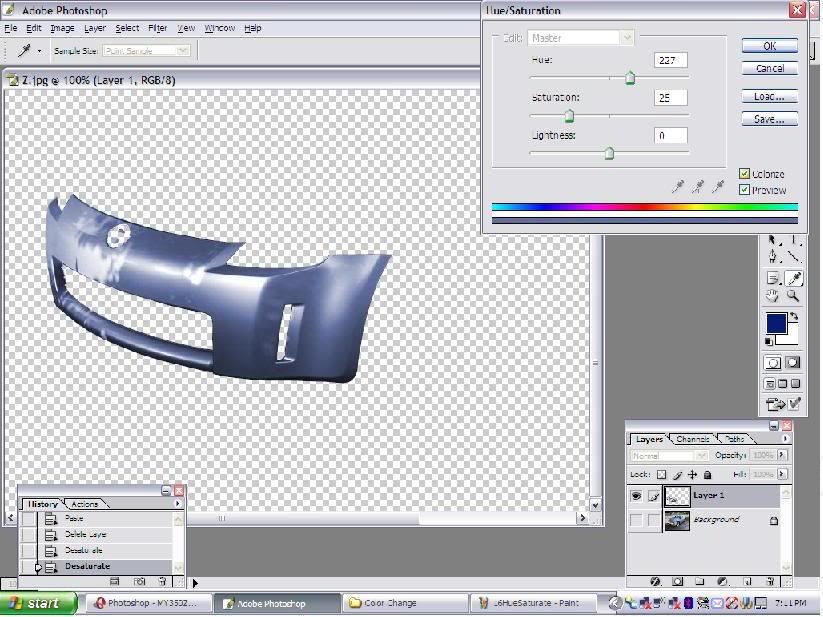
In the bottom right hand corner, click the eyeball of the original layer. This will allow you to look at just the layer that you made.
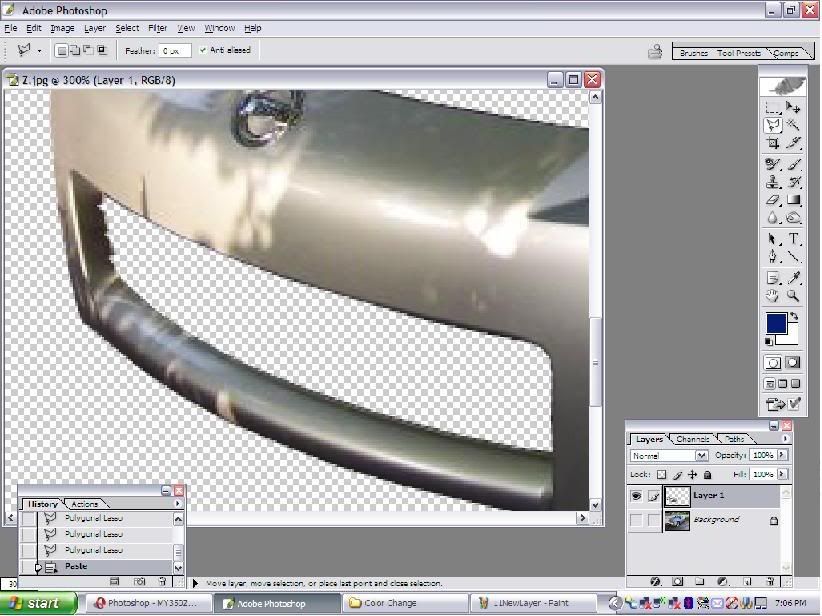
As you can tell, I forgot to remove the emblem. Try selecting the emblem and deleting it. Remember, trial and error is a good thing. If you mess up, there is always the history box in the lower left corner so you can go back a few steps.
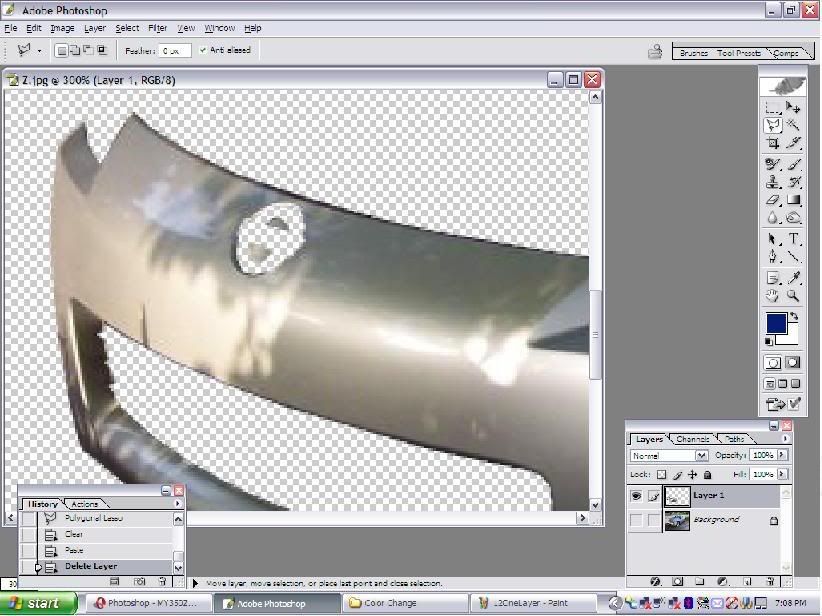
I prefer to zoom out at this point so I can see how everything looks. Do this by pressing ctrl "-"
Now take all the color out of the picture by pressing Ctrl Shift U. This is called desaturating.
Click on Image>Adjustment>Hue/Saturation

Click on the little box that says colorize. It should look like this....
As you can tell, I forgot to remove the emblem. Try selecting the emblem and deleting it. Remember, trial and error is a good thing. If you mess up, there is always the history box in the lower left corner so you can go back a few steps.
I prefer to zoom out at this point so I can see how everything looks. Do this by pressing ctrl "-"
Now take all the color out of the picture by pressing Ctrl Shift U. This is called desaturating.
Click on Image>Adjustment>Hue/Saturation
Click on the little box that says colorize. It should look like this....
Thread Starter
Registered User
Joined: Mar 2005
Posts: 1,176
Likes: 0
From:
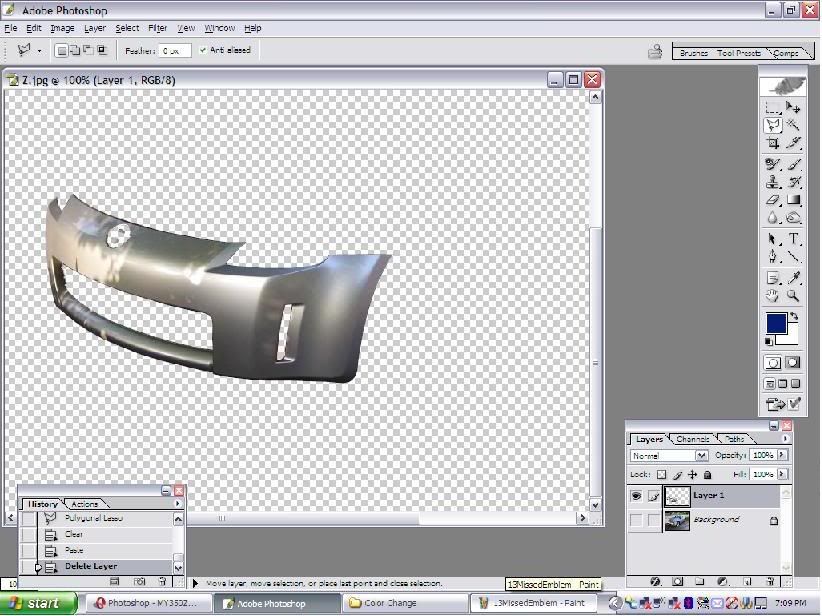
Change the Hue level, Saturation level, and Lightness level to change the colors.


Save the picture as a jpeg and you're good to go!!
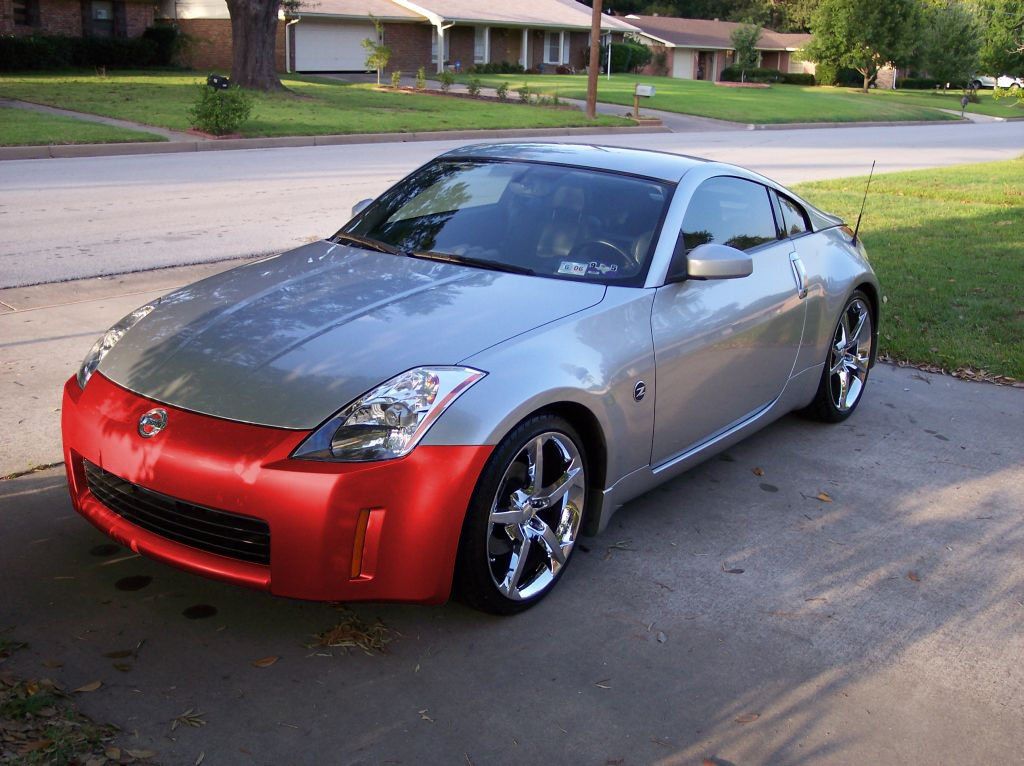
These same steps would be followed to change the entire color of the car. Instead of selecting just the bumper, select the entire car.
Save the picture as a jpeg and you're good to go!!
These same steps would be followed to change the entire color of the car. Instead of selecting just the bumper, select the entire car.


Trending Topics
Thread Starter
Registered User
Joined: Mar 2005
Posts: 1,176
Likes: 0
From:
Originally Posted by Ed 718
good stuff I wish I knew the tricks to the PS stuff....looks complicated
As I've stated in other threads. I've taught myself everything I know (which isn't that much) in photoshop.
Give it a shot! This how-to shows a lot more steps then it needs to, but it's made more for someone who has never used it before.

Originally Posted by need Z
With photoshop you have to dive right in and it feels like you're hitting a brick wall. With time, patience and trial and error you'll see success
Thread Starter
Registered User
Joined: Mar 2005
Posts: 1,176
Likes: 0
From:
Originally Posted by Ed 718
Are you using the Elements or the CS...I have the CS2 and I hear it is the more complicated PS
New Member
Joined: Feb 2005
Posts: 2,149
Likes: 0
From: East Texas (Tyler Area)
Originally Posted by Ed 718
Are you using the Elements or the CS...I have the CS2 and I hear it is the more complicated PS
 nbdyfcnsqc has used photoshop for some time I beleive, he would know of the changes.
Great write-up!
I've used Adobe Photoshop for almost a decade now and I still can't really change the colors. Why???
I'm partially colorblind with certain hues.
Now if only I had the hue/saturation codes for all the Z colors, I'd be set.
I've used Adobe Photoshop for almost a decade now and I still can't really change the colors. Why???
I'm partially colorblind with certain hues.
Now if only I had the hue/saturation codes for all the Z colors, I'd be set.
