
Sound Deadening


Thread Starter
Registered User
Joined: Feb 2008
Posts: 188
Likes: 0
From: Asheville NC
I tried looking for a fairly comprehensive walkthrough on installing sound deadening.
From what I understand a sound deadener will keep sound inside of the car (reflective aluminum and give some vibration reduction).
A mass loader is installed in high vibration areas? Door panel, floor board, and other areas...
Edead (liquid?) is pretty much applied Jack Pollack style and I am unsure as to what the product actually delivers.
I am looking for a when/where/in what order/how many layers, etc. type thing and pics would be greatly appreciated.
Thanks, I am getting my flame suit ready just in case...

I would do a 3 step approach to get the best results.
Sound Deadener first, mat or liquid, then a closed cell foam, then a open cell foam. I would install this on the floorboards, trunk, cubby holes, and doors.
Sound Deadener first, mat or liquid, then a closed cell foam, then a open cell foam. I would install this on the floorboards, trunk, cubby holes, and doors.
Originally Posted by Roper215
You got any pics of the process, I sorta want to see how things are supposed to look at the different stages.
I have a few of my door
Start at the top and attach your deadener
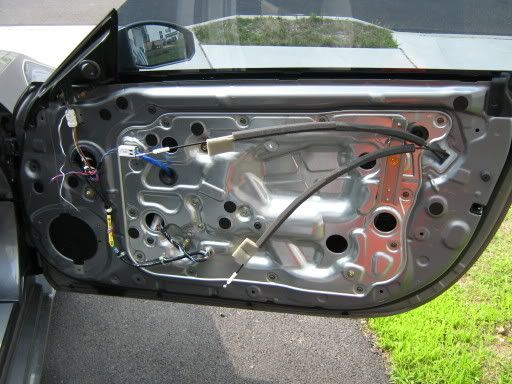
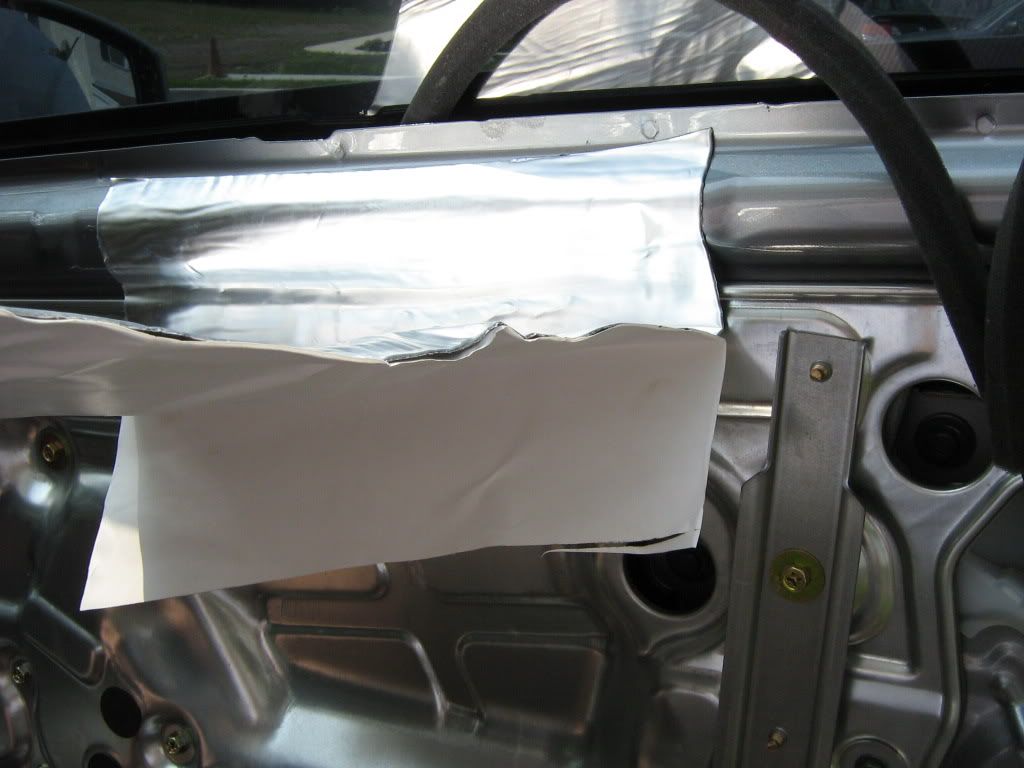
Be mindful of the holes that are used to attach the door panel, if you cover them, you must poke holes after you place your piece.
Work your way down using a roller.
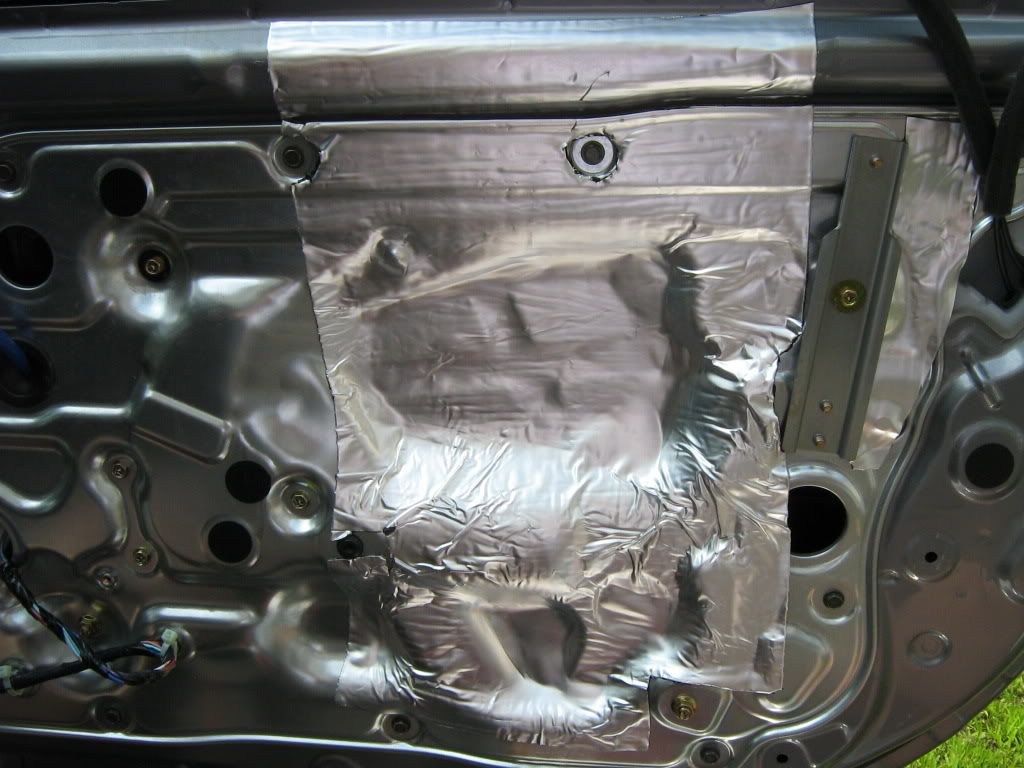
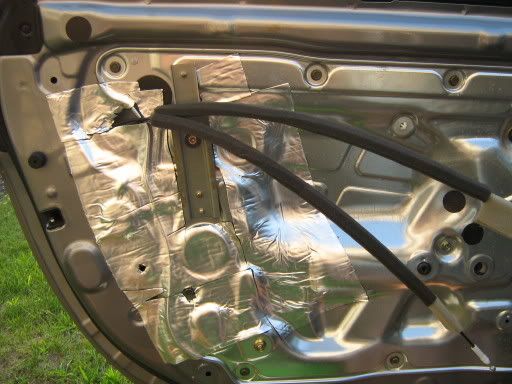
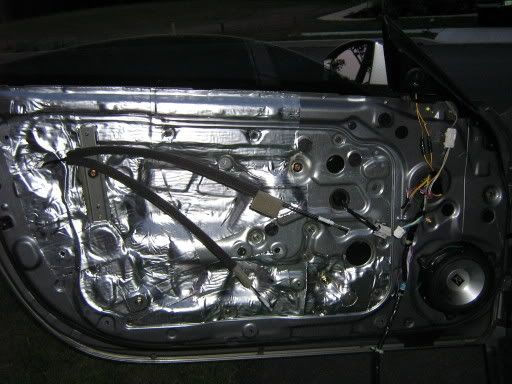
It will take some time to work around the cables, but if your utility knife is sharp and you have a few extra blades, you'll be done in no time.
I did mine on a nice hot day and I laid out the deadener in strips to prep it for install, once the sun warms it a bit it's easier to work with. Your back will be killing you after just a door so break up the install over a few days. Doors and trunk area can be done at separate times. If you want to go buck nutty and do the floor I would take out the seats remove the carpet, and do from the firewall to the area behind your seats in one shot. You dont want to remove interior pieces more than necessary.
Start at the top and attach your deadener
Be mindful of the holes that are used to attach the door panel, if you cover them, you must poke holes after you place your piece.
Work your way down using a roller.
It will take some time to work around the cables, but if your utility knife is sharp and you have a few extra blades, you'll be done in no time.
I did mine on a nice hot day and I laid out the deadener in strips to prep it for install, once the sun warms it a bit it's easier to work with. Your back will be killing you after just a door so break up the install over a few days. Doors and trunk area can be done at separate times. If you want to go buck nutty and do the floor I would take out the seats remove the carpet, and do from the firewall to the area behind your seats in one shot. You dont want to remove interior pieces more than necessary.
Last edited by Ichigo; Jul 30, 2008 at 08:25 PM.
Thread Starter
Registered User
Joined: Feb 2008
Posts: 188
Likes: 0
From: Asheville NC
Cool, I already installed that material on the door surfaces.
I am having issues with vibration on the interior door panel... also, should I use the liquid in the hatch/trunk area and then cover with edead or vice versa? Also, when you install a mass loader, do you install sound deadener on top, sort of like a sandwich?
I am having issues with vibration on the interior door panel... also, should I use the liquid in the hatch/trunk area and then cover with edead or vice versa? Also, when you install a mass loader, do you install sound deadener on top, sort of like a sandwich?

Trending Topics
Thread Starter
Registered User
Joined: Feb 2008
Posts: 188
Likes: 0
From: Asheville NC
I searched around and I couldn't find anything that I was looking for in a timely fashion...
I figured that with some of the installs I have seen on here there could be some light shed on this topic...
I figured that with some of the installs I have seen on here there could be some light shed on this topic...
Originally Posted by Roper215
I searched around and I couldn't find anything that I was looking for in a timely fashion...
I figured that with some of the installs I have seen on here there could be some light shed on this topic...
I figured that with some of the installs I have seen on here there could be some light shed on this topic...
https://my350z.com/forum/audio-video...-deadener.html
and here:
https://my350z.com/forum/audio-video...materials.html

Thread
Thread Starter
Forum
Replies
Last Post
wanderingstuden
Maintenance & Repair
6
Jan 28, 2016 07:03 PM
Justin100
Intake Exhaust
26
Nov 29, 2015 03:58 PM