
2+2 Backseat Project- Lookin for advice


Thread Starter
Registered User
Joined: Jan 2010
Posts: 608
Likes: 3
From: Kansas city
Progress Pics, well what I got done this weekend. (dont mind the dirty interior)
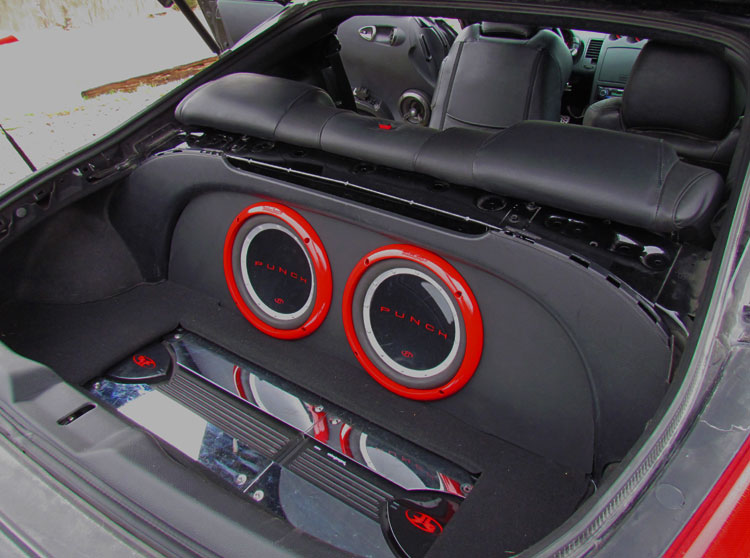
kept it super simple and cheap in my efforts to finish, I made my own "zenclosure box" only cost me $35 in wood and couple hours + my amp rack. I need new subs but I have decided on what Im getting so I put some ancient RF punches I had from my old jeep for the time being. but I have to admit the still sound pretty good. no need for w7 in this car but it would be fun.
haven't glue carpet down to my amp cover (its loose, bare with me)
oh and don't hate on the old amps, these things are awesome
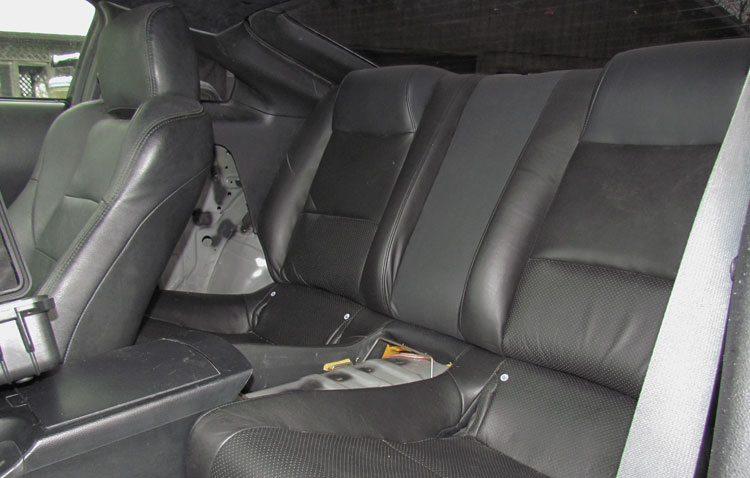
also got the back seat cut down to fit properly, looks pretty nice for doing it myself. If I put a reinforced hole in the bottom corners I can pull it fully tight and perfect, buts there is nothing to pull from there now that wont tear in time.
also got my speakers in (as one might tell I quite like RF) not components but IMO these newer ones are 90% as good as my older rf power comp.
now I have to start to fiberglass resin my skeletons, should I also use fiberglass mat? I used a heavy 100% polyester called ponte I think, read about it on a stereo forum. doesnt get brittle or crack like felt or fleece cause it's woven....? I like more for far. plan is to black vinly them or alcantara (if I nut up and buy some)
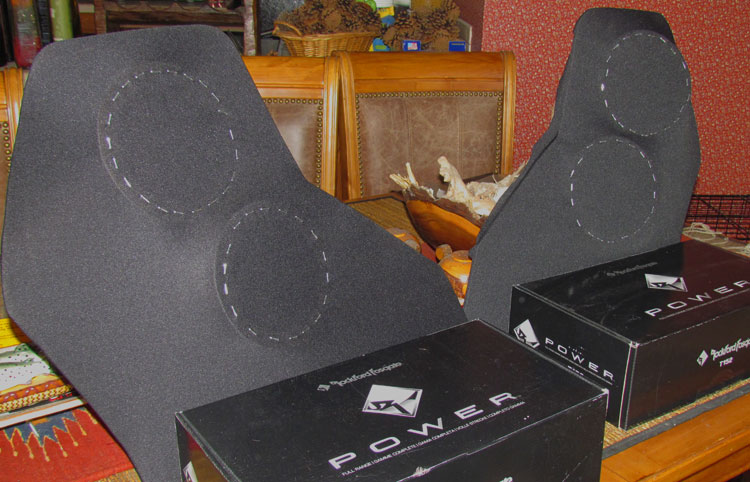
as always thanks for reading, Jackson
kept it super simple and cheap in my efforts to finish, I made my own "zenclosure box" only cost me $35 in wood and couple hours + my amp rack. I need new subs but I have decided on what Im getting so I put some ancient RF punches I had from my old jeep for the time being. but I have to admit the still sound pretty good. no need for w7 in this car but it would be fun.
haven't glue carpet down to my amp cover (its loose, bare with me)
oh and don't hate on the old amps, these things are awesome
also got the back seat cut down to fit properly, looks pretty nice for doing it myself. If I put a reinforced hole in the bottom corners I can pull it fully tight and perfect, buts there is nothing to pull from there now that wont tear in time.
also got my speakers in (as one might tell I quite like RF) not components but IMO these newer ones are 90% as good as my older rf power comp.
now I have to start to fiberglass resin my skeletons, should I also use fiberglass mat? I used a heavy 100% polyester called ponte I think, read about it on a stereo forum. doesnt get brittle or crack like felt or fleece cause it's woven....? I like more for far. plan is to black vinly them or alcantara (if I nut up and buy some)
as always thanks for reading, Jackson


Thread Starter
Registered User
Joined: Jan 2010
Posts: 608
Likes: 3
From: Kansas city


Thread Starter
Registered User
Joined: Jan 2010
Posts: 608
Likes: 3
From: Kansas city
sorry must wait for more updates, unless you want to see what my speaker panels look like in sanded bondo?  kinda holdin out for completly finished pics
turned out very nice for my first time using fiberglass on a car project, pumped to get them installed. just letting them air out in the garage for a couple days before I cover them, dont want my car smelling like fiberglass resin & bondo.
I've gotten couple requests to do a step by step DIY, although I have enough pics to write a very worthless book on this project, I dont think Im going to go though all that work. removing the metal alone was a extremly extensive diy (started but gave up)
This project required ever tool I had and then some. from sewing machines to grinders and wood saws. It wasnt extremely hard by any means, but there would be a ton a steps, and so many little things that I ran into that had to be addressed. it would bore u, plus i pretty much covered everything, just not how I did them exactly
if I get enough requests, maybe, i just don't see any1 else justifying all the time, money and Effort, but I will gladly answer any questions any1 has
plus I wouldnt mind being the worlds only ......
kinda holdin out for completly finished picsturned out very nice for my first time using fiberglass on a car project, pumped to get them installed. just letting them air out in the garage for a couple days before I cover them, dont want my car smelling like fiberglass resin & bondo.
I've gotten couple requests to do a step by step DIY, although I have enough pics to write a very worthless book on this project, I dont think Im going to go though all that work. removing the metal alone was a extremly extensive diy (started but gave up)
This project required ever tool I had and then some. from sewing machines to grinders and wood saws. It wasnt extremely hard by any means, but there would be a ton a steps, and so many little things that I ran into that had to be addressed. it would bore u, plus i pretty much covered everything, just not how I did them exactly
if I get enough requests, maybe, i just don't see any1 else justifying all the time, money and Effort, but I will gladly answer any questions any1 has
plus I wouldnt mind being the worlds only ......


Once again, it's not mention in any way that it is buiLt for humans, it for his dogs, you can squeeze a (small) reall hot girl and kids back there, but if ur into BIG girls well..... Srry

But remember you still need seatbelts if you want to out a human back there, or risk getting a FAt ticket!
Lol