
the "bmccann101s car gets a new look/ watch me suffer bodywork hell" thread


Everything is looking nice. Thats not bad for the carbon waterfall. I really like that front bumper and how you filled the lines and badge area. Hows the fitment on it? I have been thinking about getting one. I really like the martini stripes. Good job


As river as that front bumper should be, it’s actually not at all haha
I almost want that for my Z now. I remember seeing this car on YT when you first uploaded the first wide body kit. Cool to see you haven’t just sold or left it as is. Always growing.
You got any pics of that bumper with out that front splitter on the car?
Also does anyone make that in poly. Had a FG bumper in the past and hated it. Every week it would have a new chip.
Last edited by CK_32; May 2, 2018 at 02:42 PM.
Thread Starter
Joined: Aug 2006
Posts: 8,321
Likes: 467
From: Scottsdale/coyote drophouse
As far as tablet integration... I don't use air bags... So luckily the integration of the air cup lift is just a latched switch.. Yes all my lighting and accessories will be handled by the tablet using an arduino board and a relay group module. He's working on that stuff now as a favor to me.. Everything will work from a widget on the tablet screen.. And I can operate anything I choose to program on the tablet thru my steering wheel.. Inc audio controls and also any other sequence .. It allows differing functions for long holds, so a lkg hold of volume will still do volume.. But a long hold of the mode button can easily be programed to latch the front end lift switch.
As far as bumper fitment, there's plenty of pics of it on my Instagram acct @bmccann101 . The fit is perfect
We don't offer it in poly but kbd is still working on that.. I actually have a large group buy on the nsm kit w vis .. I'm still the exclusive seller for that kit for a bit longer.. Dm me or contact me on fb or ig.. The icons are next to my username.
I'm not a site sponsors here.. Can't post sale details
Thread Starter
Joined: Aug 2006
Posts: 8,321
Likes: 467
From: Scottsdale/coyote drophouse
I do have a question.. I've posted it in various other threads.. But no help so far..
Does anyone have the ability to read the Fsm wiring differences between a 2005 clock spring harness and a 2006 clock spring harness?
I need to know two things :
1-For all of the wires that are the same between the two years.. And the pin locations for each the same?
2-for the additional three wires used for lighting and audio controls... Which position are they and what signal do they require? +/- etc..
Out of everything I'm. Doing, no one seems to be able to help me w the full retrofit of this 06 st wheel and clock spring.
I may be able to do a write up about the process when I do it but it may be a month or so before then. IIRC the 3 wires for that side are one illumination, one control and one dimmer. So the illumination is + the dimmer would go to the dimmer circuit if wanted and the control is just a signal wire to head unit. Power and ground are shared so those pins will be in the the same location, horn should also be in the same position.

New Member
Joined: Jan 2011
Posts: 17
Likes: 0
From: Lithuania
I do have a question.. I've posted it in various other threads.. But no help so far..
Does anyone have the ability to read the Fsm wiring differences between a 2005 clock spring harness and a 2006 clock spring harness?
I need to know two things :
1-For all of the wires that are the same between the two years.. And the pin locations for each the same?
2-for the additional three wires used for lighting and audio controls... Which position are they and what signal do they require? +/- etc..
Out of everything I'm. Doing, no one seems to be able to help me w the full retrofit of this 06 st wheel and clock spring.
Does anyone have the ability to read the Fsm wiring differences between a 2005 clock spring harness and a 2006 clock spring harness?
I need to know two things :
1-For all of the wires that are the same between the two years.. And the pin locations for each the same?
2-for the additional three wires used for lighting and audio controls... Which position are they and what signal do they require? +/- etc..
Out of everything I'm. Doing, no one seems to be able to help me w the full retrofit of this 06 st wheel and clock spring.
These are the clock spring connectors:

M203 goes to steering wheel switches and M23 to main body harness
M23
corresponding M203 pins
Pin 26 Illumination + Pin 18
Pin 27 Illumination - Pin 21
Pin 31 Sw Gnd Pin 17
Pin 32 Remote Control B Pin 16
Pin 24 Remote Control A Pin 20
On M203 connector Pin 19 should be the horn wire and pins 14 and 15 should be cruise control switches.
Illumination positive comes from the tail lamp relay through a resistor.
Illumination ground should connect to a wire that goes to Combination meter Pin 18 (M19 connector).
Also, steering wheel control switches connect to tel adapter unit or audio unit directly.


Thread Starter
Joined: Aug 2006
Posts: 8,321
Likes: 467
From: Scottsdale/coyote drophouse
Hooray for China.. Smh.. Sometimes you win, sometimes you lose.
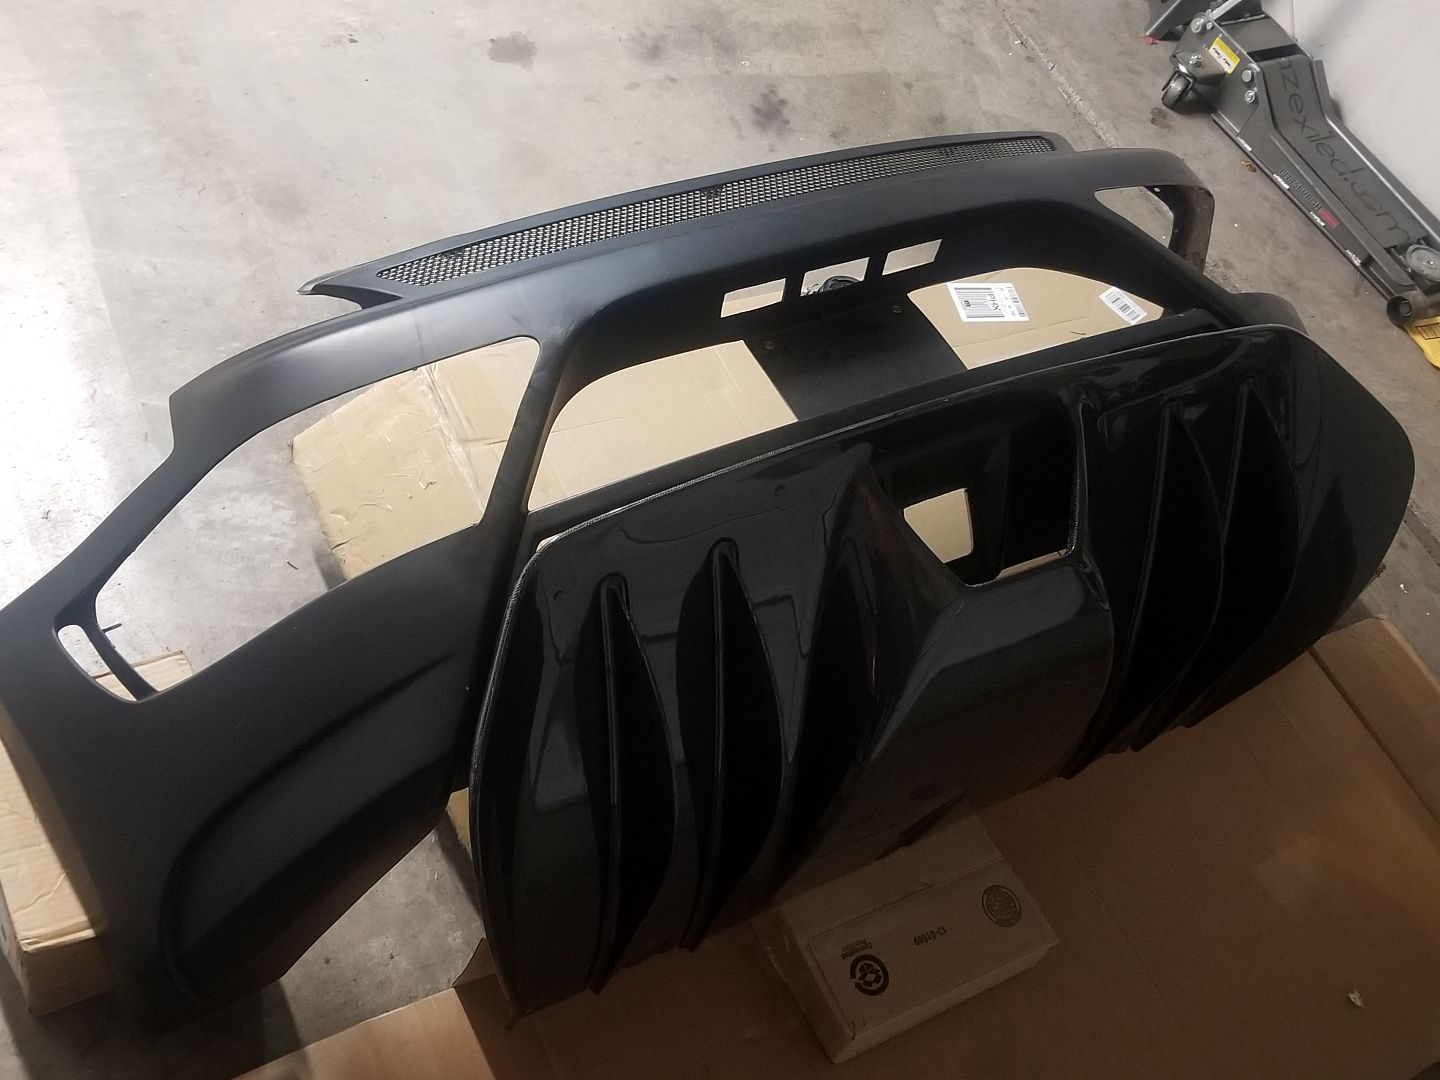
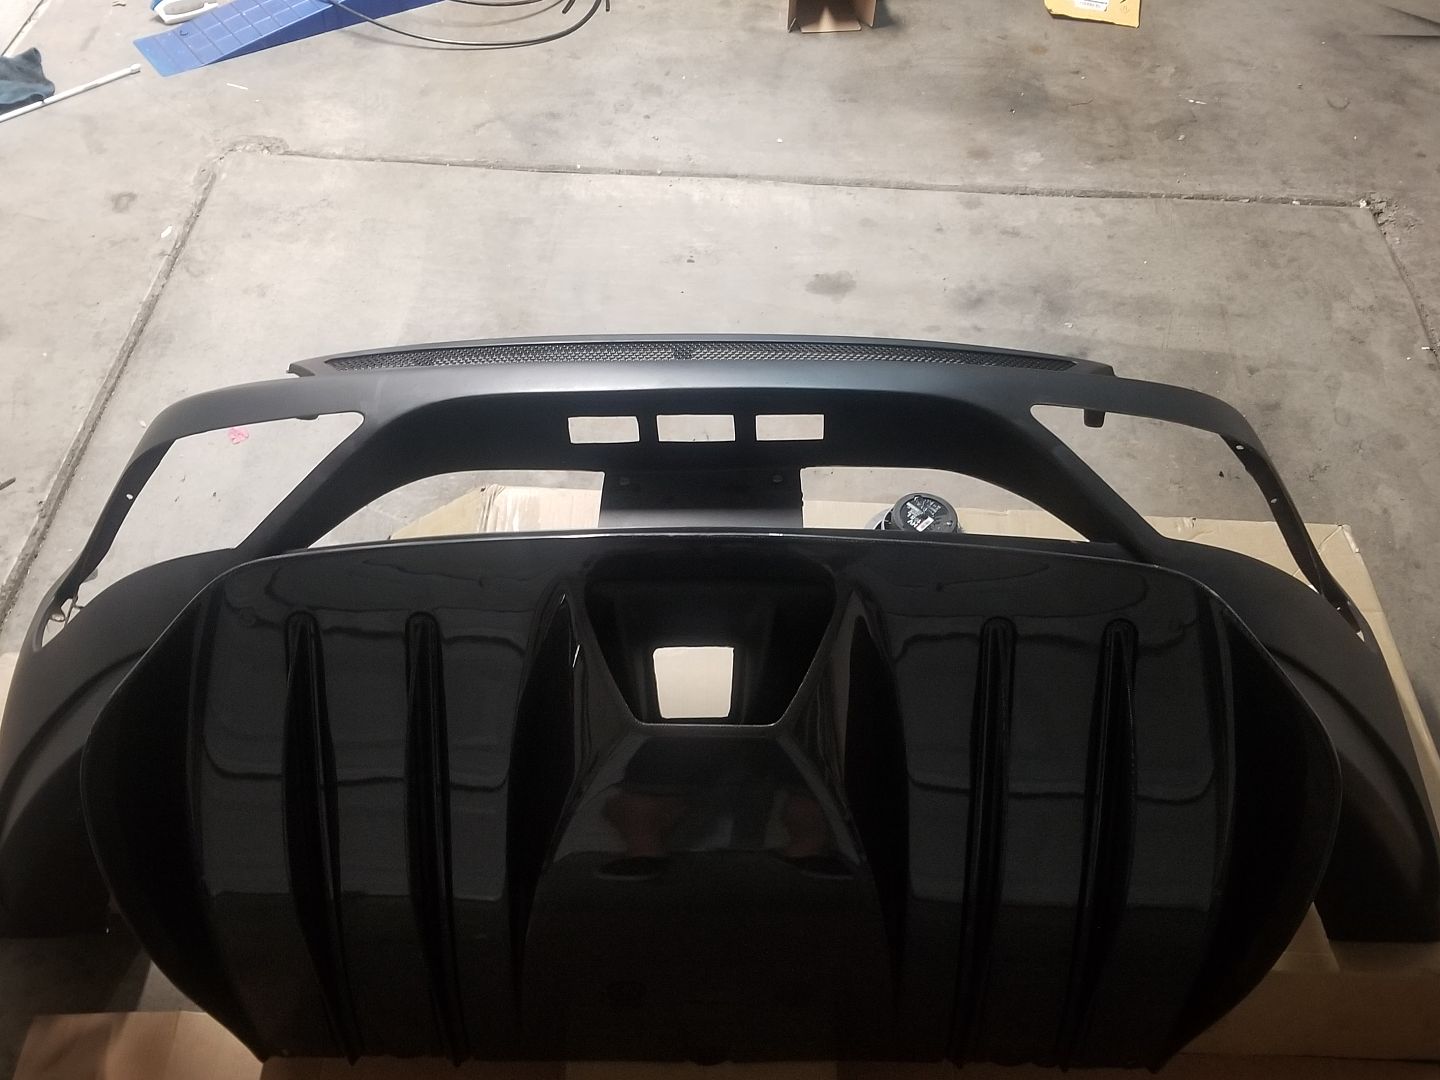
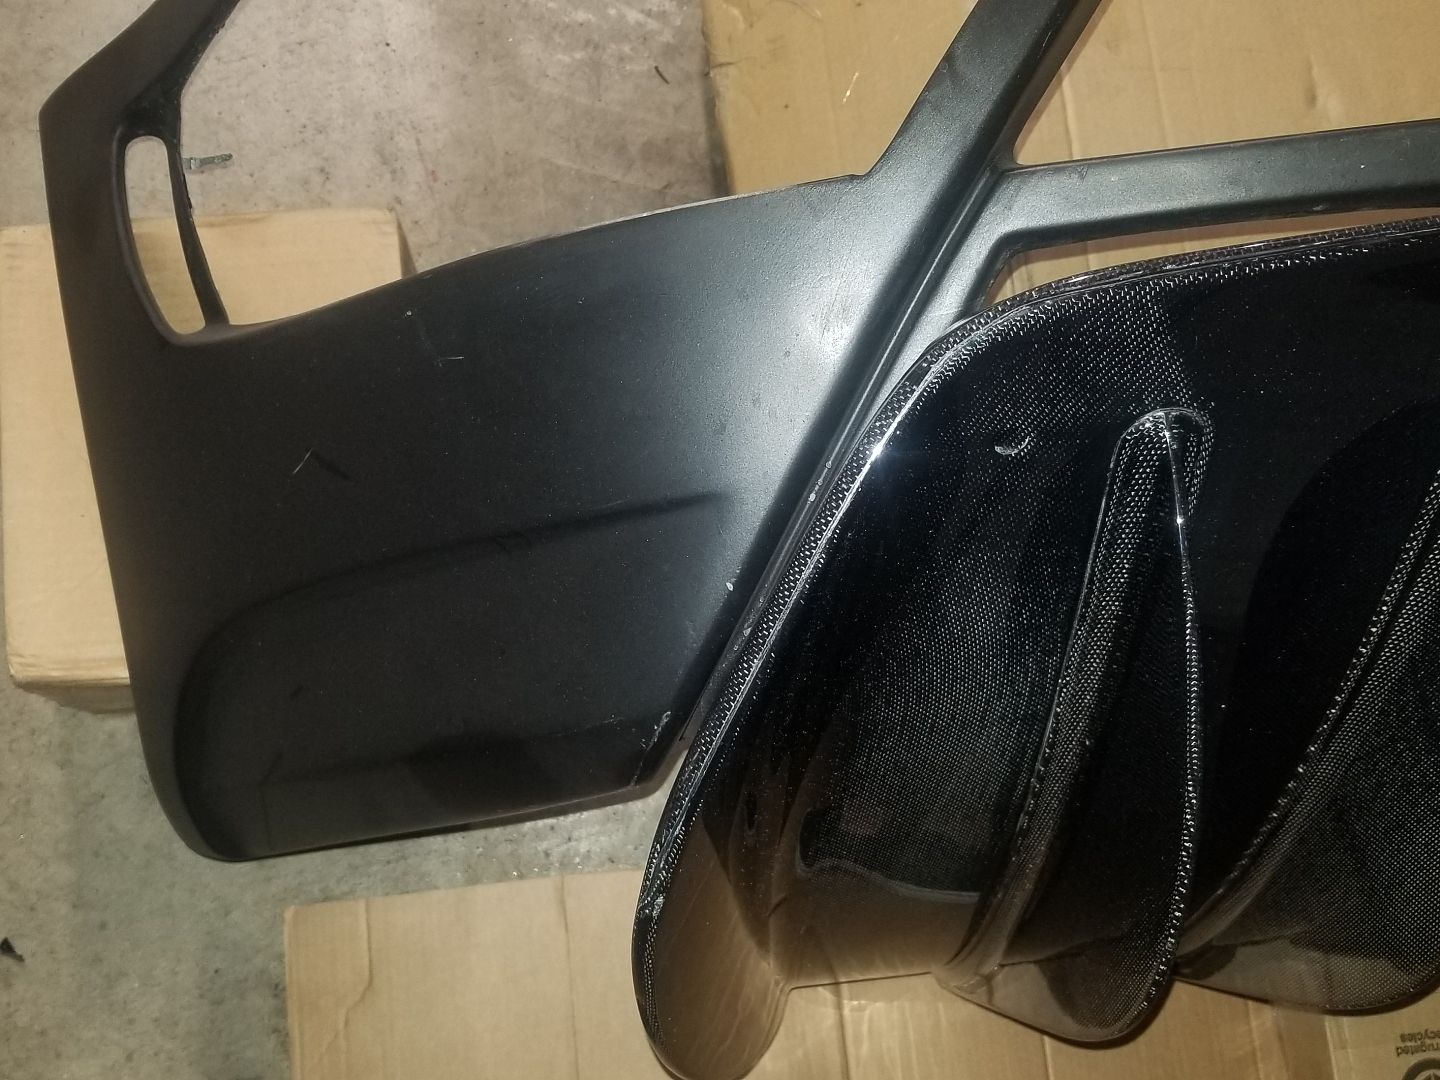
The carbon on this diffuser is total dog *****.. Hopefully I get a healthy refund at least.. I'll just paint it black.. The 1*1 carbon wasn't so hot anyway..
So yes.. I did measure and even use a protractor before I bought this.. And the end result will be reasonable to body work into the bumper
It hasn't been cut out yet, so yes this is hovering a bit, but u get the idea..
Sadly, The differential hole is smaller than anticipated . So I can use even two 4" tips that I bought.. So those are all now for sale. 50 bucks each..and already had them ceramic coated lol.. Lmk and we can chat elsewhere...


that's a shame about the diffuser, but if you are painting it, then what's to stop you from going to town on it with some fiberglass and reshaping the differential hole to fit the 3 exhaust outlets?


Thread Starter
Joined: Aug 2006
Posts: 8,321
Likes: 467
From: Scottsdale/coyote drophouse
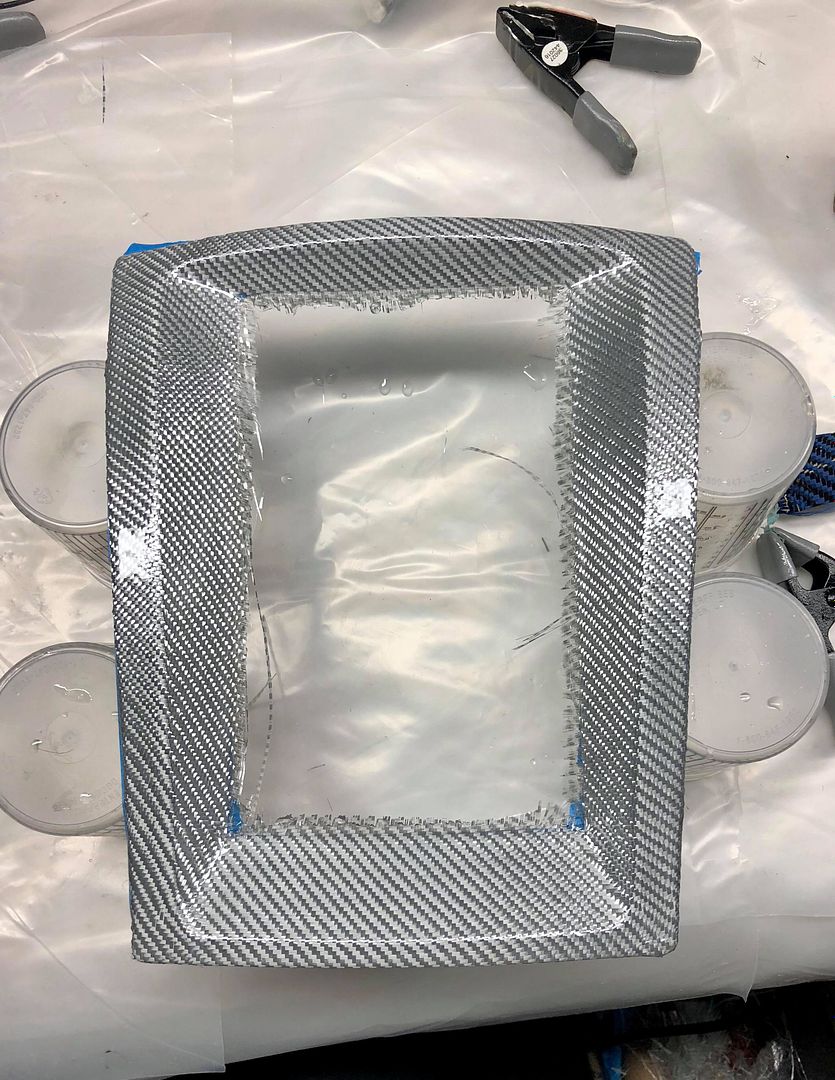
First progress shot of the tablet dash bezel in silver carbon fiber :
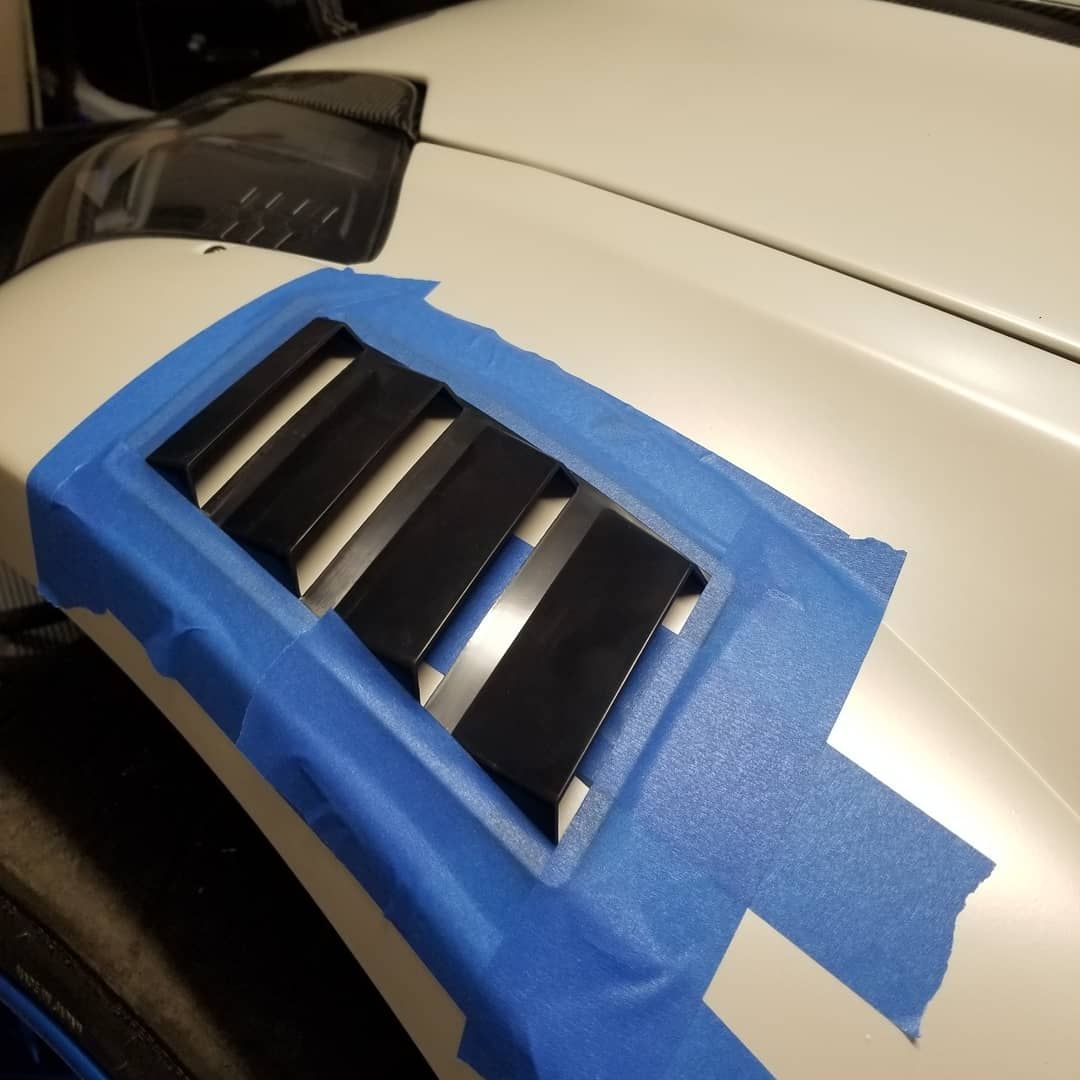
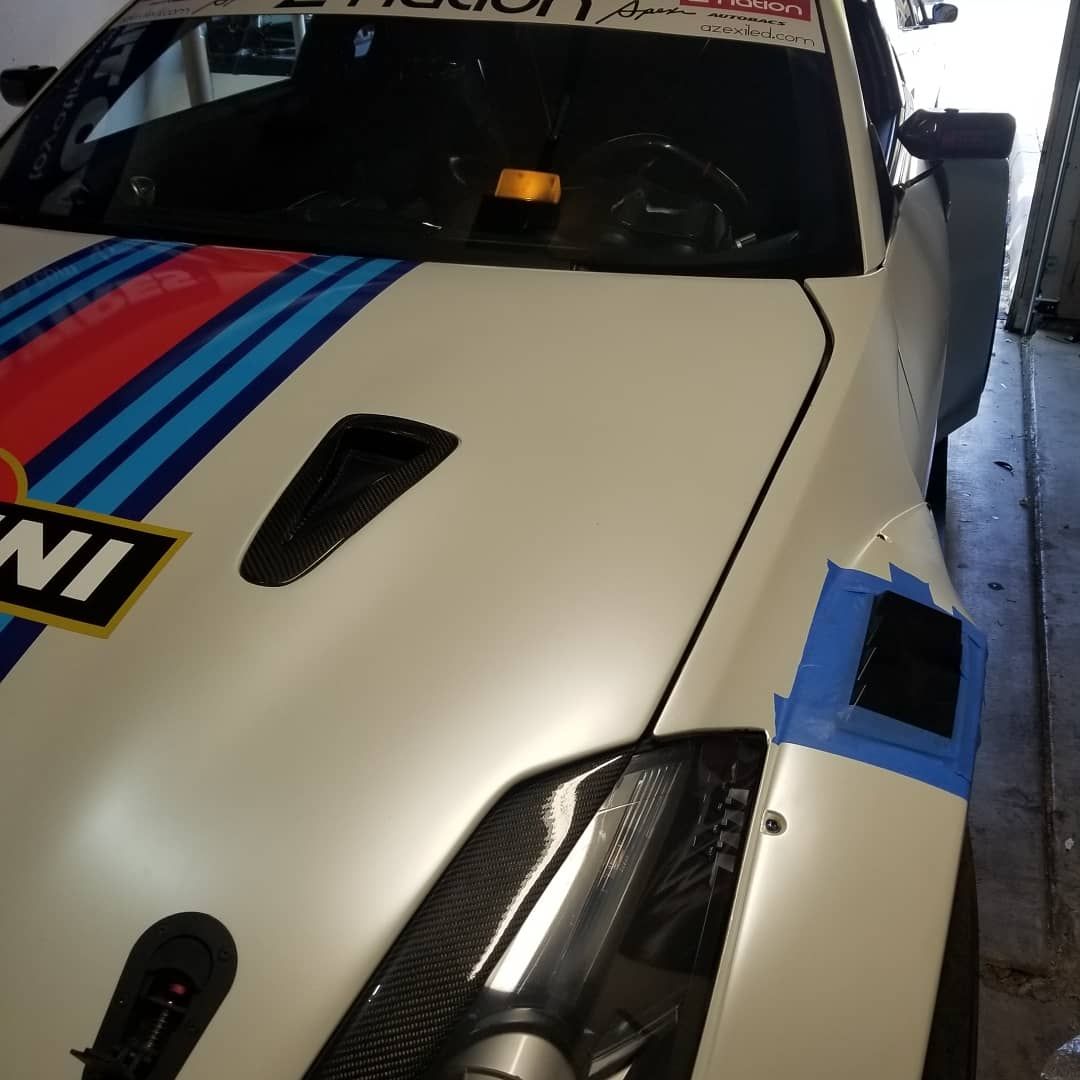
Test positioning front fender vents
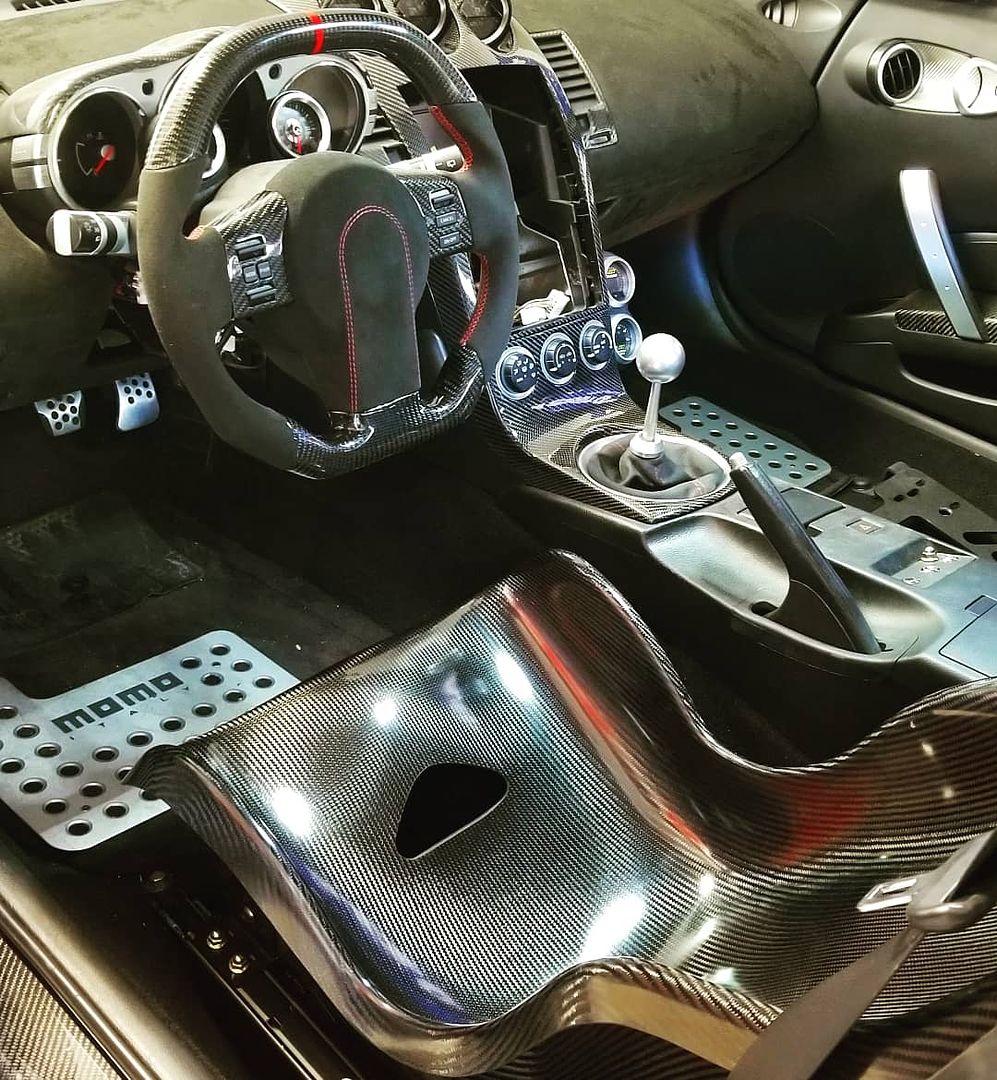
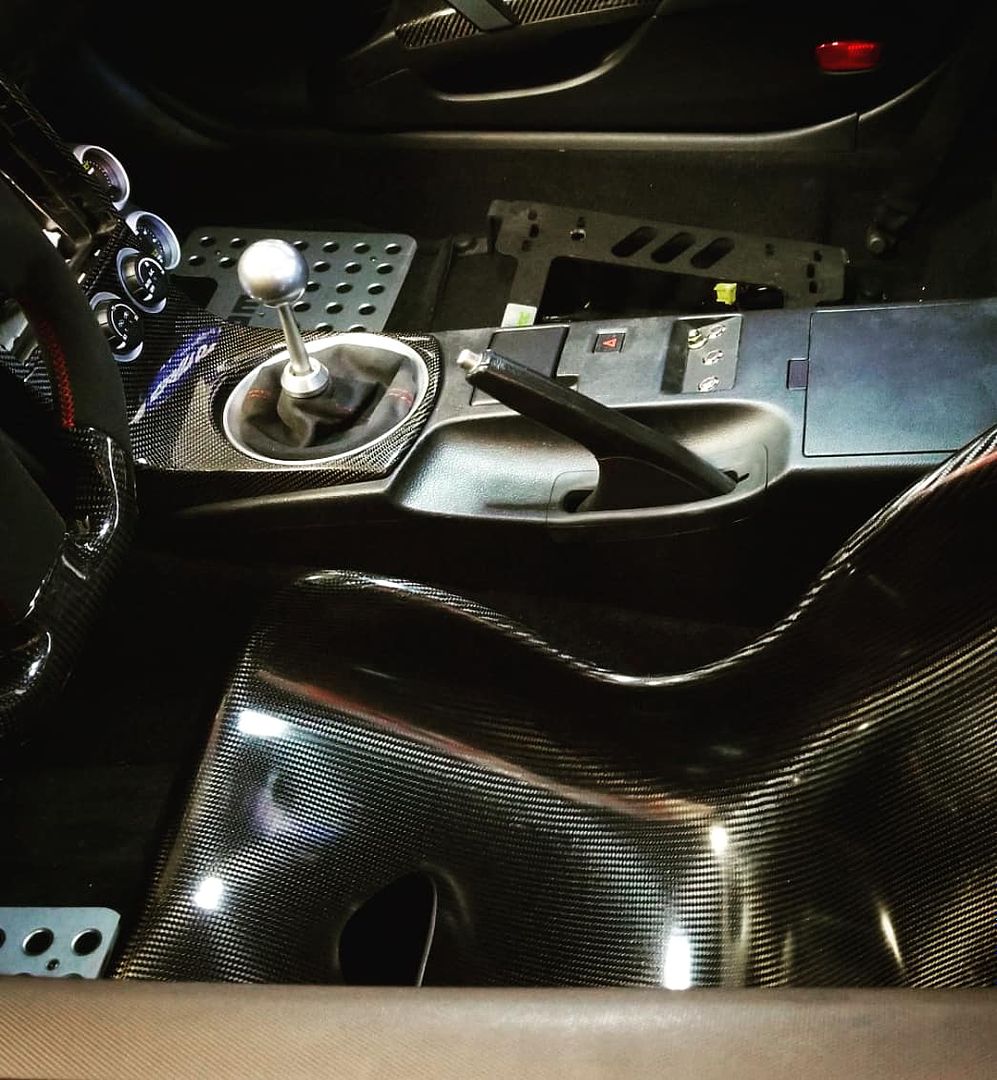
Tecnocraft seat install. These are an absolute DREAM.
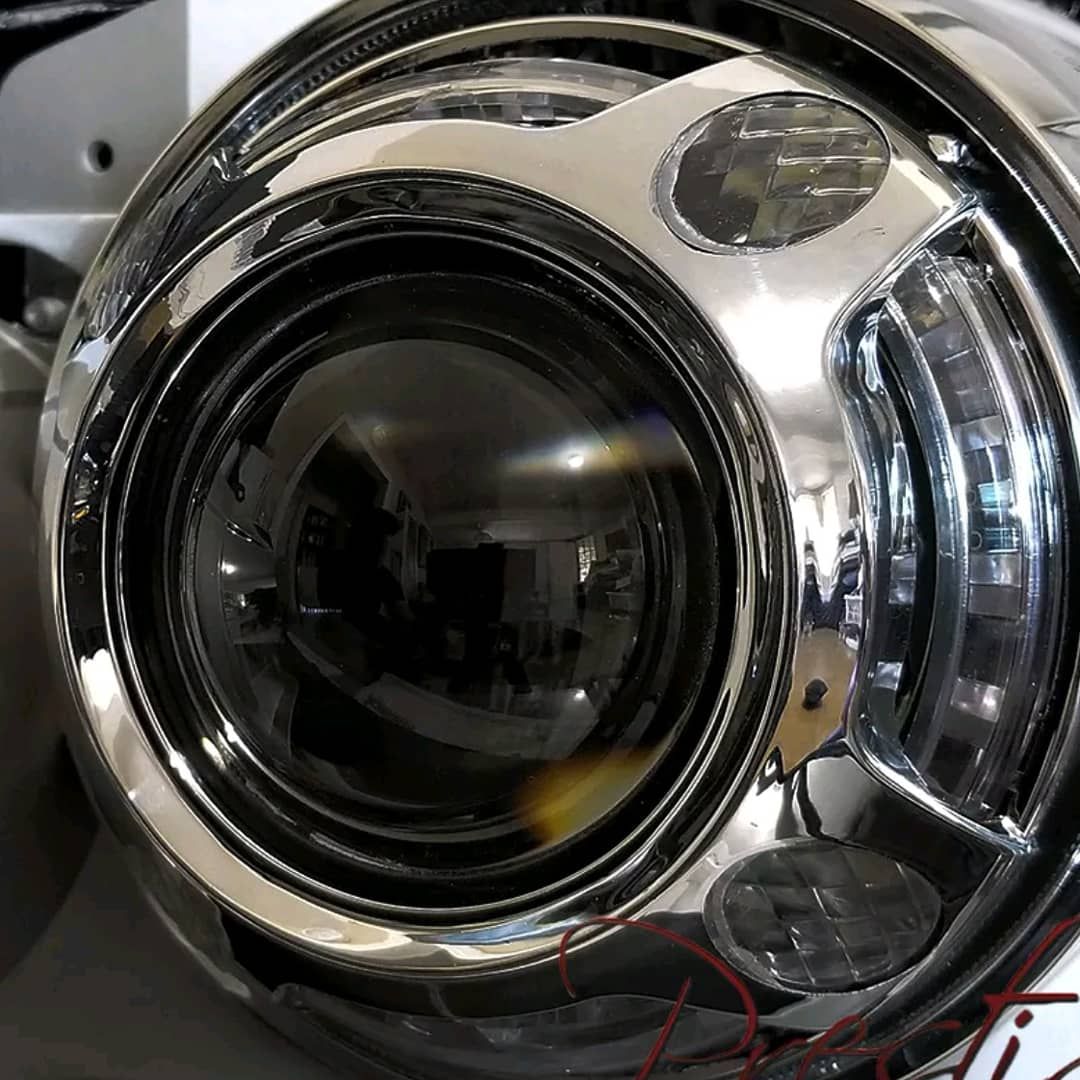
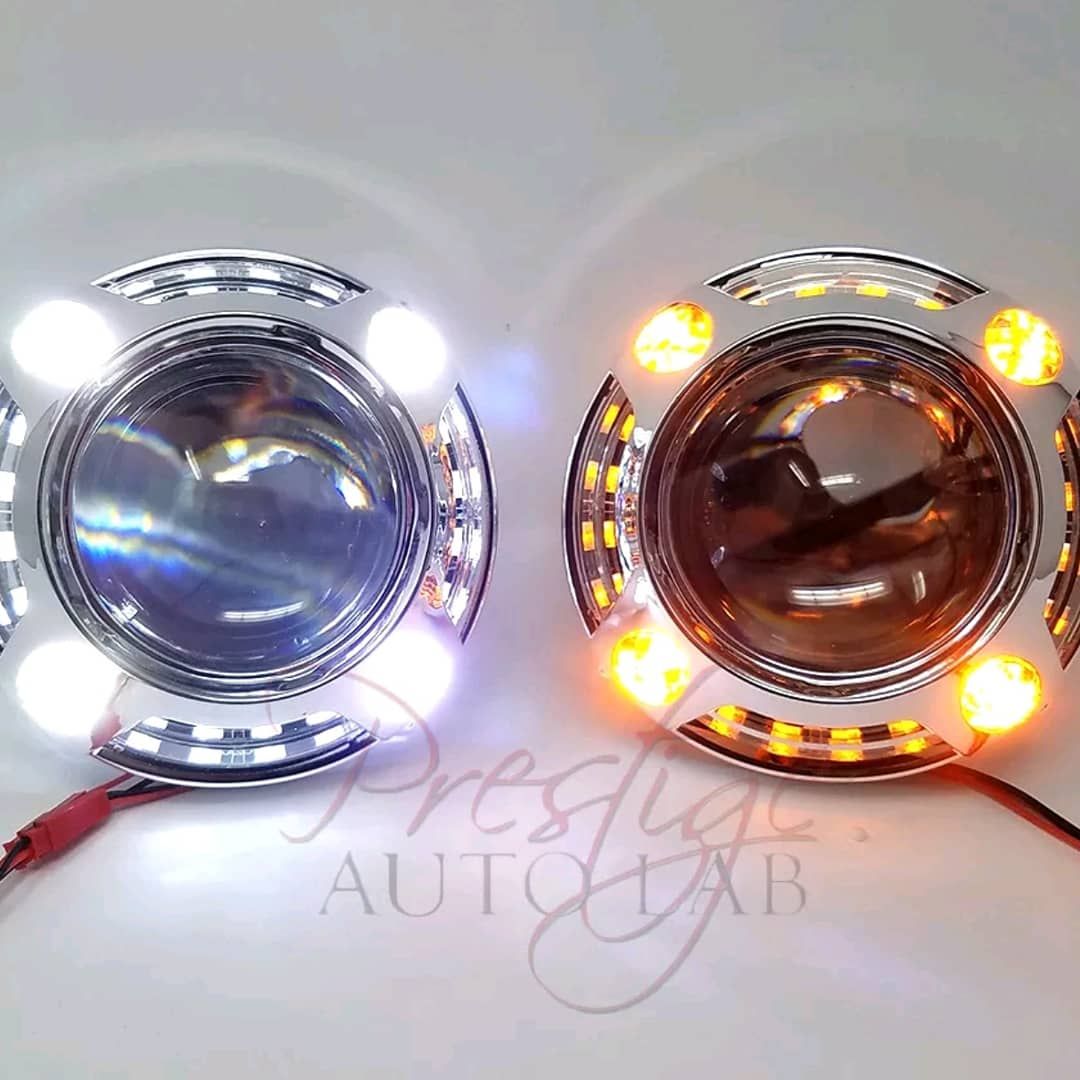
Ordered panamera switch back projector shrouds.. Will test fit on a broken dummy light I have here.
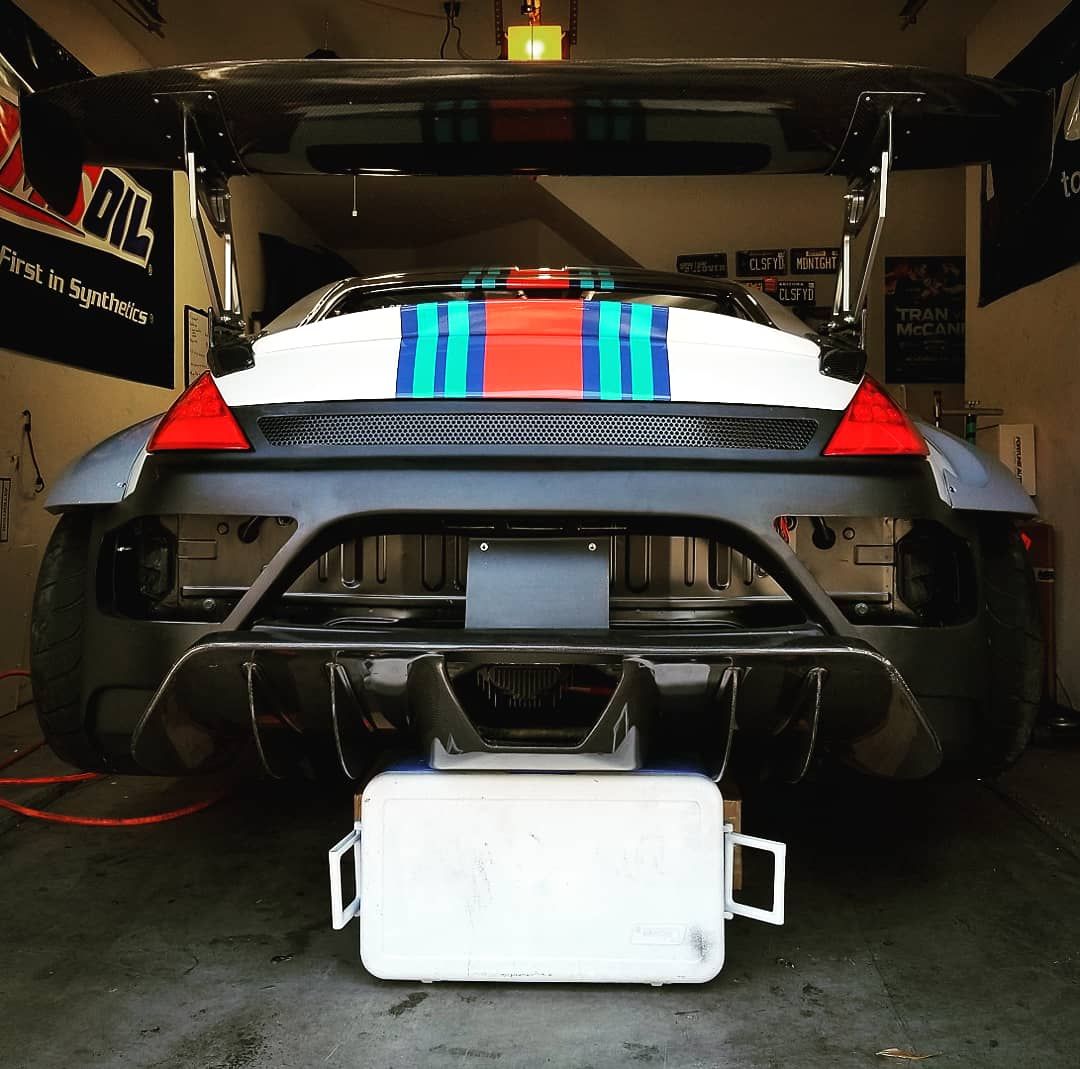
Rear bumper cut out :
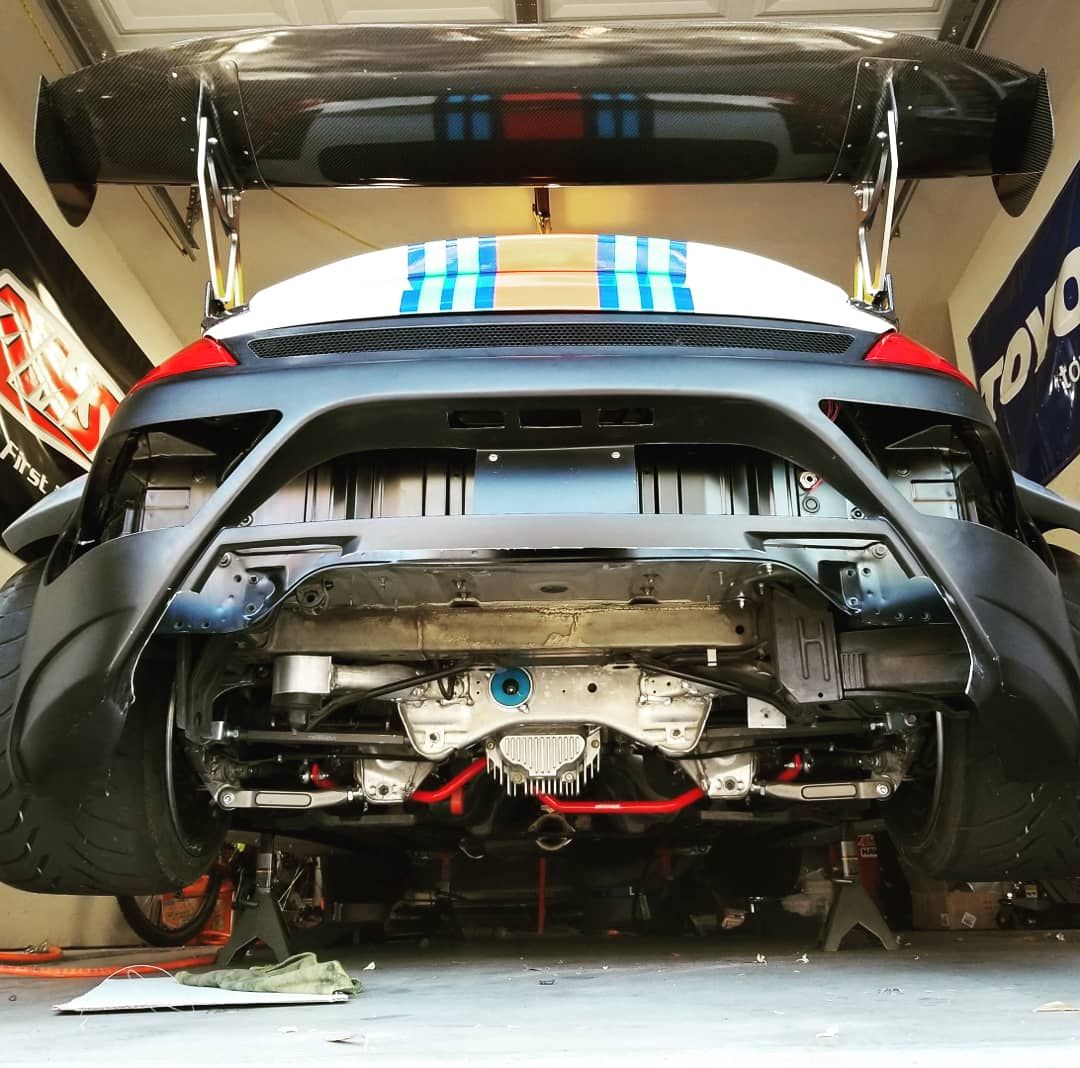
And the test fit.. It will sit lower and farther in.. Didn't have the proper sized box to shim it with..

Test positioning front fender vents


Tecnocraft seat install. These are an absolute DREAM.


Ordered panamera switch back projector shrouds.. Will test fit on a broken dummy light I have here.


Rear bumper cut out :

And the test fit.. It will sit lower and farther in.. Didn't have the proper sized box to shim it with..

Hey did you get those switches wired in? I'm in the process of doing that and apparently the rear of the clockspring is different which means you have to get the newer steering angle sensor which costs almost as much as my steering wheel. Did you replace the sensor too or found a way around it?