
the "bmccann101s car gets a new look/ watch me suffer bodywork hell" thread


So.. here's the BIG NEWS.
I brought my car to Dyno Comp about a week ago for a retune after installing the injectors anf fuel rail and pump etc..

Issues found w the car:
driver side upstream o2 ( new) was baked due to routing location, installed new one w better fire sleeve and routing.
Passenger fuel line area gets very hot, added heat shielding and wrap.
Split o ring at the return siphon billet plug inside the fuel pump basket..
Bad ground in the factory connector on fuel pump upgraded to large gauge wire posts.
Combination of theses tow issues dumped/dropped fuel pressure under boost.
Waste gate banjo fitting threads stripped and loose.
Here is three years saga, culminated into what was a simple repair list.. a total retune and one very relieved owner, me.
This car was dyno'd initially in a hub dyno, and now on this mustang dyno, I still actually picked up power.
The car has a fantastic smooth idle, no more hick ups or pops or stumbles... MY FRIKN CAR QWORKS AGAIN FOLKS>
Its been down 3 years.

Thread Starter
Joined: Aug 2006
Posts: 8,321
Likes: 467
From: Scottsdale/coyote drophouse
So now that car runs solid af, I parked it for the summer to finish up the body redesign.
I'm going to have pros do the finish work, but the rough shapes and build up will be done by myself.. Is what it is, time to learn.
After cutting out the Stardast flare bumper parts.. The head light bucket lines up again.. Will hand make all of that stuff anyways.

Started the splitter template build..


Also made a few trim panels for the trunk.


Made the floor for behind the seats out of light maple plywood.


Supplies in hand, started making a few flat fiberglass panels to cut flanges out of


A brand new rear bumper fresh out of the packing.. Much cleaner cuts made, and I'm not opening any of the bumper up until all of the body work is done.. Better frame structure, no crooked gaps this way.

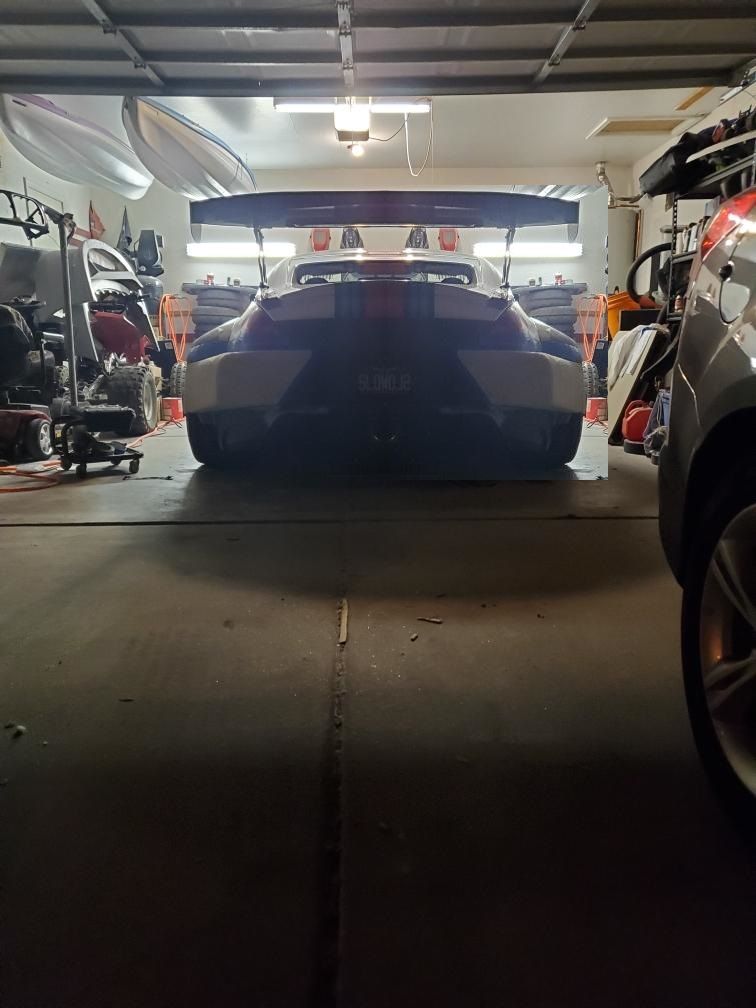
A current side shot...

Used this side shot to make sure all the body lines will match well


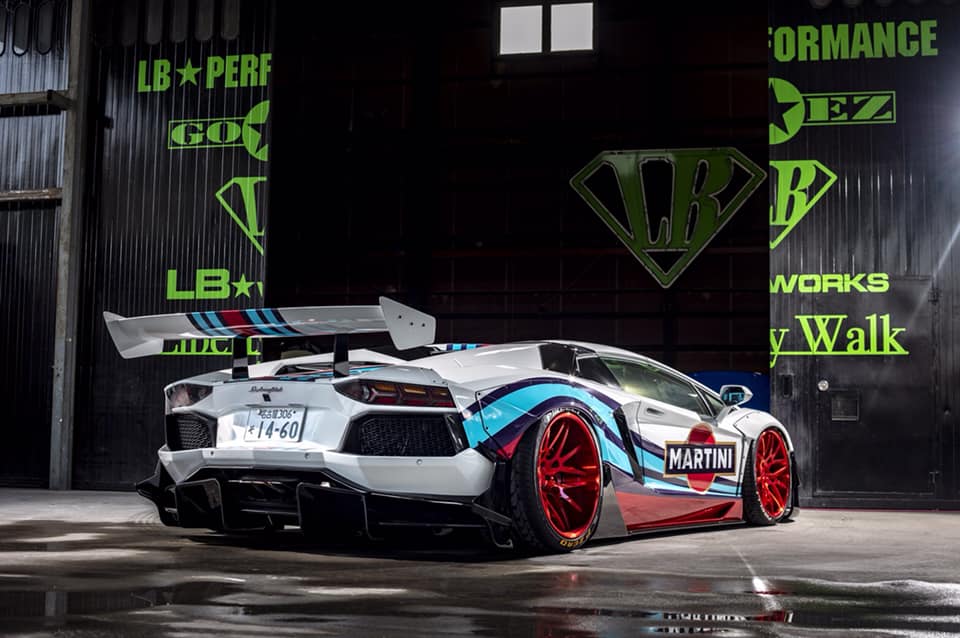
A few renders of what's being built for the rear.. I think the functionality will be good, and the ability to build these shapes myself is reasonable.


I'm going to have pros do the finish work, but the rough shapes and build up will be done by myself.. Is what it is, time to learn.
After cutting out the Stardast flare bumper parts.. The head light bucket lines up again.. Will hand make all of that stuff anyways.

Started the splitter template build..


Also made a few trim panels for the trunk.


Made the floor for behind the seats out of light maple plywood.


Supplies in hand, started making a few flat fiberglass panels to cut flanges out of


A brand new rear bumper fresh out of the packing.. Much cleaner cuts made, and I'm not opening any of the bumper up until all of the body work is done.. Better frame structure, no crooked gaps this way.

A current side shot...

Used this side shot to make sure all the body lines will match well


A few renders of what's being built for the rear.. I think the functionality will be good, and the ability to build these shapes myself is reasonable.


Thread Starter
Joined: Aug 2006
Posts: 8,321
Likes: 467
From: Scottsdale/coyote drophouse
bodywork in this tiny one car garage is HELL.
I am going to pull this off though, don't you worry.
just cutting the driver rear fender lip off, realigning it, and then sanding down this super thick monstrosity they made me last year was literally 4 hours of non stop compressor running, hand numbing die grinder action. Smmfh.
So for today, I get to pull the new rear bumper back off the car, grind down any and all areas that will get new fiberglass laid.. it is what it is.. being timid about this does me no good, so this will be the last time it leaves the garage before I have a buddy come by and help me back it in.. then its down for the month while I lay down foam, shape, reshape, and then finally layer it over with drywall putty and vinyl wrap..
(this will make it easier to remove the positive shape from behind once it dries... ill just cut out a swath from behind and then pull out the foam and what not, and lay in csm mat from behind.
The real PITA? That will be the "removing and reinstalling the entire rear bumper on every coat of CSM that I lay."
I have no real prior experience in this.. this is moma-bird pushing you out of the nest to learn to fly stuff here.


Thread Starter
Joined: Aug 2006
Posts: 8,321
Likes: 467
From: Scottsdale/coyote drophouse
so.. I gave myself a deadline.. 8/31/19.
Car wont be 100% done, but I will have it ready for final finish body work by this date.
Ill have side and front splitters mounted up to the car by next Monday, and will start shaping my outer shape cut lines for the ABS I used for the time being.. I'm bolting up the big square chunks for front and sides as is, and will take them to Dyno comp to have them all cut cleanly on their table saws.. then they will have the top edge rounded over w a router, and the whole thing will get sanded and buffed out smooth and shiny before wrapping them body color white.
I opted to use the Do Luck bumper for now.. I didn't RUIN the NSM bumper per say, but to fix it will take too much time, so I'm back burner-ing this one, having another one sent to me soon.. and am using the do luck for now.
The rear seat delete has been fully trimmed inside now, and I also bought back my K Harness bar, which will require a bit more fab work to install, so I'm not worrying about it for now.
So the work on the rear bumper will begin next week in the evenings when its cooler and the rising temps of the day here day wont change the way the catalyst cures the fiberglass.
2 part foam, tinfoil, wax paste and dollar store project board template shapes. Here goes nothin. I have no experience w this work, but oh well, sucks to suck.
Thread Starter
Joined: Aug 2006
Posts: 8,321
Likes: 467
From: Scottsdale/coyote drophouse
8/31 deadline was laughable.. It only now in the last week broke under 100 degrees here in az, so I've been plugging away on other odds n ends on the car while I wait for cooler Temps that allow the 2 part foam and fiberglass to work properly.
The good news is that we took that time to swap to stiffer Swift springs, wire up the front and rear servo boxes for each corners coilover as well.. This is especially good for the fortunes as you can't hear or feel the clicks thru the shock extender cables.. So this leaves it all up to the servo boxes instead.
The battle aero front splitter landed.. And I also actually started over with a TOTALLY new nsm front bumper. The fitment is back to spot on, and I was able to concoct a much better plan for removable flare caps:
I care full trimmed the wheel arch radius (flat part) off a fiberglass v2 nismo bumper.. And I have the Stardast end caps that weren't used off a friends car being sent from Miami.. (kid who build the huracan z)..
So together with both of those pieces, I can easily fab up a wider, more flowy end cap.
The idea is that the front flares will need to be widened a bit in the future, as will the bumper (caps).
But for now, it's being finished as is, normal existing width.
Thread Starter
Joined: Aug 2006
Posts: 8,321
Likes: 467
From: Scottsdale/coyote drophouse
this will be a good update.
Cooler temps do prevail, but so does my total and complete burn out on building..
therefore, I found a guy who will do the glass work, and have dropped the car off for what is quoted as 2 to 3 weeks worth of fiberglass work.
When the car comes back, I will need to have the front emblem indent filled in, and then take everything to a friend to have it sprayed in single stage satin black..
other than that, we wrap the car, apply the rest of the livery, and it WIL BE DONE and complete.. three years later.
This is a great moment for me.. cant wait.
Thread Starter
Joined: Aug 2006
Posts: 8,321
Likes: 467
From: Scottsdale/coyote drophouse
We decided to widen the front end and the suspension lol

The splitter was 76 wide.. And now so are the flares and bumper.. so front 76/ rear 84

We are using a combination of threading out the Voodoo13 upper control arms, s14 steering tie rod ends (wider) and an FDF mega mantis lower control arm and compression arm.. Each side will adjust out 3.5 inches, adding another 7 inches to the front width while correcting for proper steering geometry.
Longer brake lines, longer abs sensor wires. Otherwise a simple gig.
We are nearly "done" w the body work on the front flares, front bumper cap shape, and the rear bumper cap shape..

I copied and flipped the roughed out driver side rear pieces and drew over them to help conceptualize the rear.


Last edited by bmccann101; Dec 17, 2019 at 03:54 PM.

