
Oil cooler/warmer removal.............


Thread Starter
Registered User
iTrader: (8)
Joined: Apr 2003
Posts: 3,869
Likes: 4
From: Vero Beach, Florida
Originally Posted by rrmedicx
Any hammering to push it through? or was it a poking match? LOL
Any concern for damaging what is behind the ball bearing, which could ultimately not leave you with enough material to actually thread???
Any concern for damaging what is behind the ball bearing, which could ultimately not leave you with enough material to actually thread???
In the process, I was worried about what I was doing to the overall diameter of the hole. the outlet of the hole was definately enlarging. that is why I cut it down about 1/4". it was not a problem for drilling and tapping though.
Thread Starter
Registered User
iTrader: (8)
Joined: Apr 2003
Posts: 3,869
Likes: 4
From: Vero Beach, Florida
Originally Posted by rrmedicx
Hay Charles can you make an additional bracket similar to the one holding up your alternator. PM me your price shipped to NYC.
I hate that ugly OEM bracket anyway? Thanks.
I hate that ugly OEM bracket anyway? Thanks.
all you need are a pair of heim joints, nuts, and a length of threaded rod.....at least's what it looks like from Charles' pics.
correct, its all pieced together on mcmaster. its an aluminum hex female threaded rod, 2 nuts, 2 stainless rod ends, and a couple stainless metric bolts. unfortunately i do not have the part numbers anymore.
i had to do that because the adjustability of that is what allows me to tension the belt without the stock tensior. I have the same type of rod on my powersteering pump as well so that i can tension it.
make sure that you do a right hand / left hand combo, so that it actually gets longer and shorter when you turn the hex rod. if they are both the same direction thread then it will just slide the hex rather then extend or shorten the length.
Originally Posted by phunk
correct, its all pieced together on mcmaster. its an aluminum hex female threaded rod, 2 nuts, 2 stainless rod ends, and a couple stainless metric bolts. unfortunately i do not have the part numbers anymore.
i had to do that because the adjustability of that is what allows me to tension the belt without the stock tensior. I have the same type of rod on my powersteering pump as well so that i can tension it.
make sure that you do a right hand / left hand combo, so that it actually gets longer and shorter when you turn the hex rod. if they are both the same direction thread then it will just slide the hex rather then extend or shorten the length.
i had to do that because the adjustability of that is what allows me to tension the belt without the stock tensior. I have the same type of rod on my powersteering pump as well so that i can tension it.
make sure that you do a right hand / left hand combo, so that it actually gets longer and shorter when you turn the hex rod. if they are both the same direction thread then it will just slide the hex rather then extend or shorten the length.
Any help would be appreciated. I would love to get rid of some of the unnecessary pulleys as well.
Thread Starter
Registered User
iTrader: (8)
Joined: Apr 2003
Posts: 3,869
Likes: 4
From: Vero Beach, Florida
go to www.mcmaster.com
search for "heim Joint"
I don't know what size Phunk used, but I would guess somewhere about a 3/8" or 5/16" shank on the heim joints. then, you'll need to get the matching thread "connector rod" and a couple of nuts for locking the length in place.
once thing I don't know is the size of the bolts to mount it to the block and the alternator. It is fairly important as you don't want the bolt to have a sloppy fit inside the ball joint.

So... I don't know if I missed it, but do you have to replace the stock oil cooler/warmer with a sandwich plate, or can you just put your oil filter straight on? The fitting for the HR is only long enough for the oil filter right?

Originally Posted by 2slo2bfurious
So... I don't know if I missed it, but do you have to replace the stock oil cooler/warmer with a sandwich plate?
No you dont... but if you do you need to make a sleeve to fit the new sandwich plate you plan on using... this is if you are using the stock bolt
I f you want to delete the factory oil cooler/warmer and not add a sandwich plate...you need the hr stud
, or can you just put your oil filter straight on? No , you cant
The fitting for the HR is only long enough for the oil filter right? yes
Last edited by QuicksilverZ33; Jul 2, 2008 at 05:35 PM.
Thread Starter
Registered User
iTrader: (8)
Joined: Apr 2003
Posts: 3,869
Likes: 4
From: Vero Beach, Florida
Originally Posted by 2slo2bfurious
So... I don't know if I missed it, but do you have to replace the stock oil cooler/warmer with a sandwich plate, or can you just put your oil filter straight on? The fitting for the HR is only long enough for the oil filter right?
the oil filter fits right onto the block now.
if you want to add a sandwich plate, it is easy and attaches just like any other sandwich plate on other cars now. the plate will screw onto the HR stud.
Thread Starter
Registered User
iTrader: (8)
Joined: Apr 2003
Posts: 3,869
Likes: 4
From: Vero Beach, Florida
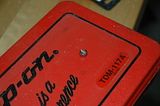
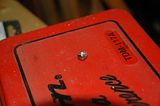
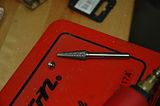
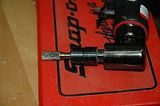
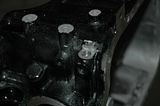
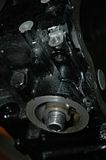
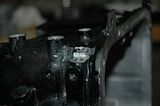
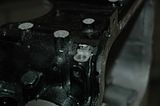
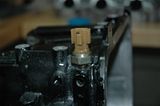
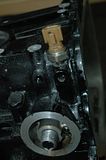
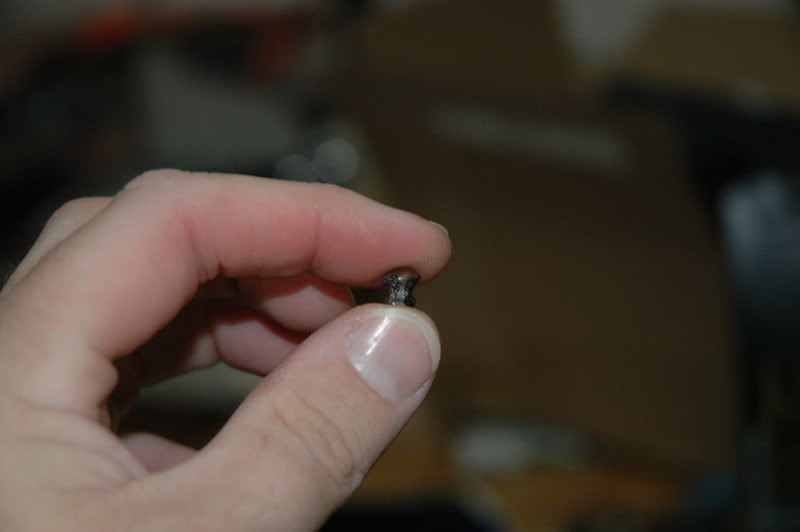
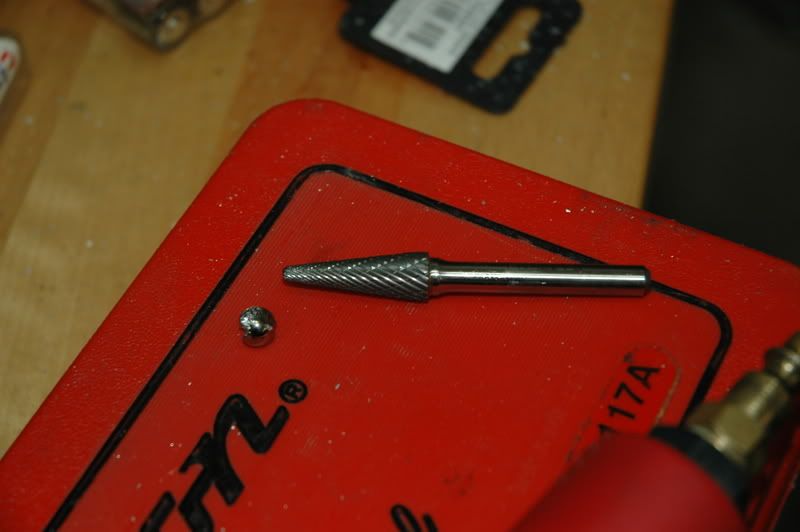
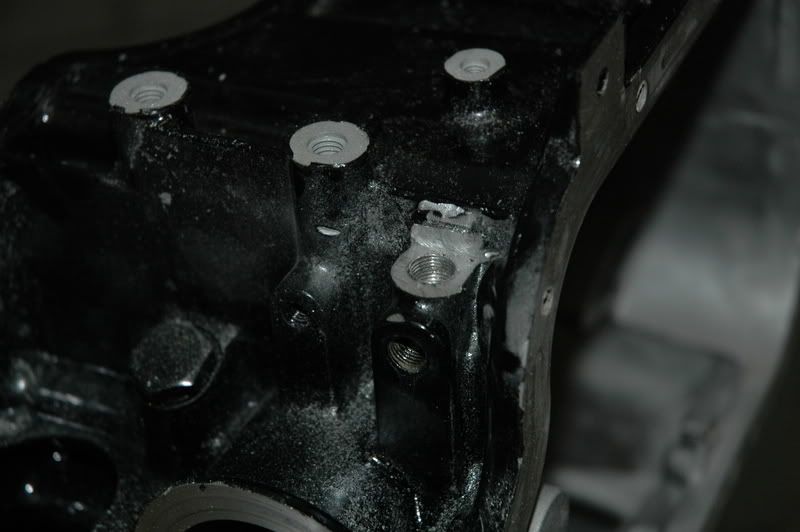
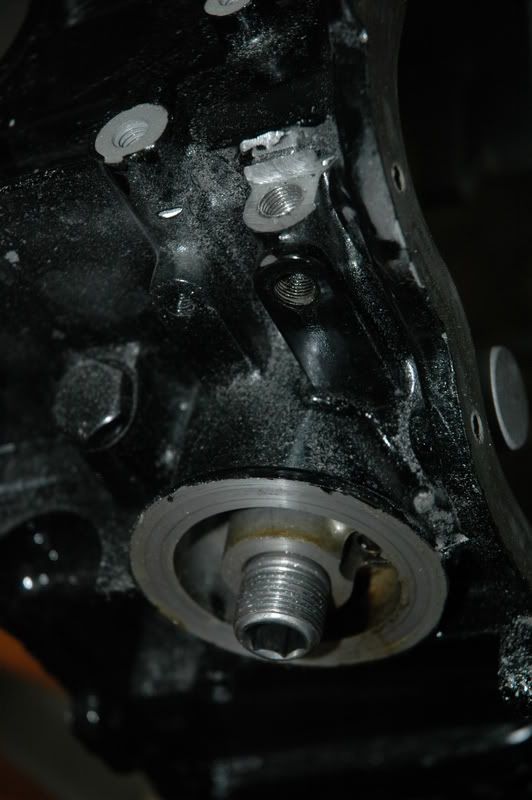
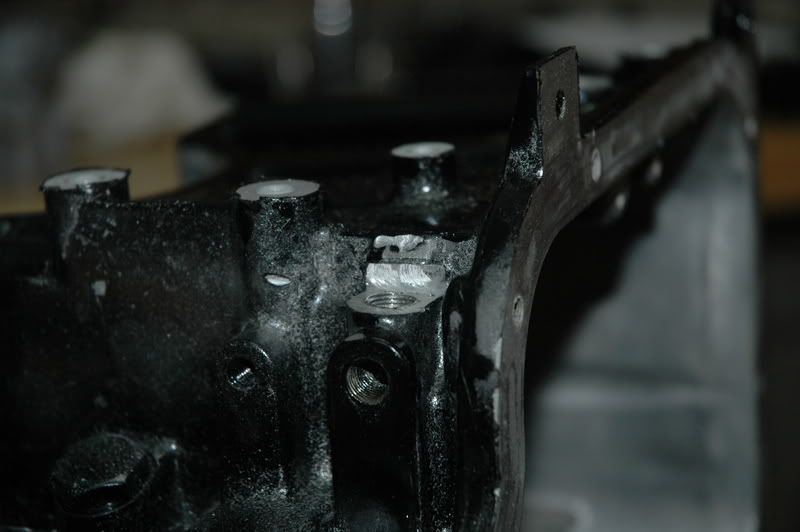
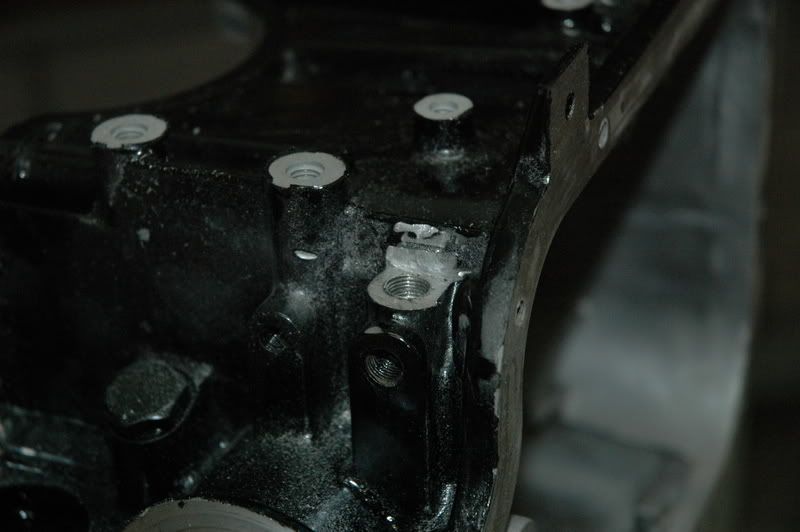
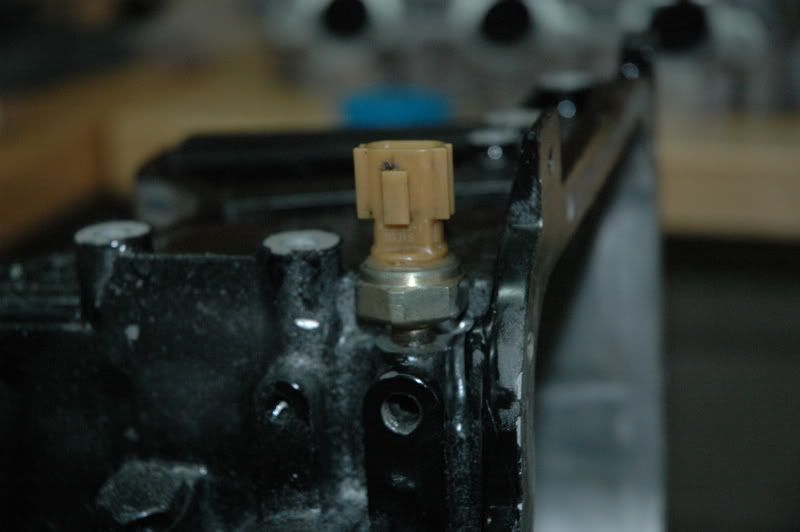
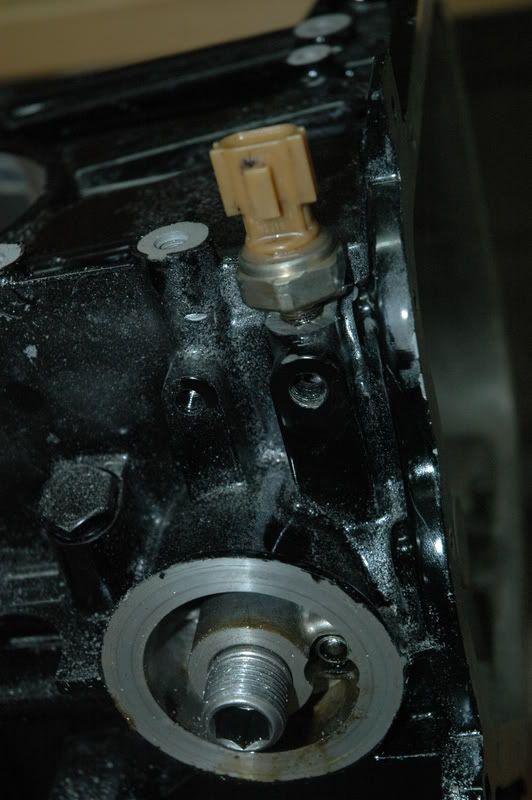
Here's some pics of what I had to do to get that bearing out. I used the tapered die grinder bit to try to grind a flat spot on the bearing. once I achieved a nic flat spot, I used a punch and a hammer on the flat spot to rotate the bearing. I had to repeat this procedure many times! That bearing is very hard, and using the just the tip of the grinder bit doesn't make work any easier or quicker. In the pics, you can see just how much material I had to grind away and rotate. finally, I was able to use a pair of pics, one coming in from the top and the other one coming in from the normal oil pressure sensor bung. once I was able to rotate the ball and get it out of there, I used a different grinder bit to smooth off the surface. you can see I took a fair amount of material off from the pan to get a nice mating surface. It wasn't necessary to remove that much, but my die grinder works fast! One thing I didn't take picture of was some more material I removed to give clearance to the oil pressure sensor. It has a pretty big diameter on the wrenching surface. Anyways, here's the pics!!!


Quad,
Is there anyway to remove the hardline without removing the A/C compressor? Is looks like its impossible to get the last bolt behind it....I'm in the process of remving the factory warmer/already got the HR stup and the new sandwich plate mounted with my cooler...
thanks in advance
Is there anyway to remove the hardline without removing the A/C compressor? Is looks like its impossible to get the last bolt behind it....I'm in the process of remving the factory warmer/already got the HR stup and the new sandwich plate mounted with my cooler...
thanks in advance
Thread Starter
Registered User
iTrader: (8)
Joined: Apr 2003
Posts: 3,869
Likes: 4
From: Vero Beach, Florida
Originally Posted by QuicksilverZ33
Quad,
Is there anyway to remove the hardline without removing the A/C compressor? Is looks like its impossible to get the last bolt behind it....I'm in the process of remving the factory warmer/already got the HR stup and the new sandwich plate mounted with my cooler...
thanks in advance
Is there anyway to remove the hardline without removing the A/C compressor? Is looks like its impossible to get the last bolt behind it....I'm in the process of remving the factory warmer/already got the HR stup and the new sandwich plate mounted with my cooler...
thanks in advance
you probably have to unbolt the A/C compressor. I don't remember exactly what I did. it is easy to unbolt the A/C compressor though. it is only 3 bolts and then you can slide the A/C compressor forward (toward the radiator.) of course, I am assuming that you already removed the A/C belt.

when I removed the oil warmer, I also did alot of bypassing of other coolant pipes. I no longer have the ugly rubber crossover hose that runs across the upper front of the motor. I also removed all the little coolant lines too.....and removed and replaced the coolant and heater hard pipes that run along the sides of the motor. I had new pipes with all the extra bung removed and then powdercoated gloss black.
It was alot of work to do.

^ Thanks for the info....No I have not yet removed the belt but I will do so tomrrow...correct I used 2.5 feet of 5/16 heater hose to by pass the factory sandwich plate...from the pass side coolant pipe to the thermostat...I will post pics tomorrow morning
thanks again
thanks again
Last edited by QuicksilverZ33; Jul 4, 2008 at 08:48 PM.
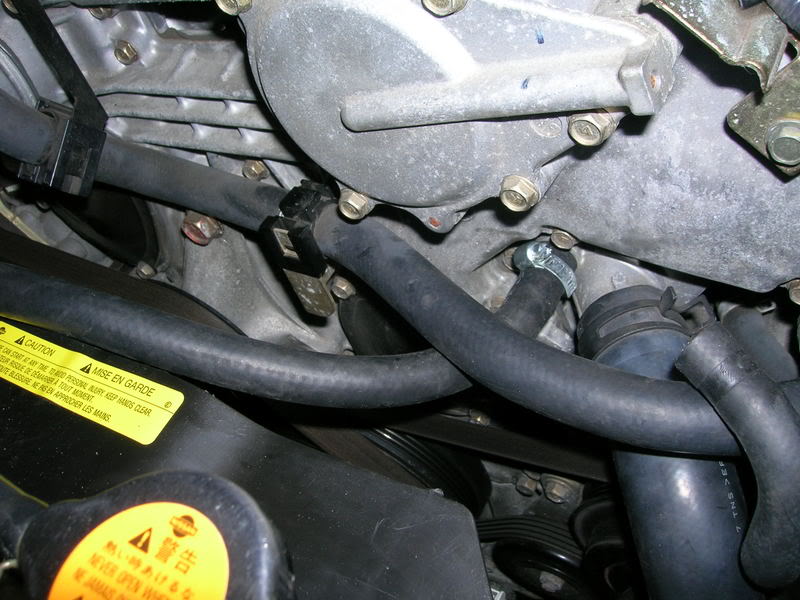
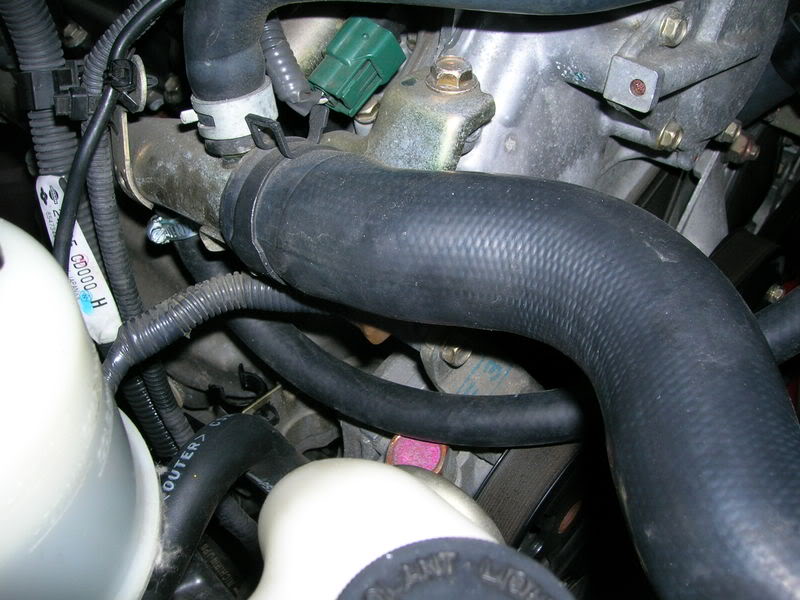
Pics of my progress...
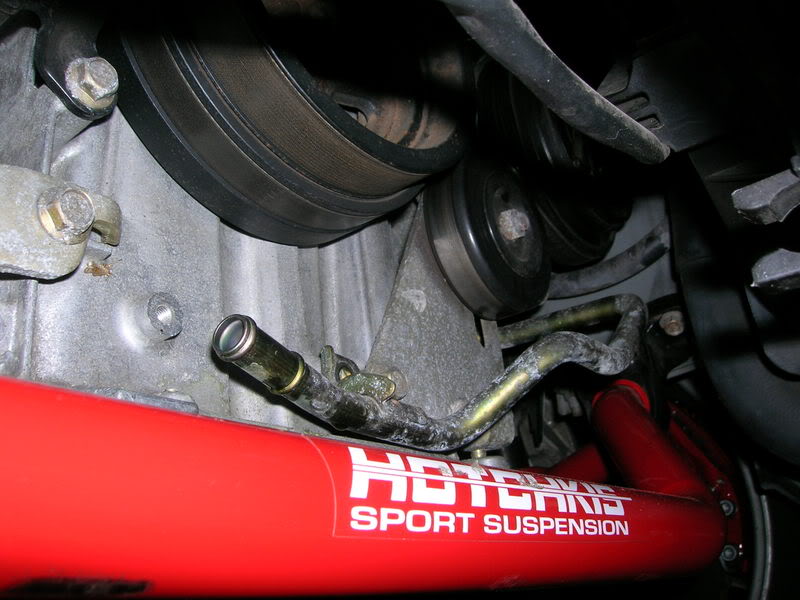
By-pass hose...from pass side coolant pipe to thermostat:
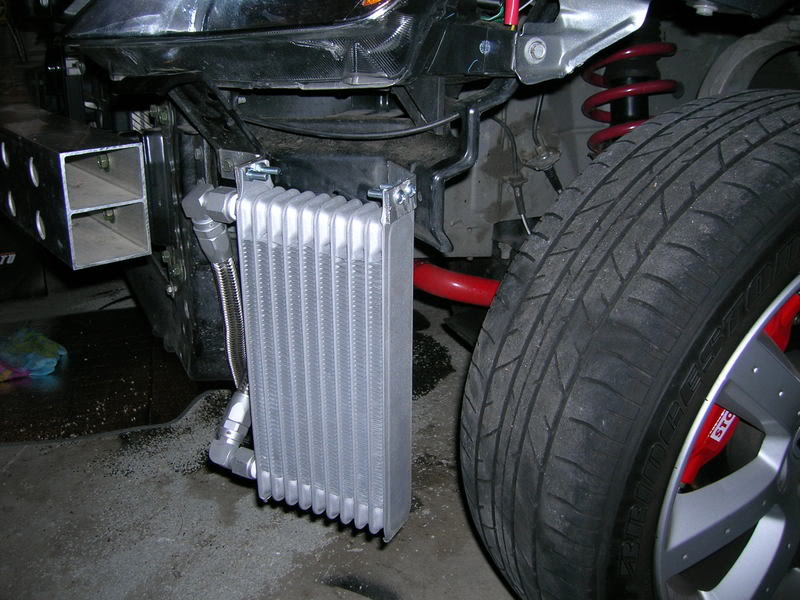
Cooler Mounted:
Stock Sandwich plate removed/VQ35HR Stud installed/Aftermarket sandwich plate installed:
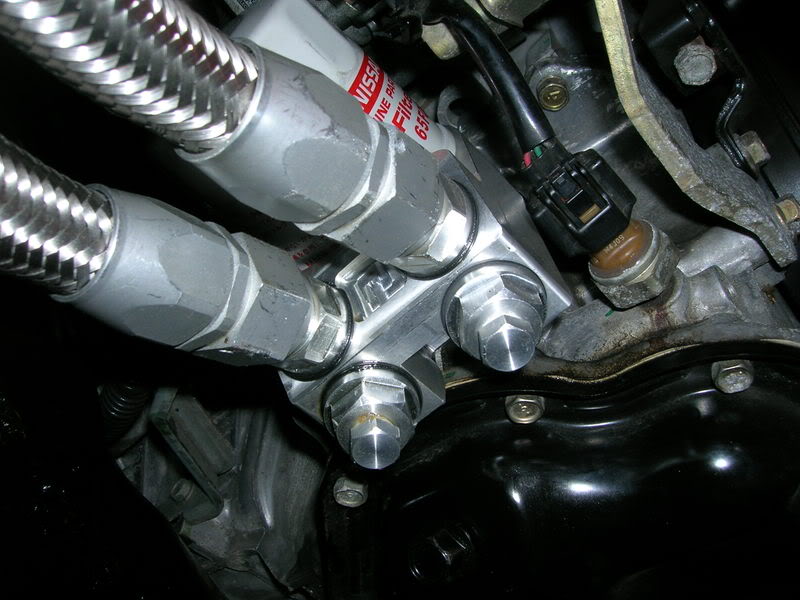
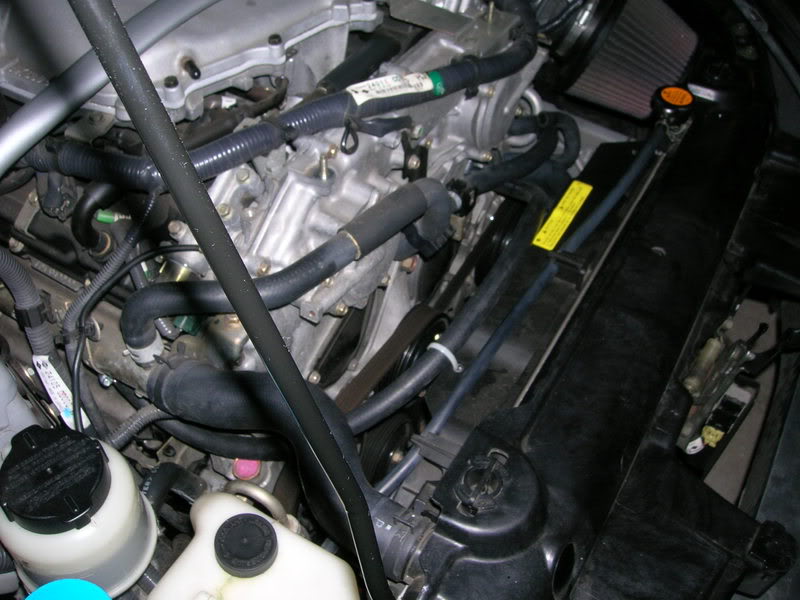
As you can see the hardline remains until I loosen the A/C compressor to get to the last bolt:
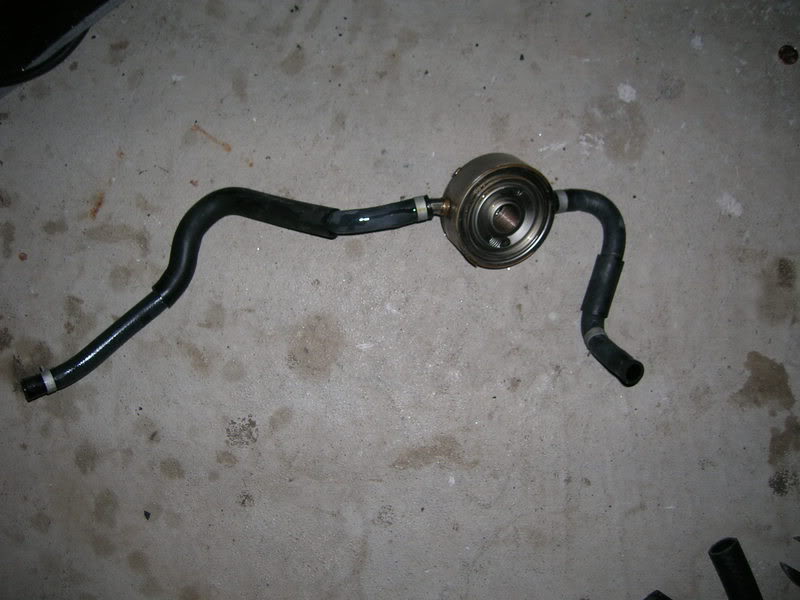
Stock Warmer Removed:
Couple of questions:
When I removed the coolant hose form the pass side coolant pipe, air entered the pipe as coolant came out(I lost a bit of coolant, but not to much). Should I be worried about air in the coolant? Or have the system purged?
Also I noticed a "whining" noise when I first started the car after I reconnected all the lines...the noise goes up and down corresponding with engine rpm...I have not noticed this before...Any idea what it could be?
Not sure if it makes a difference, but I switched to Mobile 1 Full Synthetic 5w-30(from castrol conventional 5w30) while doing my oil cooler install/removing factery warmer...could this have anything to do with this noise?
Again Thanks in Advance....
By-pass hose...from pass side coolant pipe to thermostat:
Cooler Mounted:
Stock Sandwich plate removed/VQ35HR Stud installed/Aftermarket sandwich plate installed:
As you can see the hardline remains until I loosen the A/C compressor to get to the last bolt:
Stock Warmer Removed:
Couple of questions:
When I removed the coolant hose form the pass side coolant pipe, air entered the pipe as coolant came out(I lost a bit of coolant, but not to much). Should I be worried about air in the coolant? Or have the system purged?
Also I noticed a "whining" noise when I first started the car after I reconnected all the lines...the noise goes up and down corresponding with engine rpm...I have not noticed this before...Any idea what it could be?
Not sure if it makes a difference, but I switched to Mobile 1 Full Synthetic 5w-30(from castrol conventional 5w30) while doing my oil cooler install/removing factery warmer...could this have anything to do with this noise?
Again Thanks in Advance....
Thread Starter
Registered User
iTrader: (8)
Joined: Apr 2003
Posts: 3,869
Likes: 4
From: Vero Beach, Florida
not sure what the whining noise is. It may have been there but you never noticed it.....happens alot whenever you change something. You tend to be more critical of small noises after making a change.
BTW, I would check the coolant lines and purge any possible air. you don't want the pump to cavitate.....you'll overheat in no time.
BTW, I would check the coolant lines and purge any possible air. you don't want the pump to cavitate.....you'll overheat in no time.
Thread Starter
Registered User
iTrader: (8)
Joined: Apr 2003
Posts: 3,869
Likes: 4
From: Vero Beach, Florida
Originally Posted by rrmedicx
Hey Quad, wanna swap oil pans? Now that you did all of the hard work.
Great pics.
Great pics.
sure.....if you want to. Of course, I need some coin for the powdercoating I had done on the pan plus this new work.
^ Thanks for the help Quad...got the hardline off after I unbolted the ac compressor and tilted it slightly...took less than an hour to unbolt it and put it back....
thanks again
thanks again